Bewertungen eintragen
Enter grades
Ziele:
In dieser Anleitung wird der Unterschied zwischen den Punkten einer Aktivität und den Punkten der Bewertungsübersicht erklärt. Sie erfahren exemplarisch am Beispiel der Aktivitäten „Aufgabe” und „Lektion” wie Punkte in Kurse eingetragen werden können.
Schwierigkeit: einfach
Gültig ab Moodle Version 4.5
Goals:
This guide explains the difference between the points of an activity and the points of the Grader report. You will learn how to enter points in courses using the "Assignment" and "Lesson" activities as an example.
Difficulty: easy
Valid from Moodle version 4.5
11 Schritte:
Wichtige Information zur Bewertung von Aktivitäten
Bewertungen sollten immer zuerst in die Aktivität eingetragen werden. Korrekturen bzw. Nachbesserungen an den Punkten – z.B. im Zuge eines Abgabegesprächs – können danach in die „Bewertungsübersicht des Kurses" eingetragen werden und somit die Punkte der Aktivität überschreiben.
Am Beispiel der Aktivität „Aufgabe“ wird nun das richtige Eintragen gezeigt.
Important information about grading activities
Assessments should always be entered into the activity first. Corrections or adjustments of the points – e.g. in the course of a hand-in discussion – can be entered in the "Grader report" of the course afterwards and thus overwrite the points of the activity.
Using the activity "Assignment" as an example, we will now demonstrate how to enter points correctly.
Bewerten in der Aufgabe
Öffnen Sie zunächst die Aufgabe. Sie haben nun zwei Möglichkeiten: Klicken Sie auf den Tab „Einreichungen”, um zu allen Abgaben in der Bewertungstabelle zu gelangen oder klicken Sie auf die Schaltfläche „Bewerten”, um gleich zur Bewertung des ersten Studierenden in einer Einzelansicht zu springen. Weitere Informationen dazu erhalten Sie in der Anleitung Aufgabe erstellen und bewerten.
In unserem Beispiel möchten wir zur Bewertung die Übersicht „Einreichungen” nutzen. Klicken Sie daher zunächst auf den Tab „Einreichungen”. Im nächsten Schritt sollen Bewertungen einzelner Studierender direkt eingetragen werden.
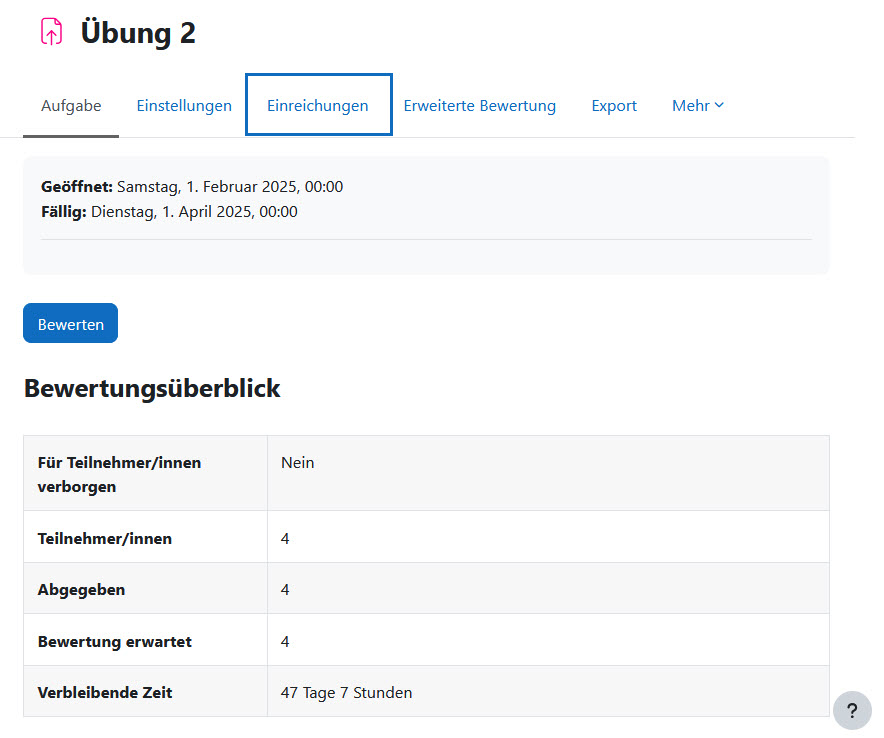
Grade the assignment
Click on the tab ”Submissions” to view all submissions in the grading table or click on the button "Grade” to jump straight to the first student‘s assessment in a single view mode. Further information can be found in the guide Create and grade assignment.
In our example, we would like to use the "Submissions" overview for grading. Therefore, first click on the tab "Submissions". In the next step grades of individual students should be entered.

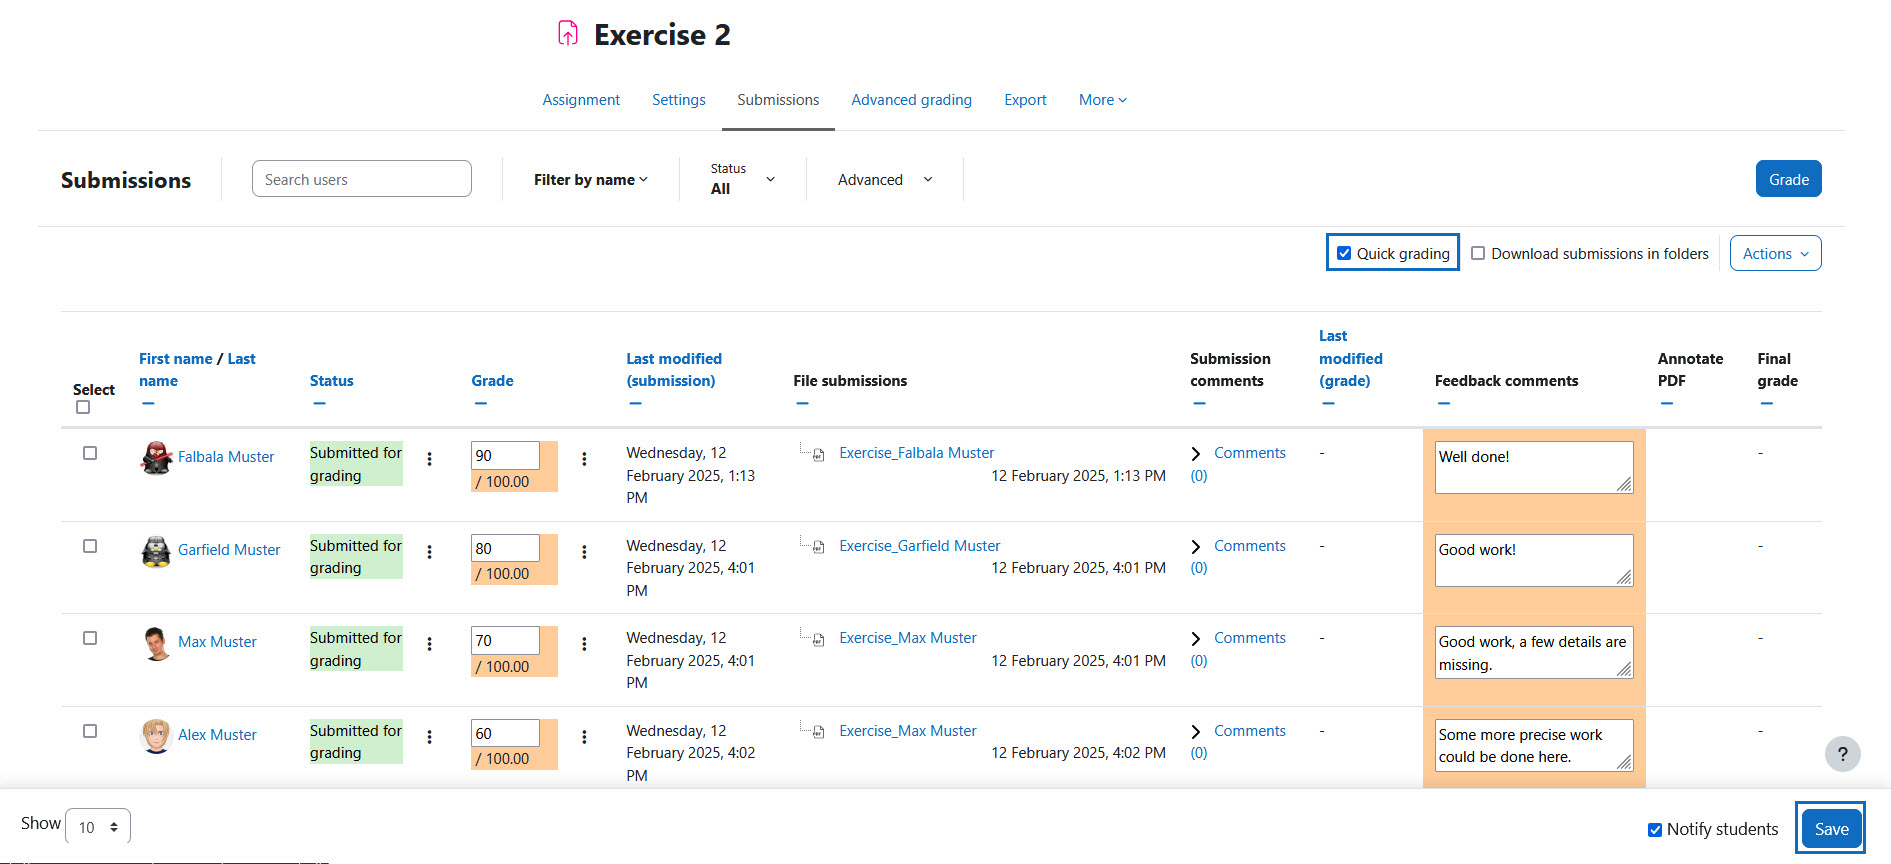
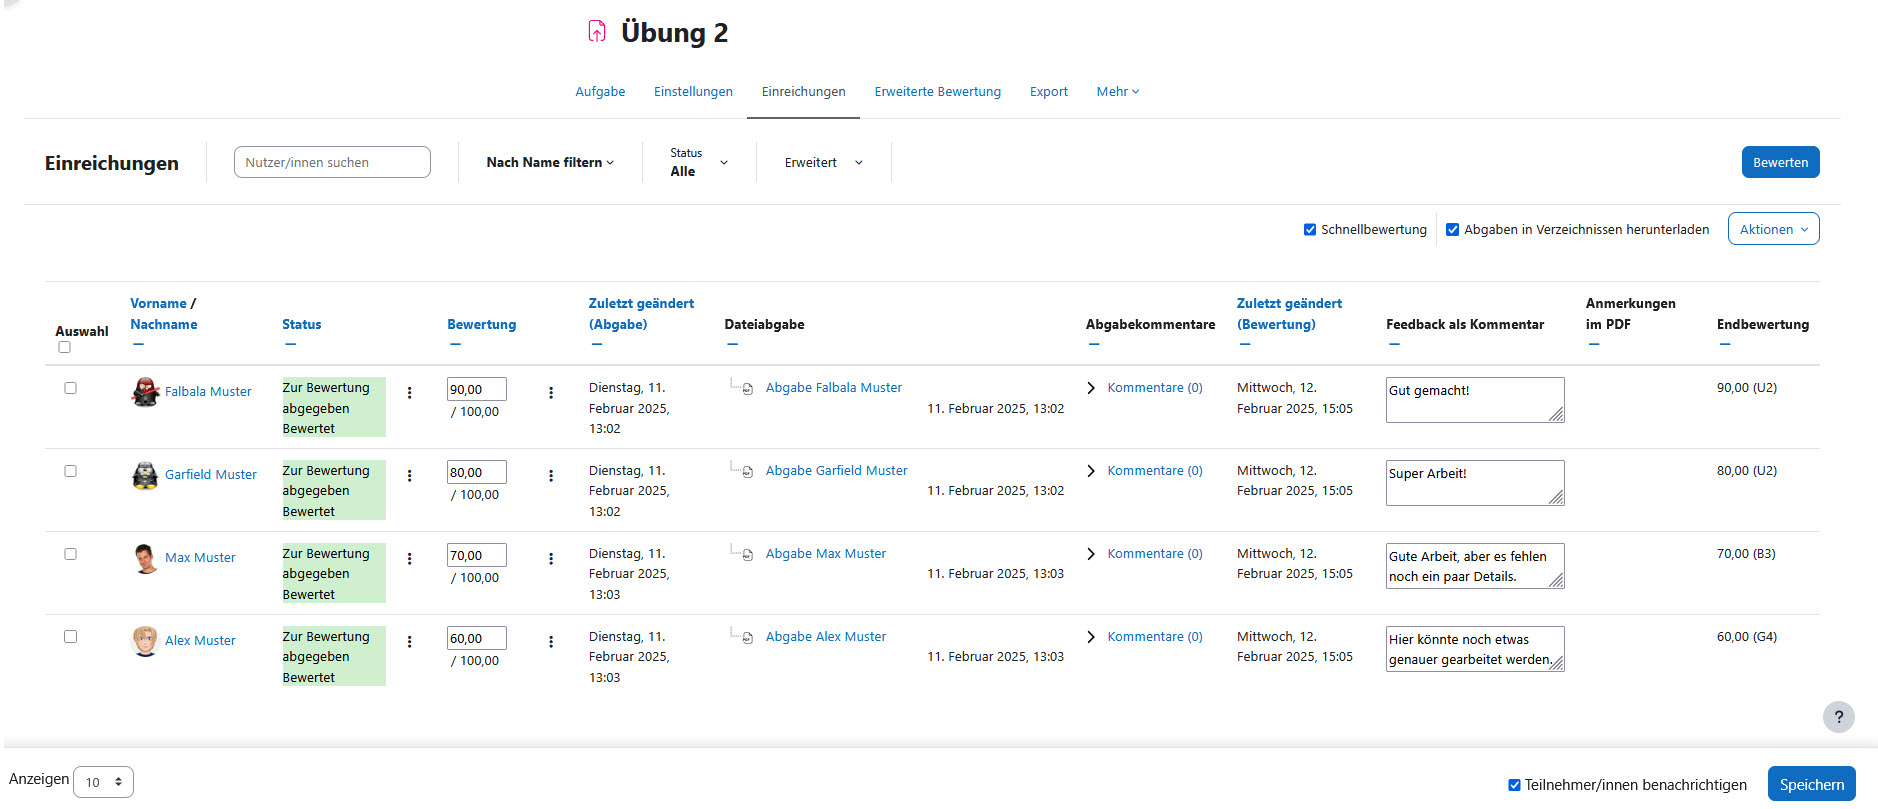
Aufgaben-Bewertung mit der Schnellbewertung
Sofern nicht bereits aktiv, ist es empfehlenswert die „Schnellbewertung“ zu aktivieren. Die Schnellbewertung ermöglicht es Ihnen, direkt in der Übersichtstabelle Bewertungen vorzunehmen.
Tragen Sie nun in der Zeile der Studierenden die Punkte ein. Optional kann auch ein Feedback hinterlegt werden. Überschriebene Felder werden zunächst automatisch orange hinterlegt. Speichern Sie die Überschreibung unten mit der Schaltfläche „Speichern".
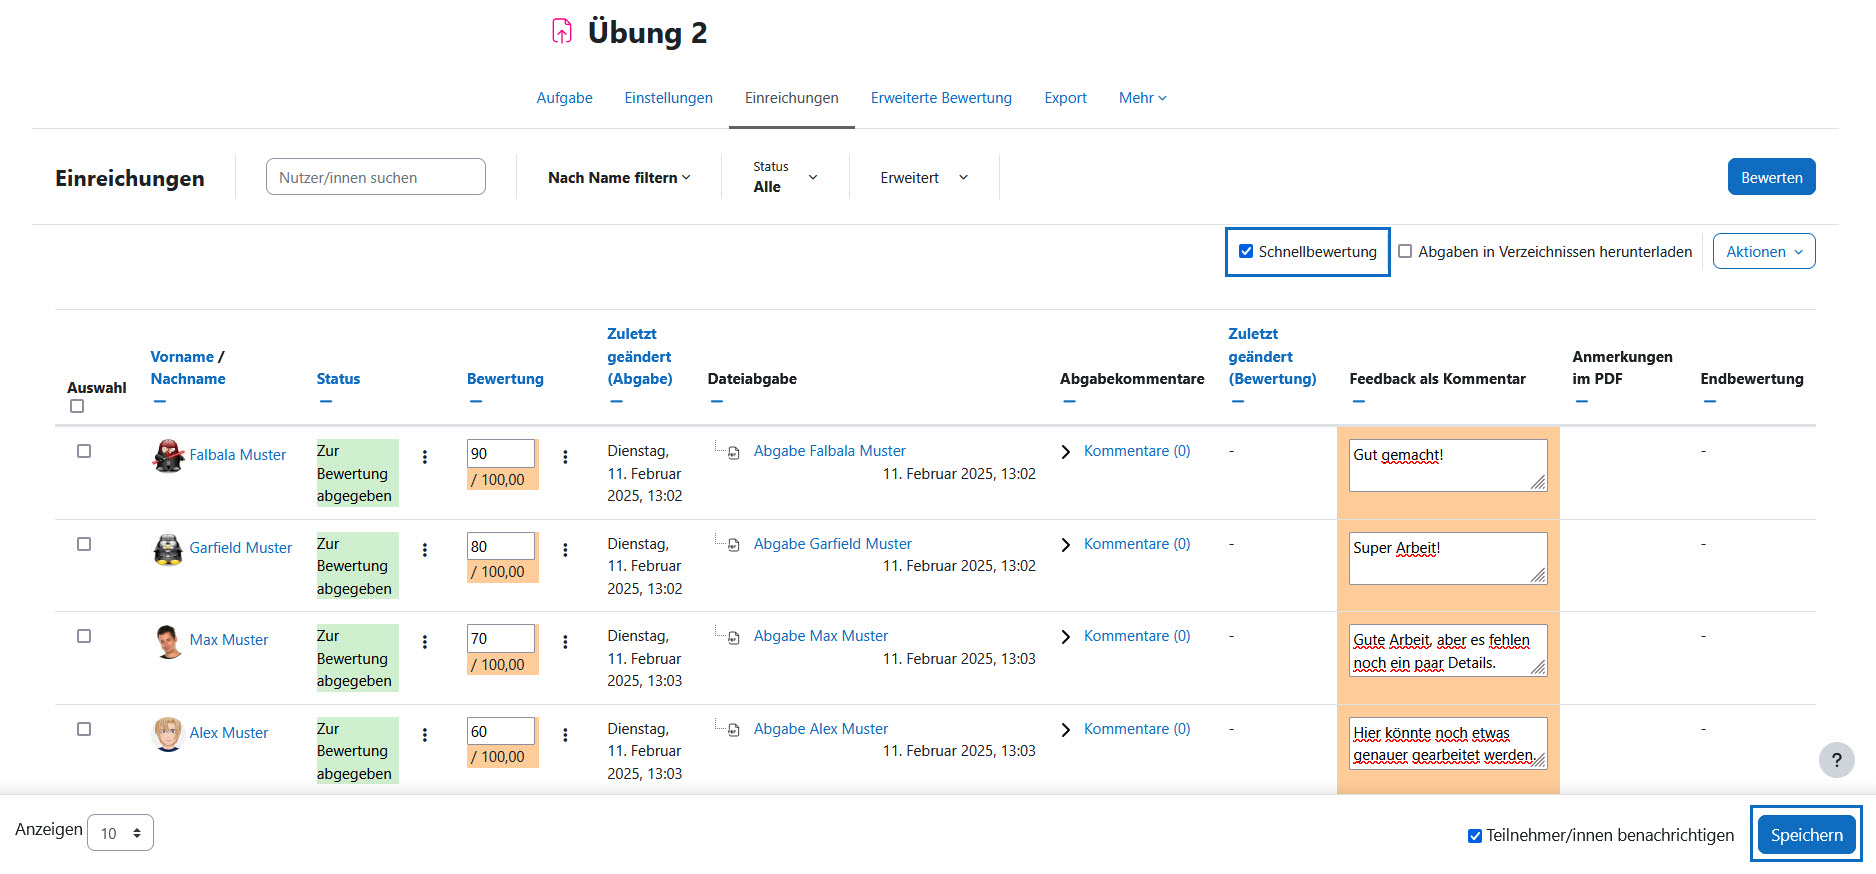
Grade assignments with qick grading
If not already active, it is recommended to activate the "Quick grading" checkbox. This option allows you to assign grades (and outcomes) directly in the submissions table.
Now enter the points in the row of the students. Feedback can also be added. Overwritten fields are intially automatically highlighted in orange. Save the override below with the "Save" button.
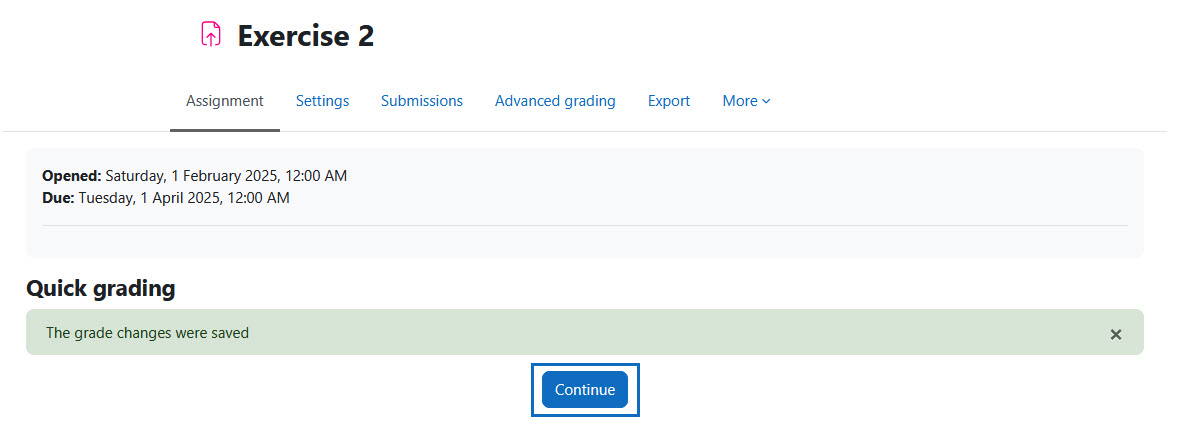
Bestätigen der Änderungen
Klicken Sie anschließend auf „Weiter", um wieder zurück zur Übersicht zu gelangen.
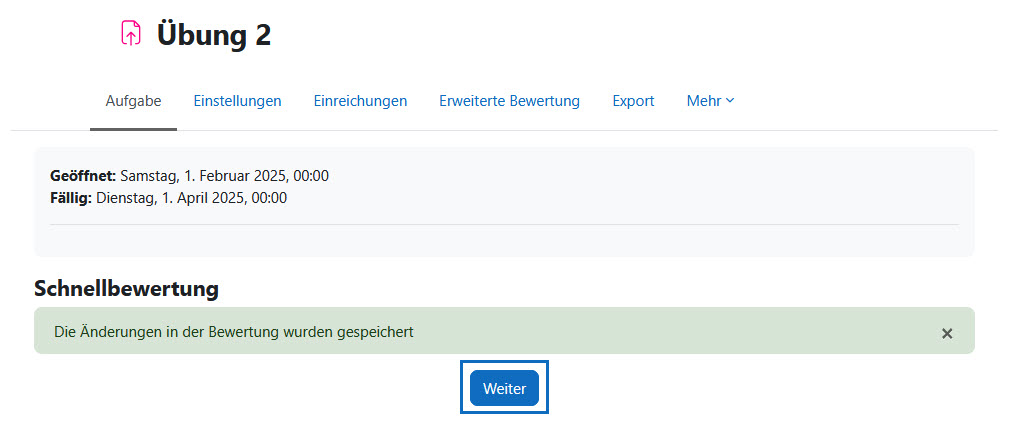
Confirm the changes
Then click on "Continue" to return to the overview.
Bewertungen einsehen
Die geänderten Bewertungen können nun in der Übersicht eingesehen und bei Bedarf durch Wiederholen der letzten Schritte geändert werden.
View grades
The changed grades can now be viewed in the overview and, if necessary, changed by repeating the last steps.
Bewertungen überschreiben
Bewertungen können auch direkt in der „Bewertungsübersicht" überschrieben werden. Dadurch bleiben bereits eingetragene Bewertungen in der Aufgabe sichtbar. Es wird jedoch immer die überschriebene Bewertung zur Berechnung der Endbewertung herangezogen. Das Überschreiben der ursprünglichen Bewertung ist beispielsweise sinnvoll, wenn es zu einer Verbesserung der Bewertung kam.
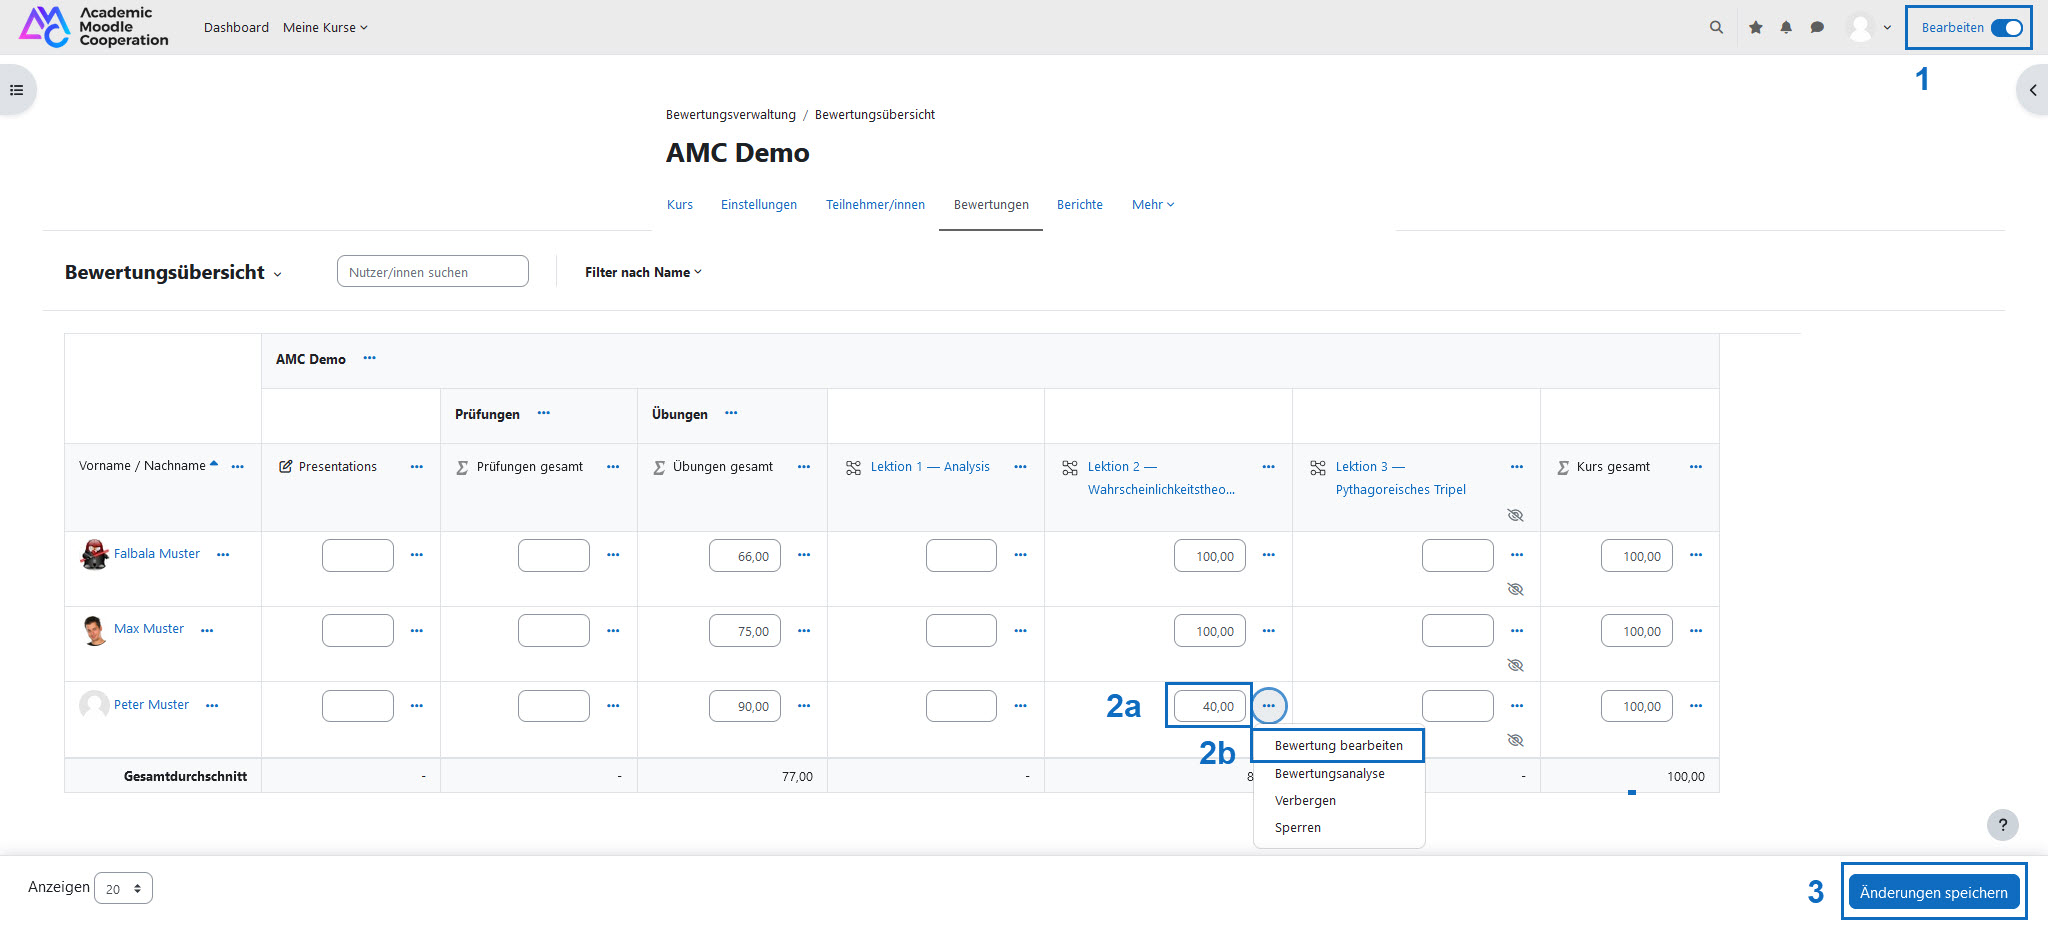
Navigieren Sie dazu über Bewertungen zu „Bewertungsübersicht" und wechseln Sie bitte rechts oben in den Bearbeitungsmodus. Nun können einzelne Bewertungen überschrieben werden. Sichern Sie die Änderungen mit der Schaltfläche „Änderungen speichern".
Hinweis: Sobald Bewertungen überschrieben wurden, können Sie nicht mehr in der Aufgabe geändert werden. Wenn Bewertungen in der Aufgabe direkt geändert werden sollen, ist ein Zurücksetzen der Überschreibung notwendig. Nähere Informationen erhalten Sie in der Anleitung Überschriebene Bewertungen zurücksetzen.
Tipp: Es ist auch möglich, beim Überschreiben der Bewertungen ein Feedback zu hinterlegen. Rufen Sie dazu über das Aktionsmenü „..." neben der Bewertung das Feld „Bewertung bearbeiten" auf. Im Schritt „Bewertung bearbeiten" wird dieser Vorgang genauer gezeigt.
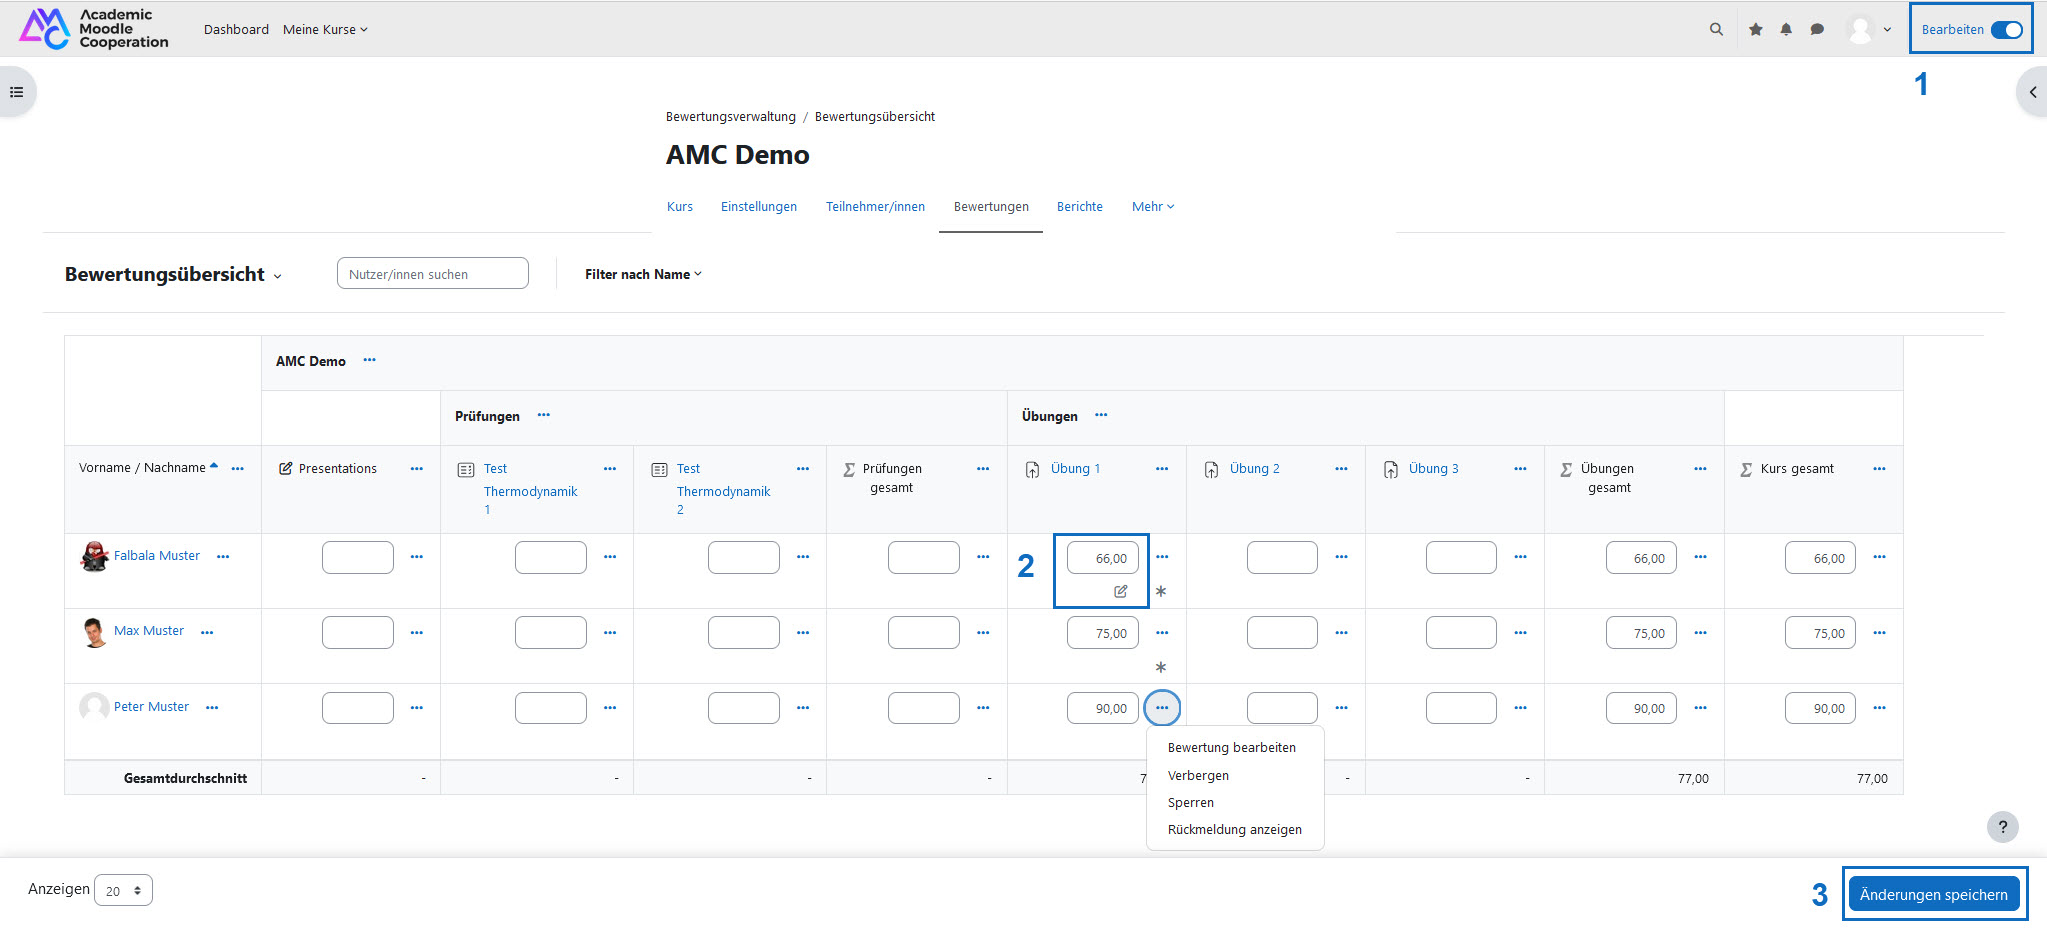
Overwrite grades
Grades can also be overwritten directly in the "Grader report". This means that grades that have already been entered remain visible in the assignment. However, the overwritten grades is always used to calculate the final grade. Overwriting the original grade is useful, for example, if the grade has been improved.
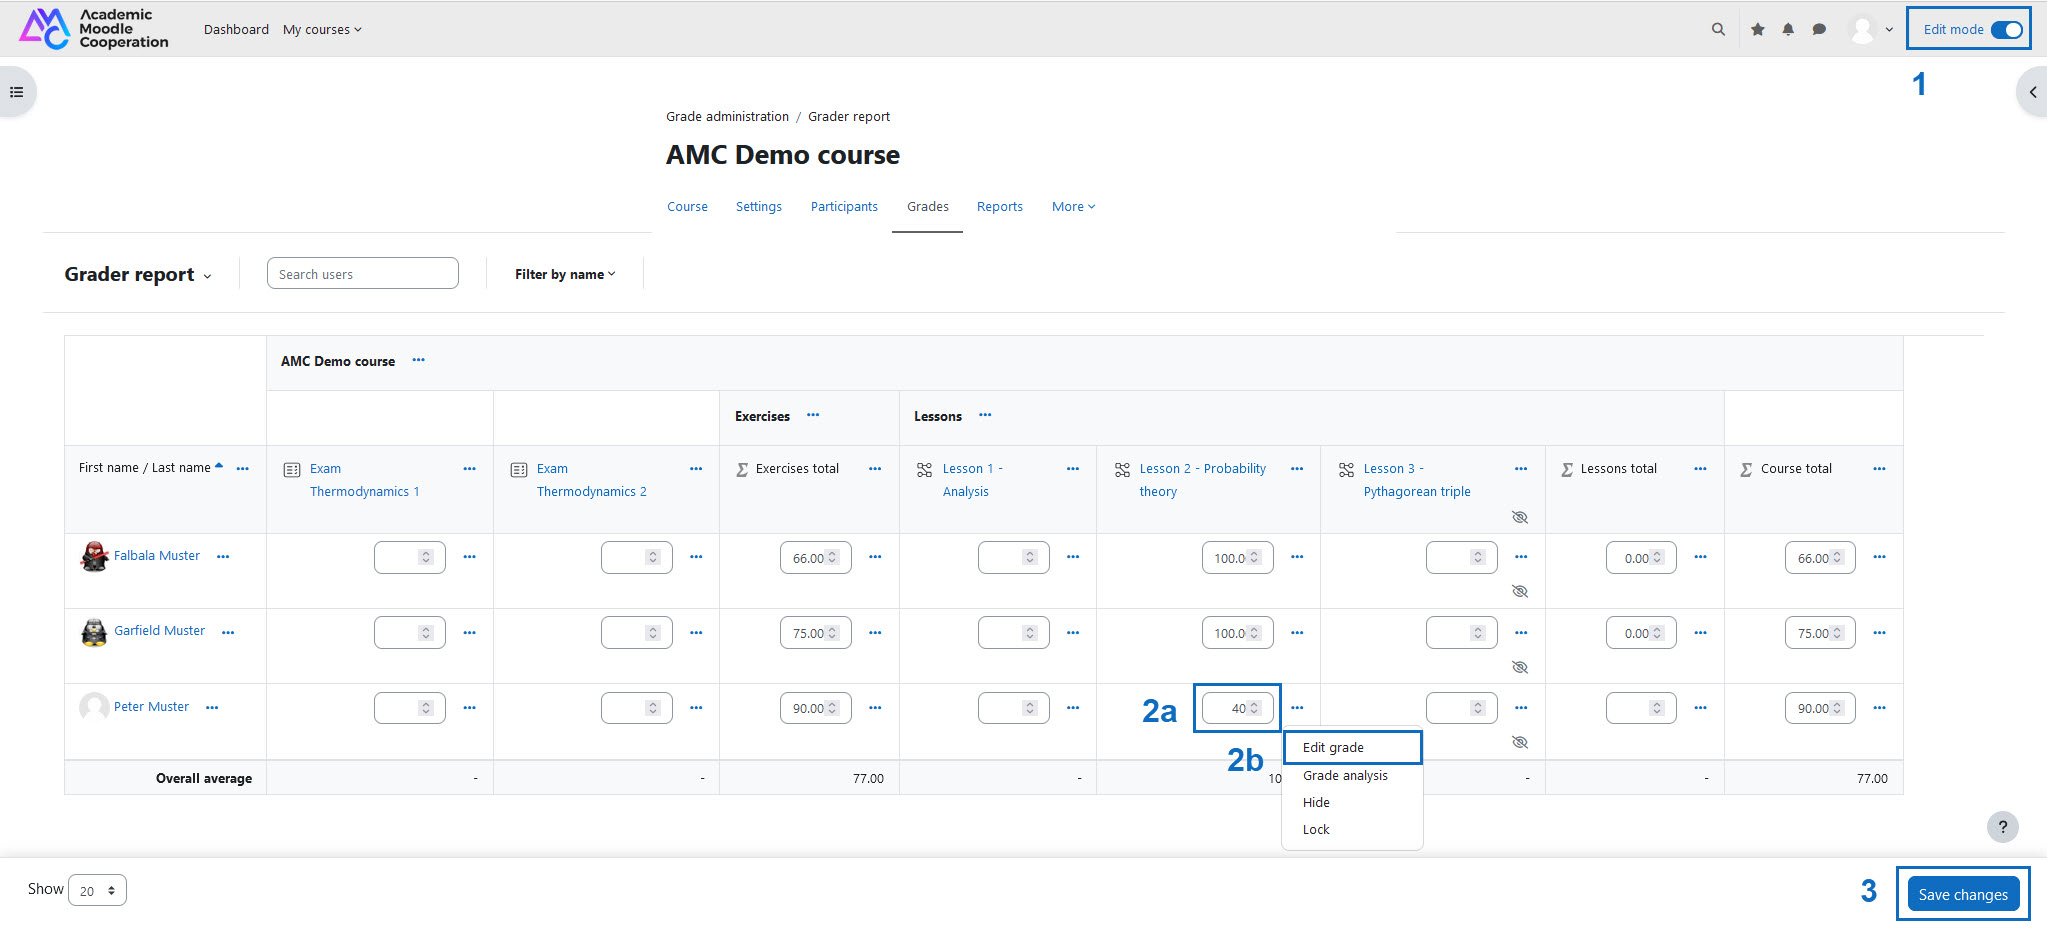
To do this, navigate to "Grader report" via Grades and switch to edit mode in the top right-hand corner. Individual grades can now be overwritten. Save the changes with the "Save changes" button.
Note: Once grades have been overwritten, they can no longer be changed in the assignment. If grades are to be changed directly in the assignment, it is necessary to reset the overwriting. You can find more information in the guide Reset overwritten grades.
Tip: It is also possible to enter feedback when overwriting grades. To do this, call up the "Edit grades" field via the "..." action menu next to the grade. This process is shown in more detail in the "Edit grade" step.

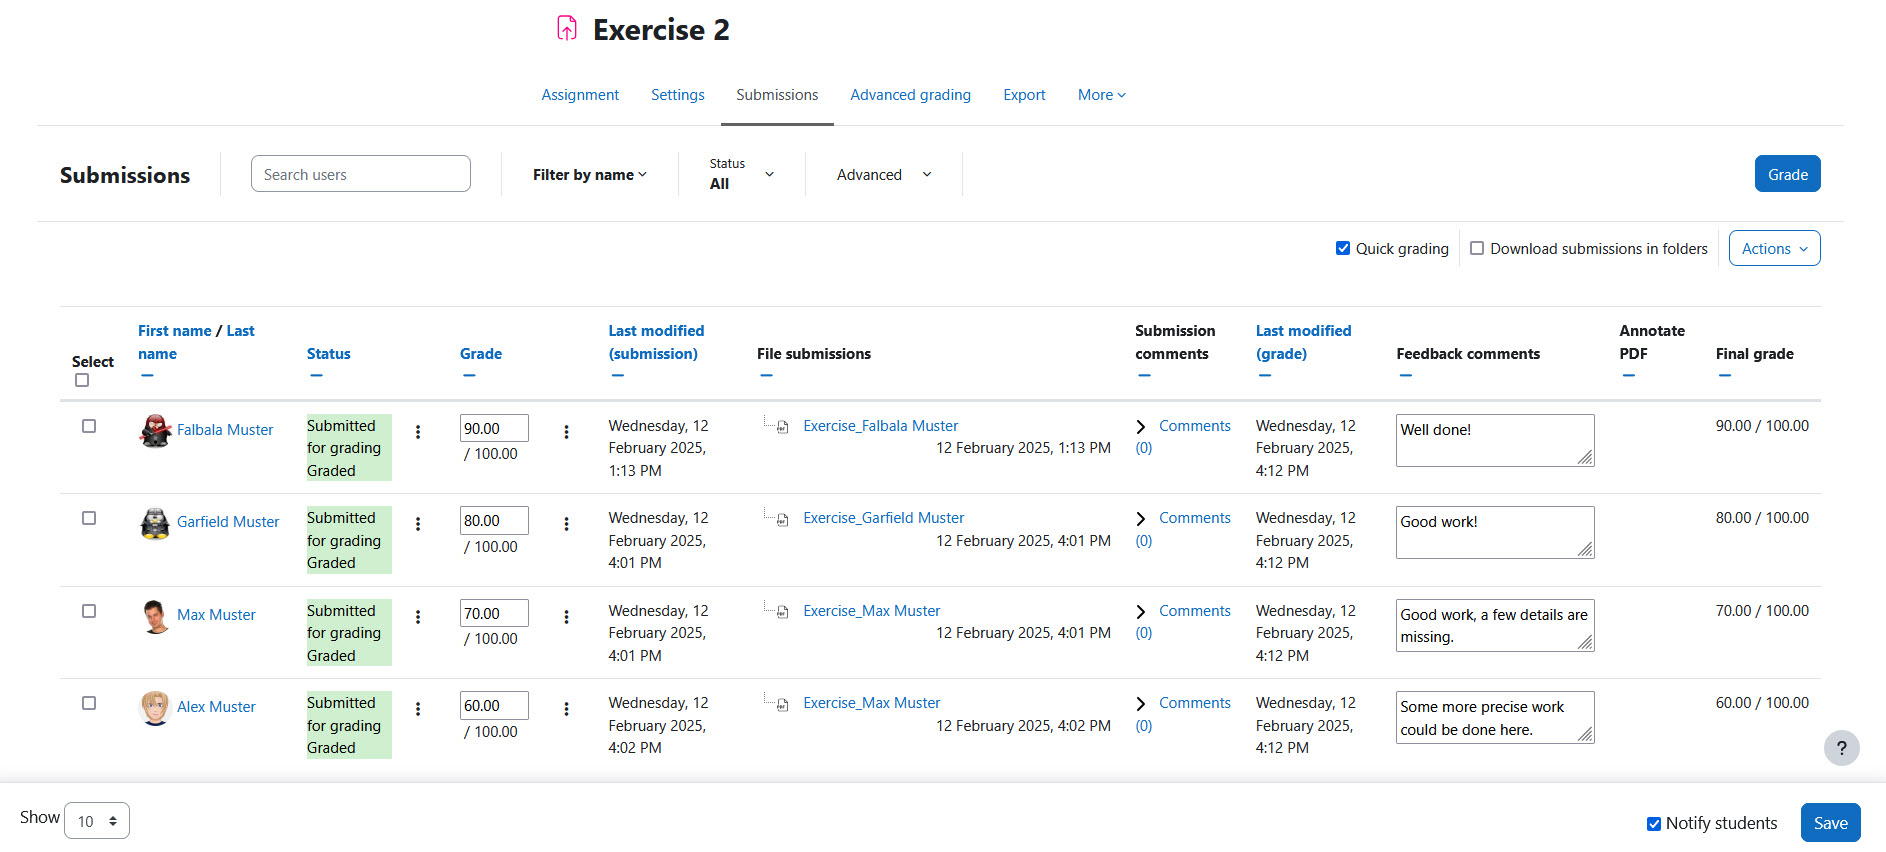
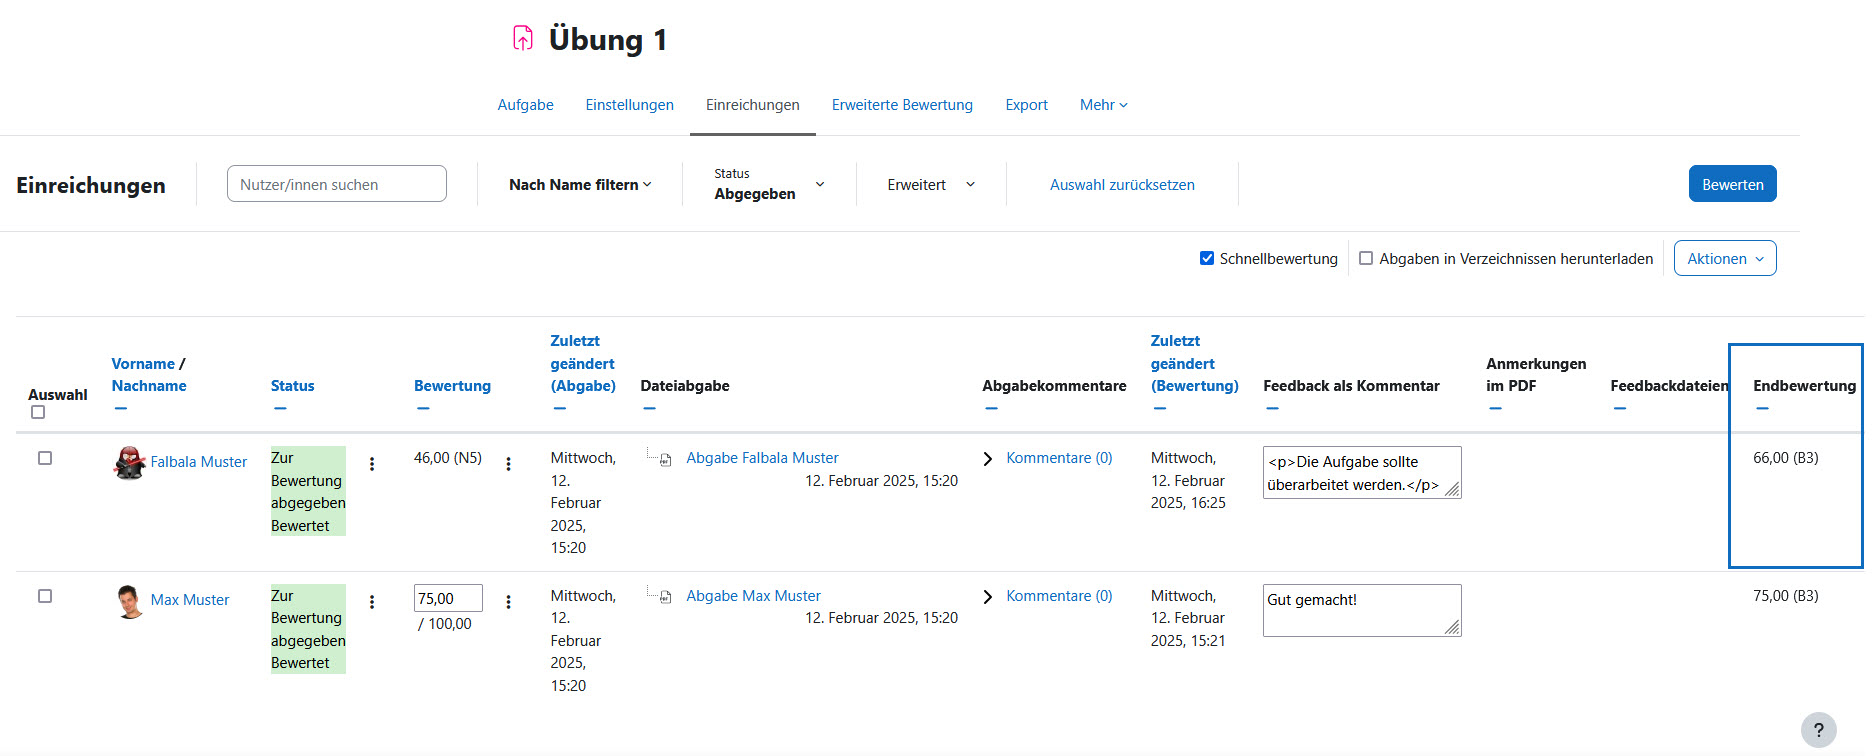
Auswirkung der Überschreibung in Aufgabe einsehen
Um die Auswirkung der Überschreibung einzusehen, wechseln wir wieder zurück in die Aufgabe. Rufen Sie dazu wieder die Aufgabe auf und klicken Sie auf den Tab „Einreichungen“.
In der Spalte „Endbewertung“ werden die in der Bewertungsübersicht überschriebenen Punkte angezeigt. Für eine etwaige Notenberechnung werden die Punkte in der Bewertungsübersicht bzw. der Spalte „Endbewertung“ herangezogen.
Im vorliegenden Beispiel hatte Falbala Muster ursprünglich nur 46 Punkte und hat das Feedback bekommen, dass die Arbeit überarbeitet werden sollte. Sie konnte die Arbeit verbessern und damit konnte sie eine bessere Bewertung erreichen, die von der Lehrperson in der Bewertungsübersicht überschrieben wurde.
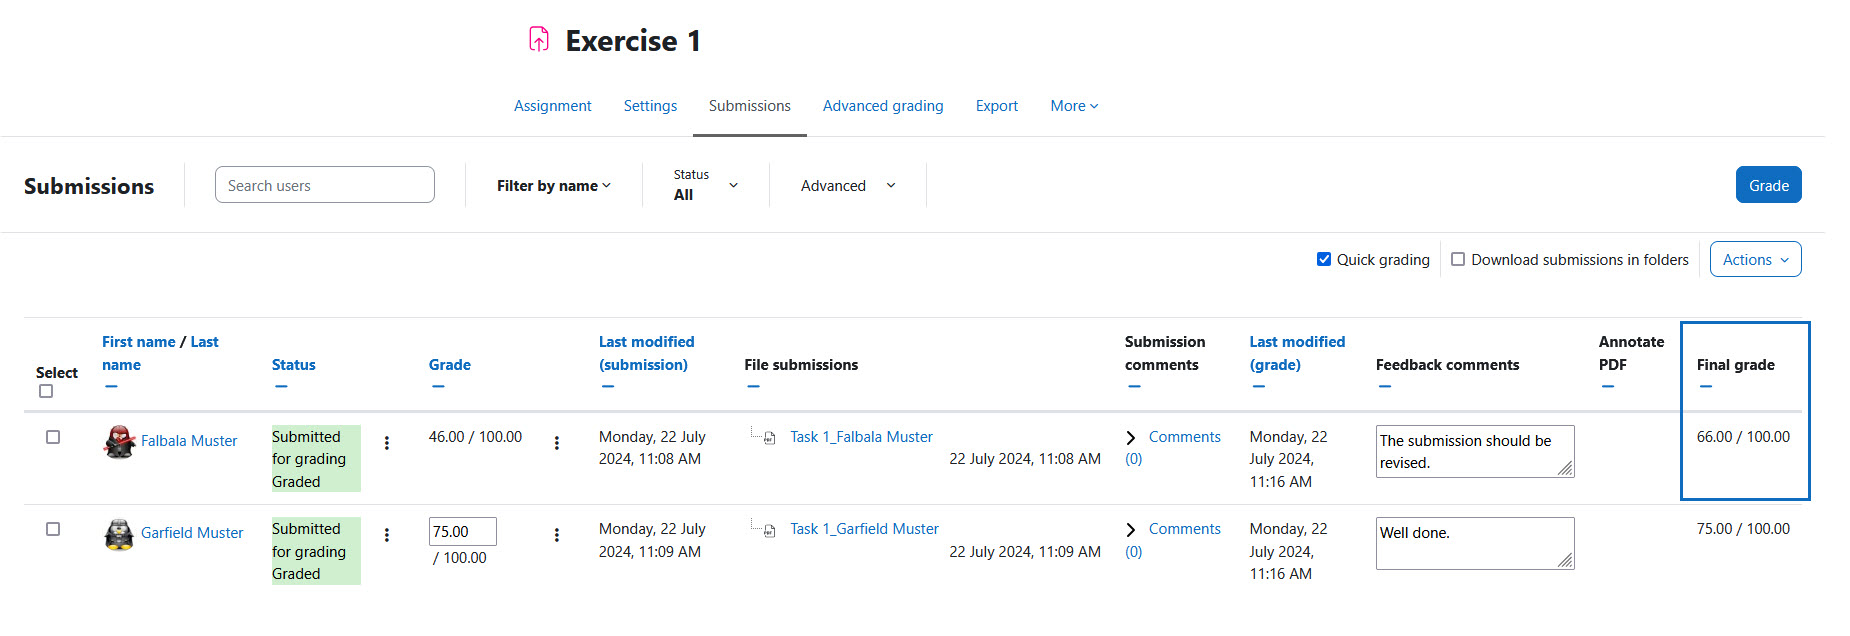
View the effects of the overwriting in the assignment
To see the effects of the overwriting, we are switching back to the assignment. Click on the assignment and then on the tab "Submissions".
In the "Final grade" column, the points overwritten in the submissions overview are displayed. The points in the submissions overview or the "Final grade" column are used for any grade calculation.
In this example, Falbala Muster originally only had 46 points and received feedback that the work should be revised. She was able to improve the work and was therefore able to receive a better grade, which was overwritten by the teacher.
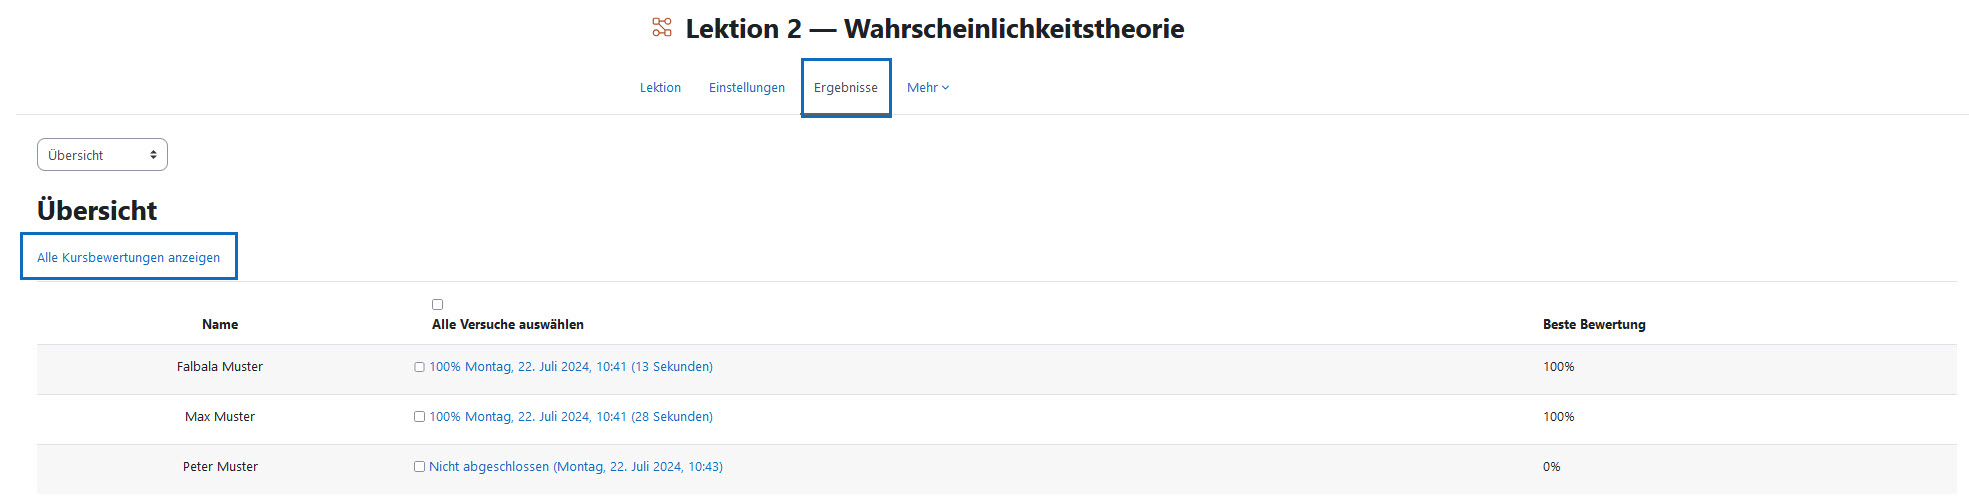
Lektionen bewerten
Als zweites Beispiel für eine Überschreibung der Bewertung wird die Lektionsbewertung gezeigt.
Rufen Sie zunächst die entsprechende Lektion in Ihrem Kurs auf und wählen Sie den Karteireiter „Ergebnisse“. Anschließend klicken Sie auf „Alle Kursbewertungen anzeigen“.
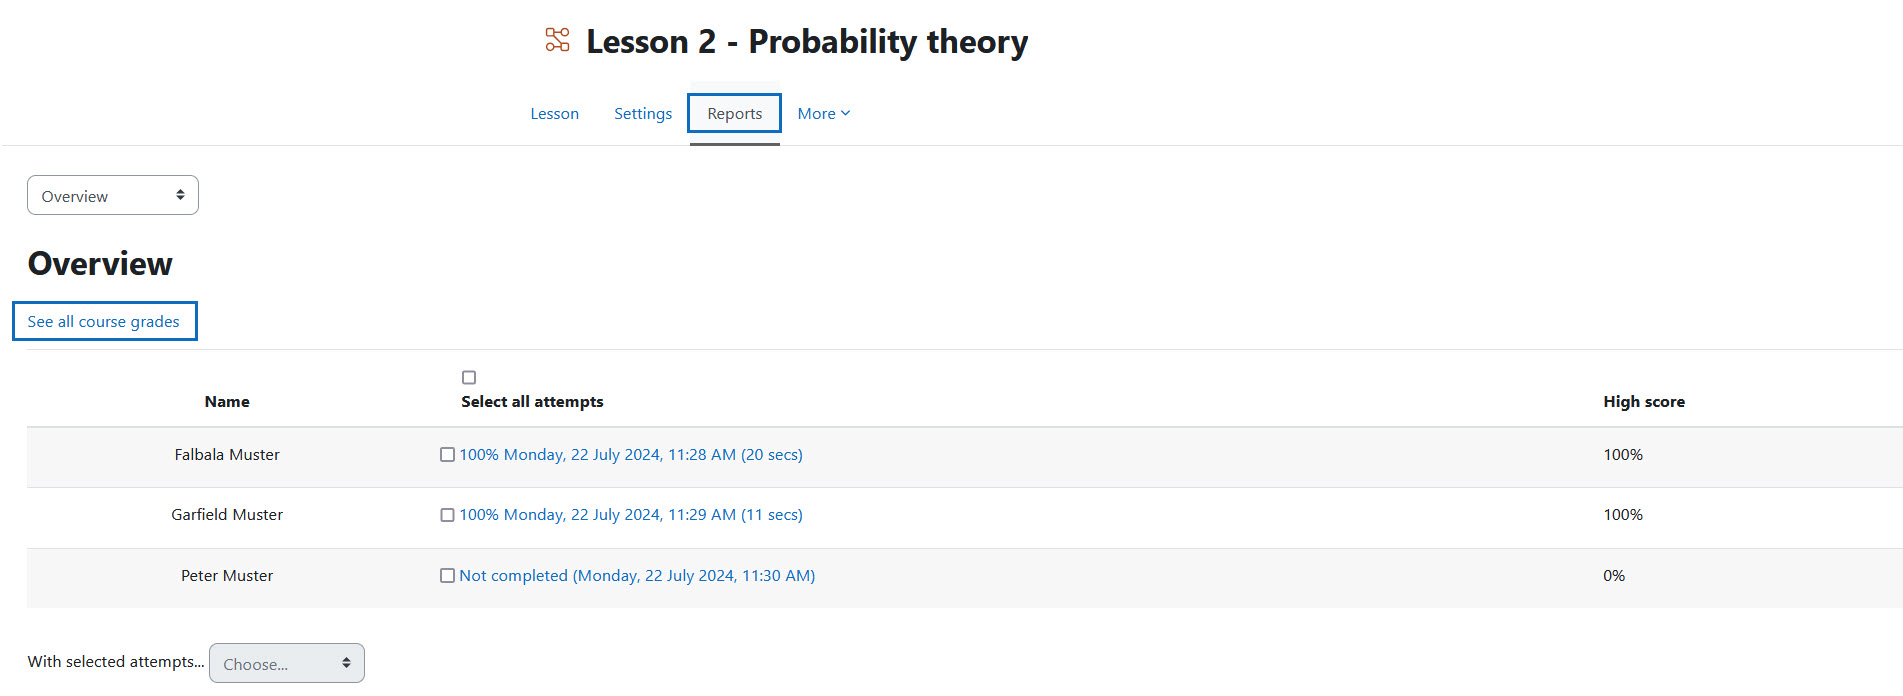
Grade lessons
As second example for a grade overwriting the lessons grading is shown.
First, call up the corresponding lesson in your course and select the "Reports" tab. Then click on "Show all course grades".
Bewertungsübersicht der Lektionen
Sie befinden sich direkt in der Bewertungsübersicht. Nun können Sie jede Lektion individuell in einem Punktebereich von 0–100 bewerten. Bestätigen Sie anschließend Ihre Änderungen mit „Änderungen speichern“.
Hinweis: Möchten Sie weiterführendes Feedback einer vergebenen Note ergänzen, klicken Sie auf die drei Punkte neben der vergebenen Punktezahl und wählen Sie aus dem Optionsmenü „Bewertungen bearbeiten“ aus. Im nächsten Schritt wird dies näher erklärt.
Lessons grade overview
You are in the Grader Report. Now you can rate each lesson individually in a point range from 0–100. Confirm your changes with "Save changes".
Note: If you would like to add more detailed feedback to an assigned grade, click on the three dots next to the score and select "Edit grade" from the options menu. This is described in the next step.
Bewertung bearbeiten
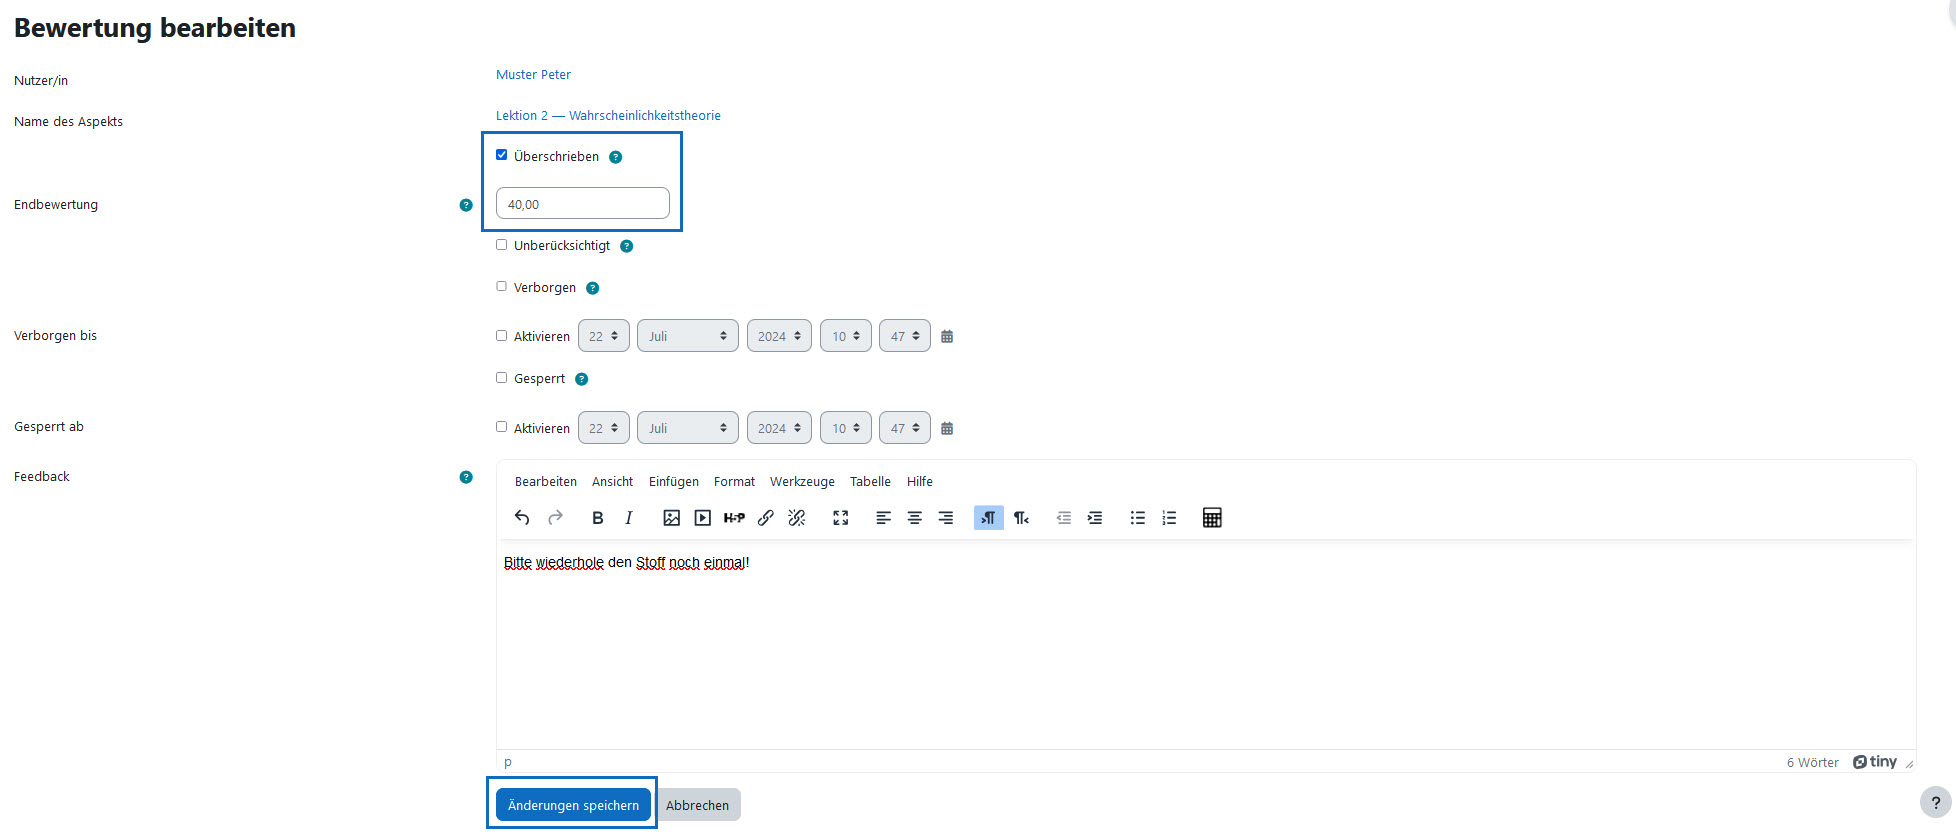
In dieser Übersicht können Sie die Bewertung überschreiben und im HTML-Textfeld „Feedback“ näherführende Erklärungen oder Anmerkungen ergänzen. Vergessen Sie nicht, anschließend mit „Änderungen speichern“ zu bestätigen.
Edit grade
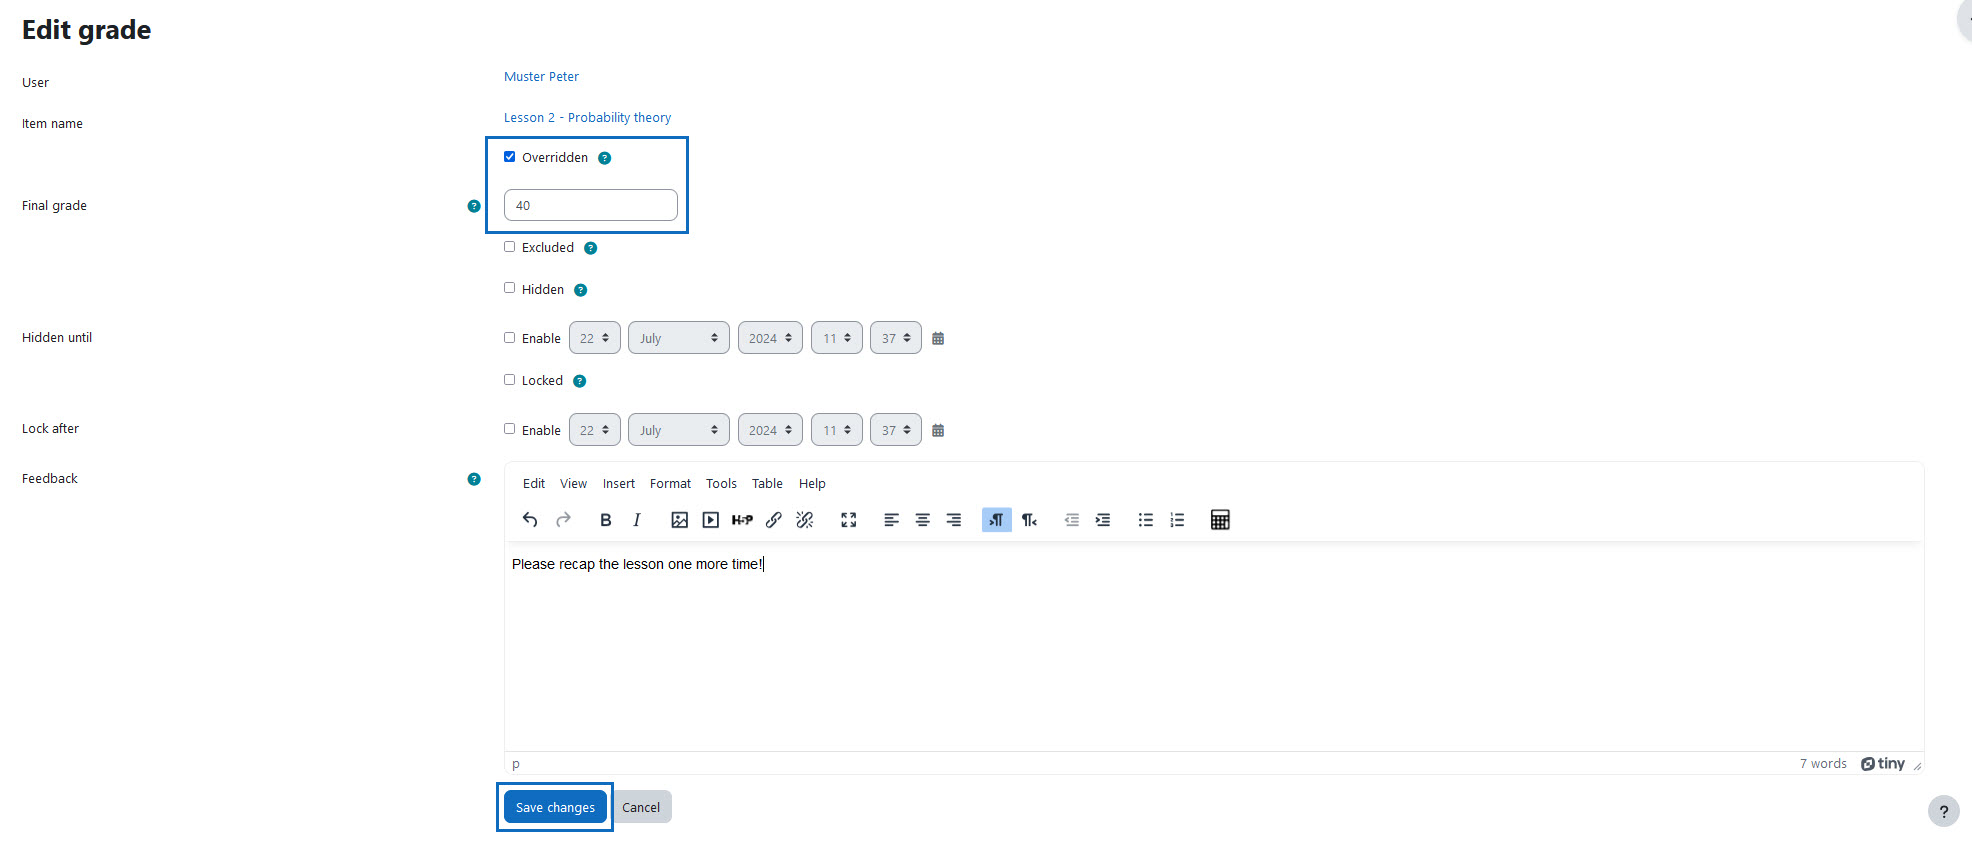
In this overview, you can overwrite the grade and add more detailed explanations or comments in the HTML text field "Feedback". Do not forget to confirm with "Save changes" afterwards.
Weitere Informationen
Bei Fragen zur Barrierefreiheit wenden Sie sich bitte an die entsprechende Supporteinrichtung Ihrer Hochschule.
Dieses Werk steht unter einer Creative Commons Attribution-ShareAlike 4.0 Lizenz:
https://creativecommons.org/licenses/by-sa/4.0/
Further information
If you have any questions regarding accessibility, please contact the relevant support facility at your university.
This work is licensed under a Creative Commons Attribution-ShareAlike 4.0 License:
https://creativecommons.org/licenses/by-sa/4.0/