Bewertungen mit Rubriken durchführen
Grading with rubrics
Ziele:
Diese Anleitung beschreibt, wie über Rubriken Bewertungen mit selbst bestimmten Kriterien durchgeführt werden können. Sie erfahren, wie Sie Kriterien und Levels für eine Rubrik erstellen und als Bewertungsmethode festlegen und wie Sie eine exemplarische Bewertung mit Rubriken in einer Aufgabe durchführen.
Schwierigkeit: fortgeschritten
Gültig ab Moodle Version 4.2
Goals:
This guide describes how to use rubrics to perform assessments with criteria you define yourself. You will learn how to create criteria and levels for a rubric and set them as an assessment method and how to perform an exemplary assessment with rubrics in an assignment.
Difficulty: intermediate
Valid from Moodle Version 4.2
8 Schritte:
Vorbereitung: Aufgabe anlegen
Um die folgenden Schritte dieser Anleitung umzusetzen, sollte bereits eine Aufgabe angelegt worden sein. Falls noch keine Aufgabe erstellt wurde, zeigt die Anleitung „Aufgabe erstellen und bewerten”, wie eine Aufgabe angelegt wird.
Preparation: Create an assignment
To follow the steps of this guide, there should already be an assignment created. If no assignment is available yet, the guide "Create and grade assignment" shows how to set up an assignment.
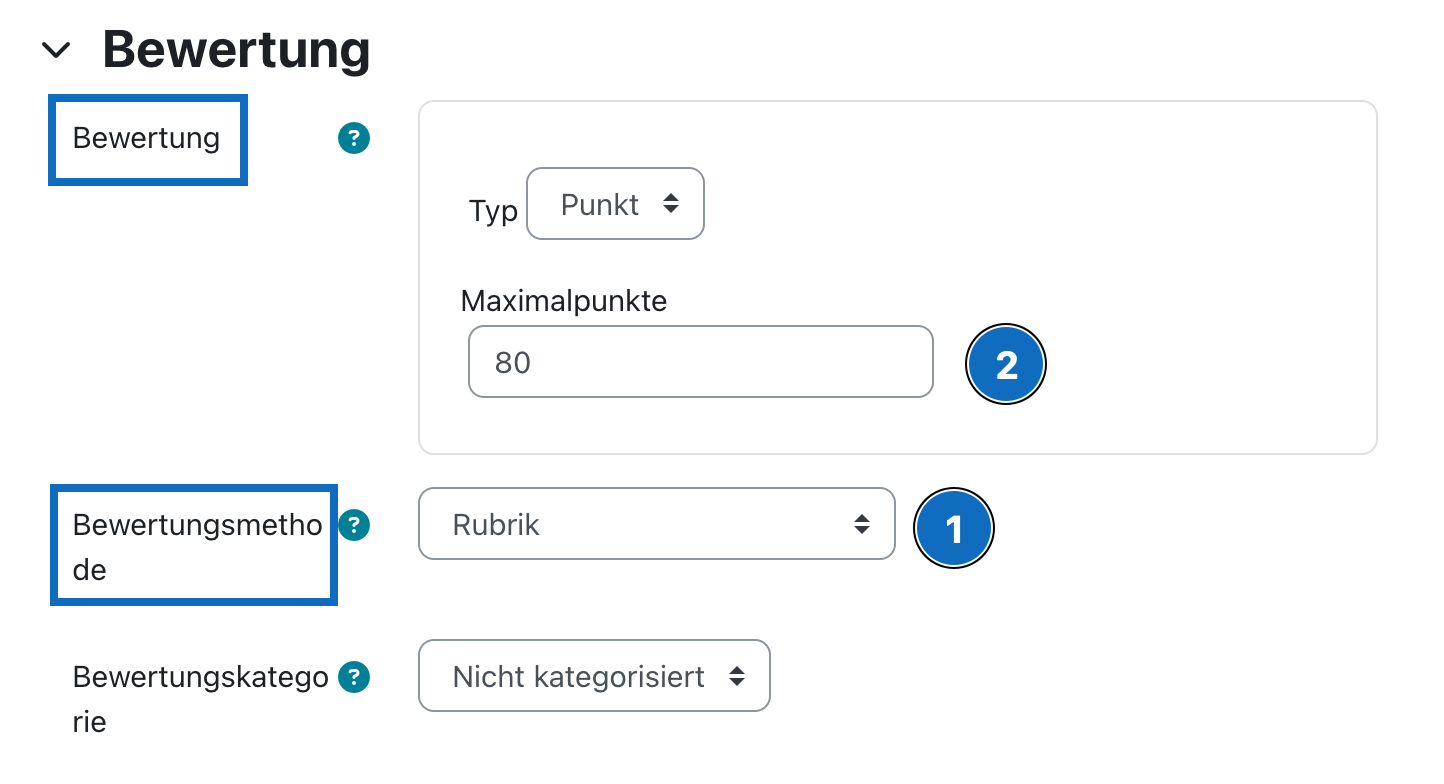
1. In Aufgabe eine „Rubrik” als Bewertungsmethode festlegen
Wählen Sie bitte in den Einstellungen der Aufgabe im Abschnitt „Bewertung” für den Parameter „Bewertungsmethode” den Eintrag „Rubrik” im Drop-down-Menü aus (1). Tragen Sie anschließend die Maximalpunkte (2) ein und klicken Sie bitte abschließend auf die Schaltfläche „Speichern und anzeigen” am unteren Ende des Fensters.
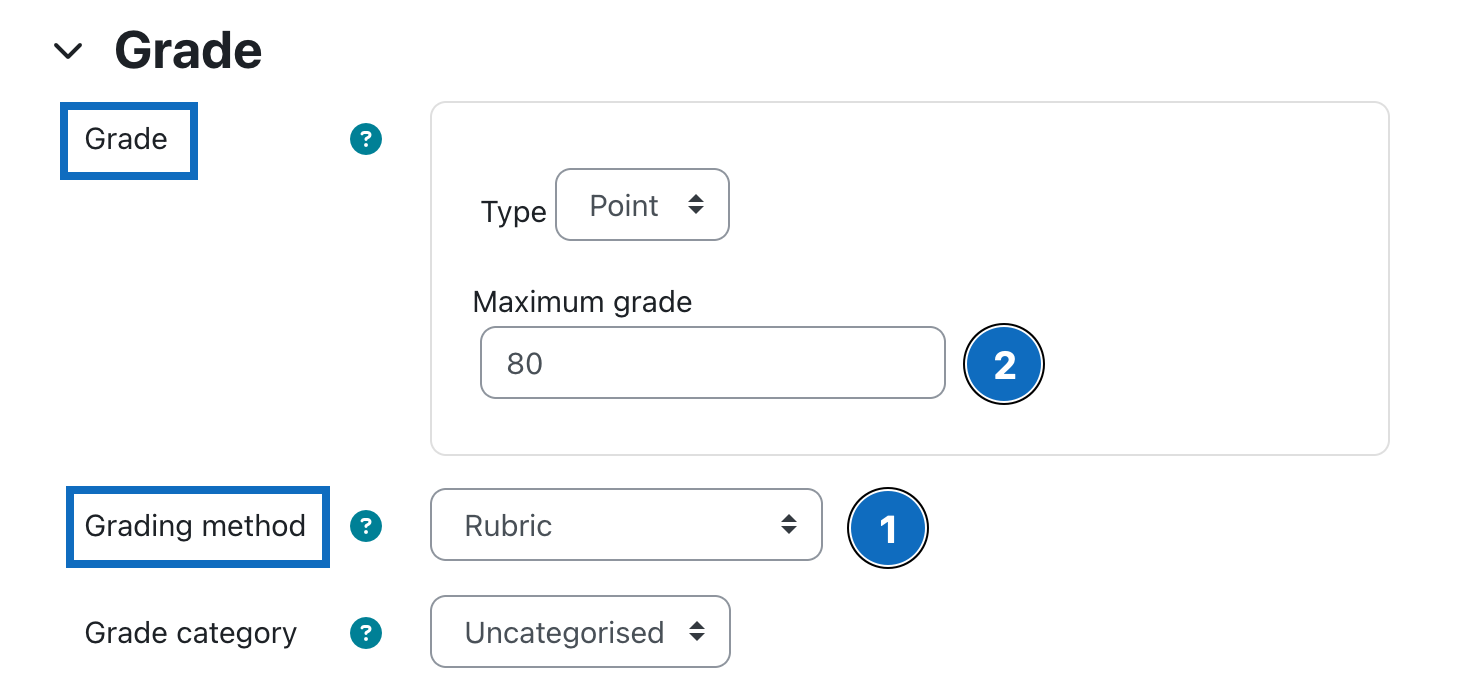
1. Define "rubric" as the grading method in the assignment
In the section "Grade" of the assignment's settings, please select the entry "Rubric" in the drop-down menu for the parameter "Grading method" (1). Then enter the maximum points (2) and finally click on the button "Save and display" at the bottom of the window.
2. Neues Bewertungsformular erstellen
Sie werden zum Anlegen einer Rubrik aufgefordert. Klicken Sie hier auf die Schaltfläche „Völlig neues Bewertungsformular erstellen”.
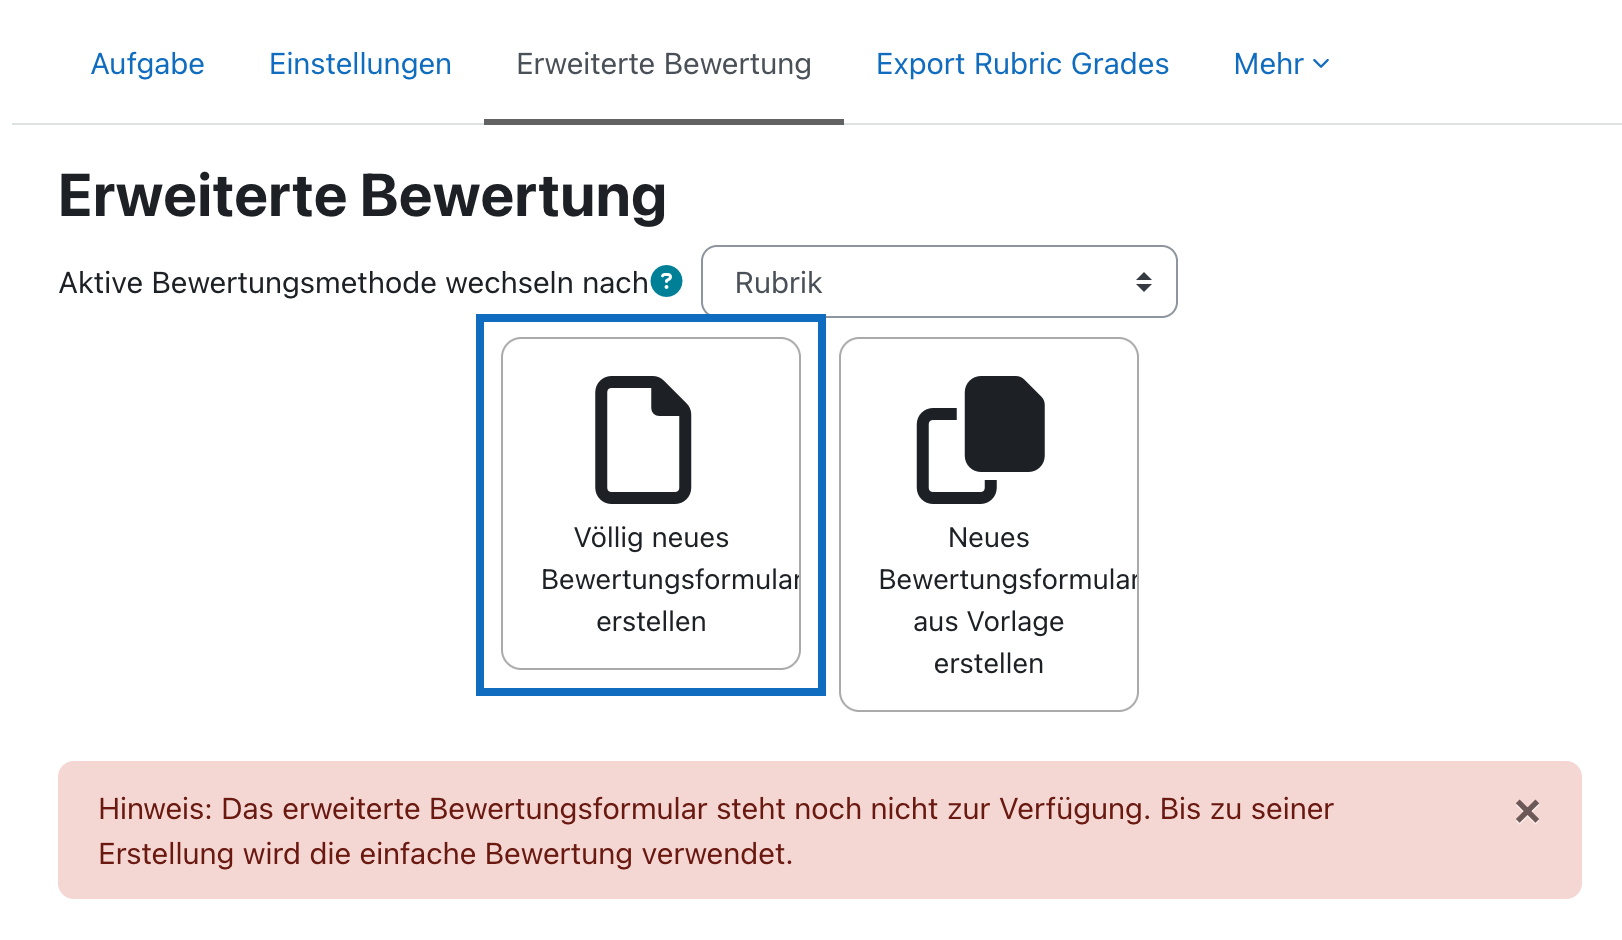
2. Create new grading form
You will be asked to create a new rubric. Here, please click the button "Create a new grading form from scratch".

3. Kriterium erstellen
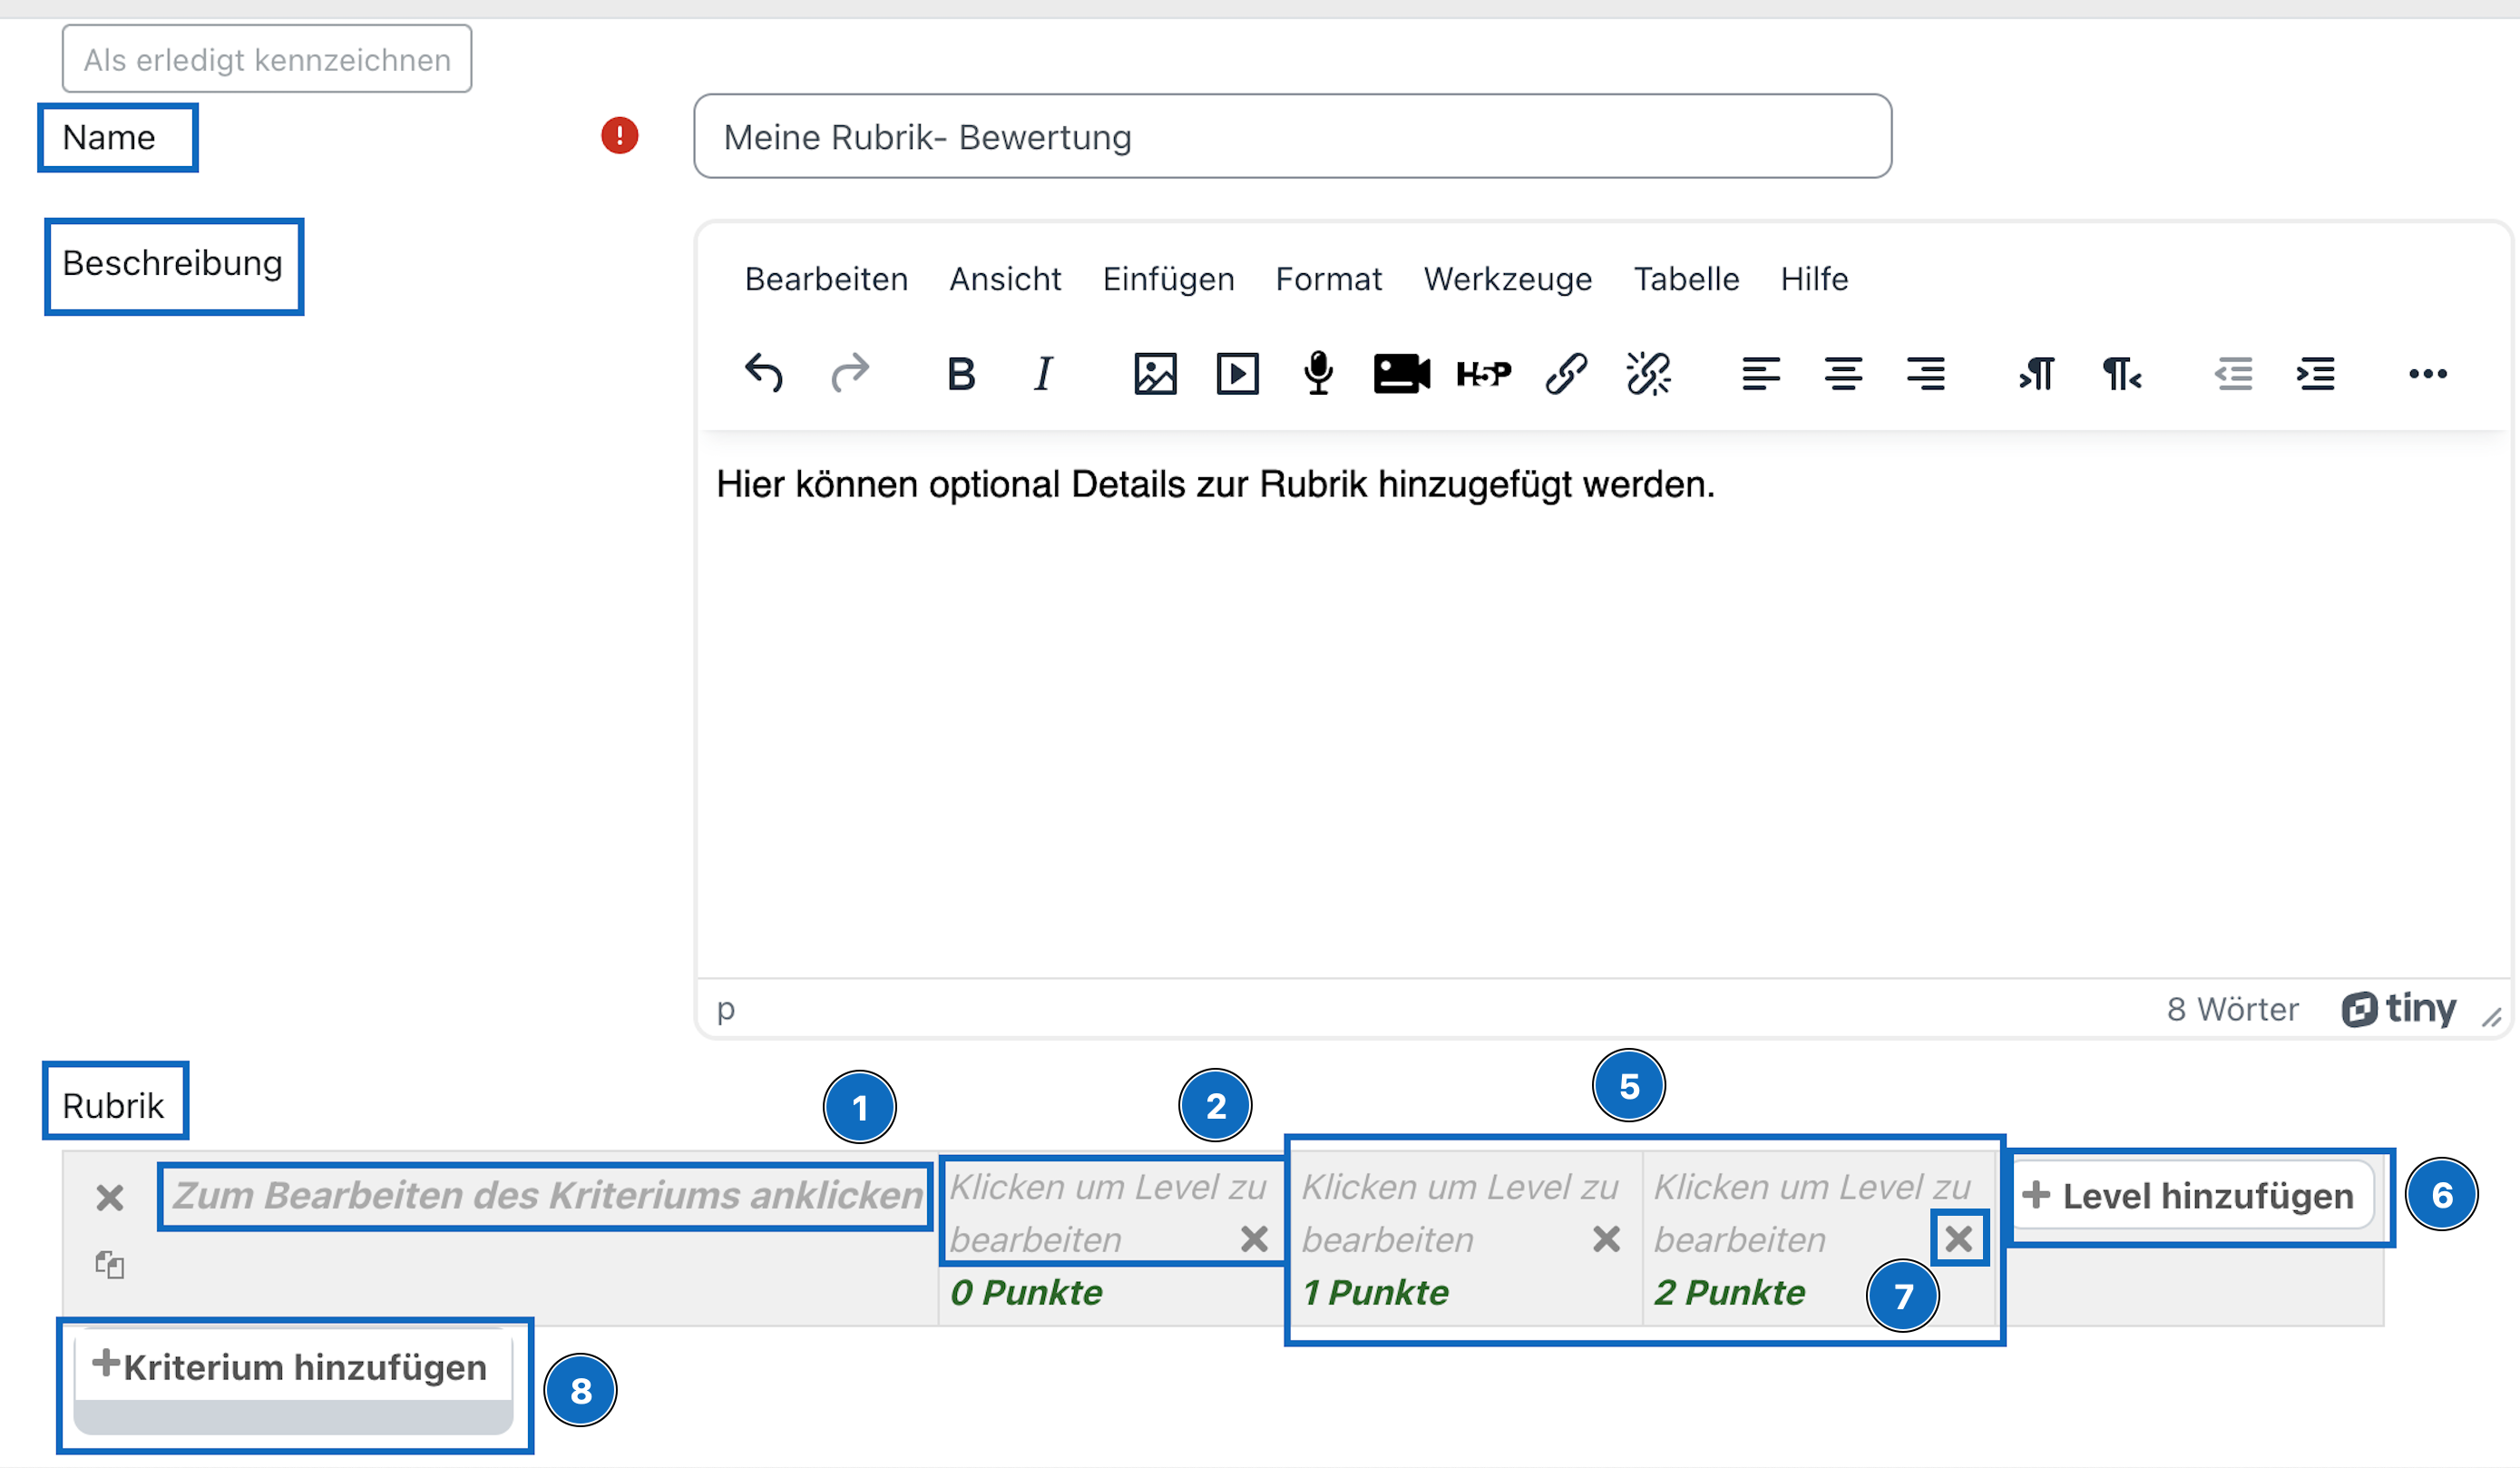
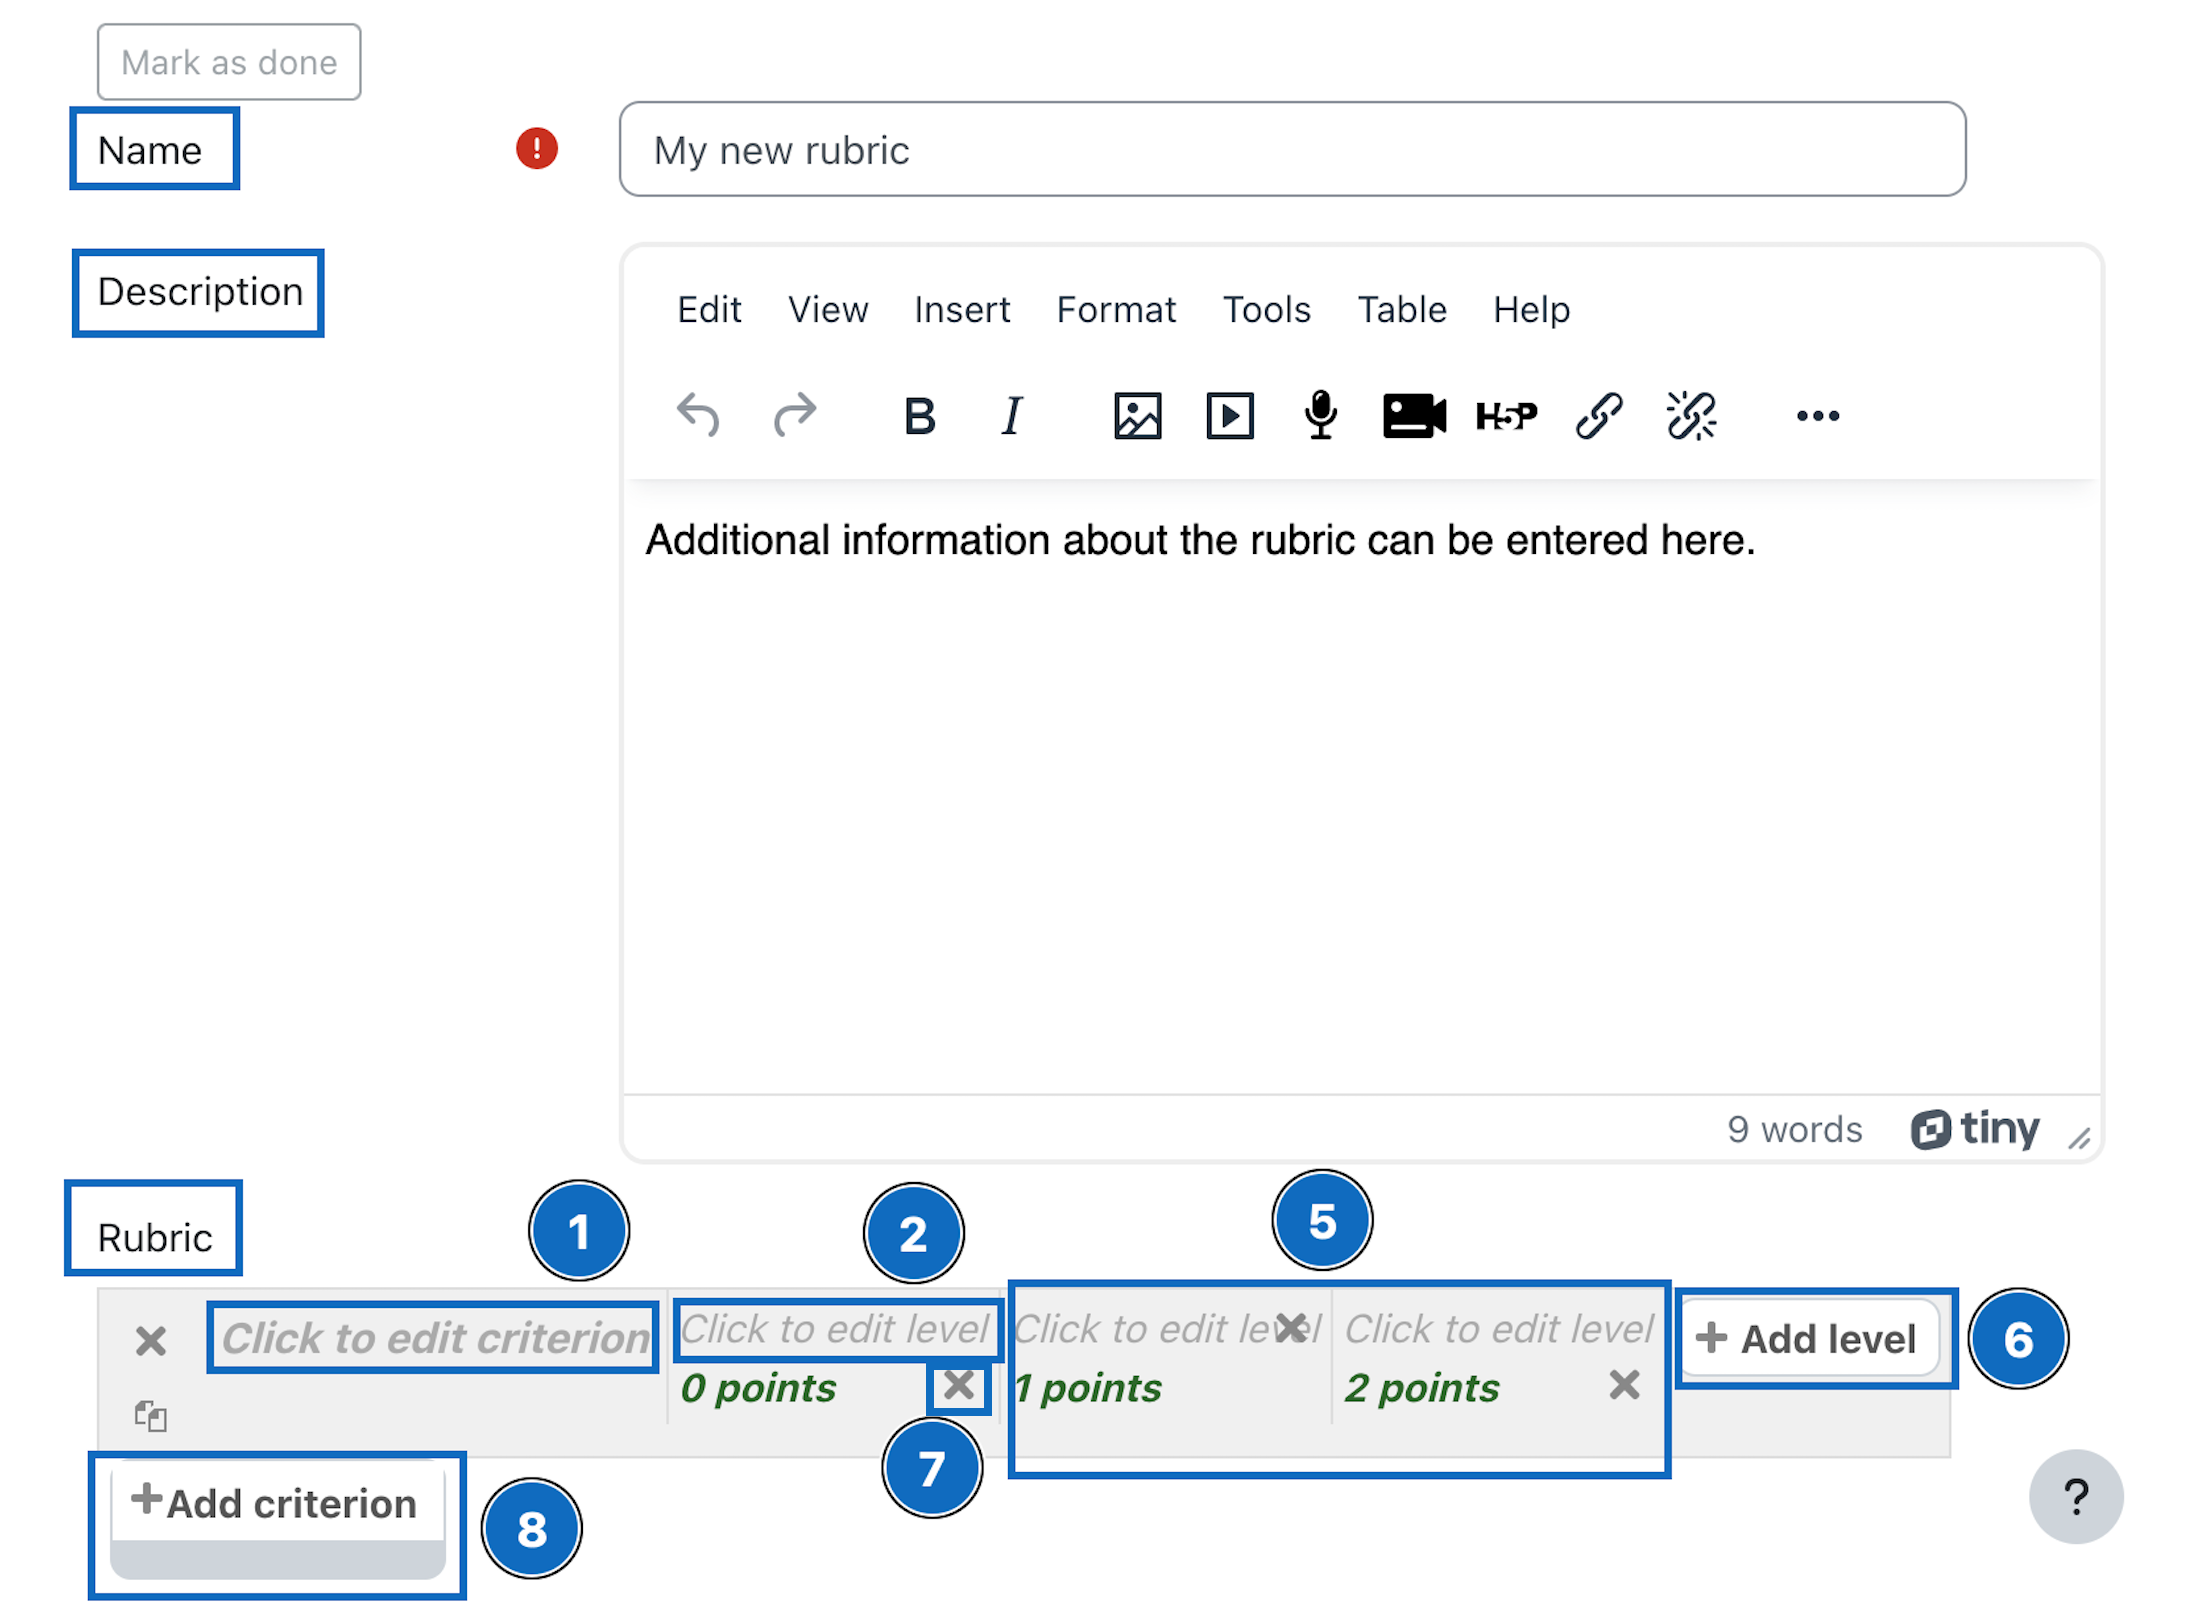
Vergeben Sie als Erstes einen Titel unter „Namen" und optional eine Erklärung unter „Beschreibung" für die Rubrik. Danach definieren Sie die einzelnen Kriterien der Bewertung im Abschnitt „Rubrik”. Gehen Sie für jedes Kriterium wie folgt vor:
In der ersten Spalte wird unter „Zum Bearbeiten des Kriteriums anklicken” der Name des Kriteriums eingetragen (1).
Öffnen Sie anschließend die Bearbeitungsansicht des einzelnen Levels durch Klick in das Feld „Klicken um Level zu bearbeiten” (2).
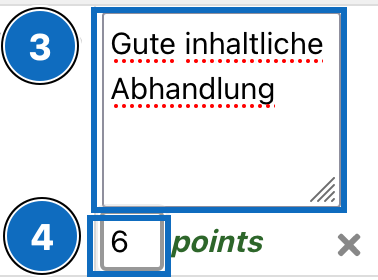
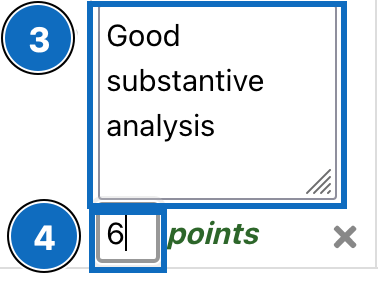
Hier kann nun für dieses Level ein Name eingetragen (3) und die Punkte vergeben werden, indem Sie auf den Zahlenwert klicken (4):
Legen Sie auch für die weiteren Levels die Namen sowie die Punkte fest (5).
Wenn Sie weitere Levels benötigen, klicken Sie in der Zeile des Kriteriums auf die Schaltfläche „Level hinzufügen” (6). Um Levels zu löschen, klicken Sie auf die Löschen-Icons „X” (7).
Wichtig: Zu Beginn besteht eine Rubrik aus nur einem Kriterium. Durch Klick auf die Schaltfläche „Kriterium hinzufügen” (8) können zusätzliche Kriterien erstellt werden.
3. Create criterion
First, assign a title in the field "name" and optionally an explanation in the field "description" for the rubric. Then define the individual criteria of the assessment in the section "Rubric". Proceed as follows for each criterion:
The name of the criterion is entered in the first column "Click to edit criterion" (1).
Then open the editing view of the individual level by clicking in the field "Click to edit level" (2).
Now you can enter a name for this level (3) and assign points by clicking on the numerical value (4):
Set the names and points for the other levels as well (5).
If you need more levels, please click the button "Add level" in the criterion row (6). To delete levels, please click on the delete icons "X" (7).
Important: At the beginning a rubric consists of only one criterion. By clicking on the button "Add criterion" (8), additional criteria can be created.
4. Zusätzliche Einstellungen
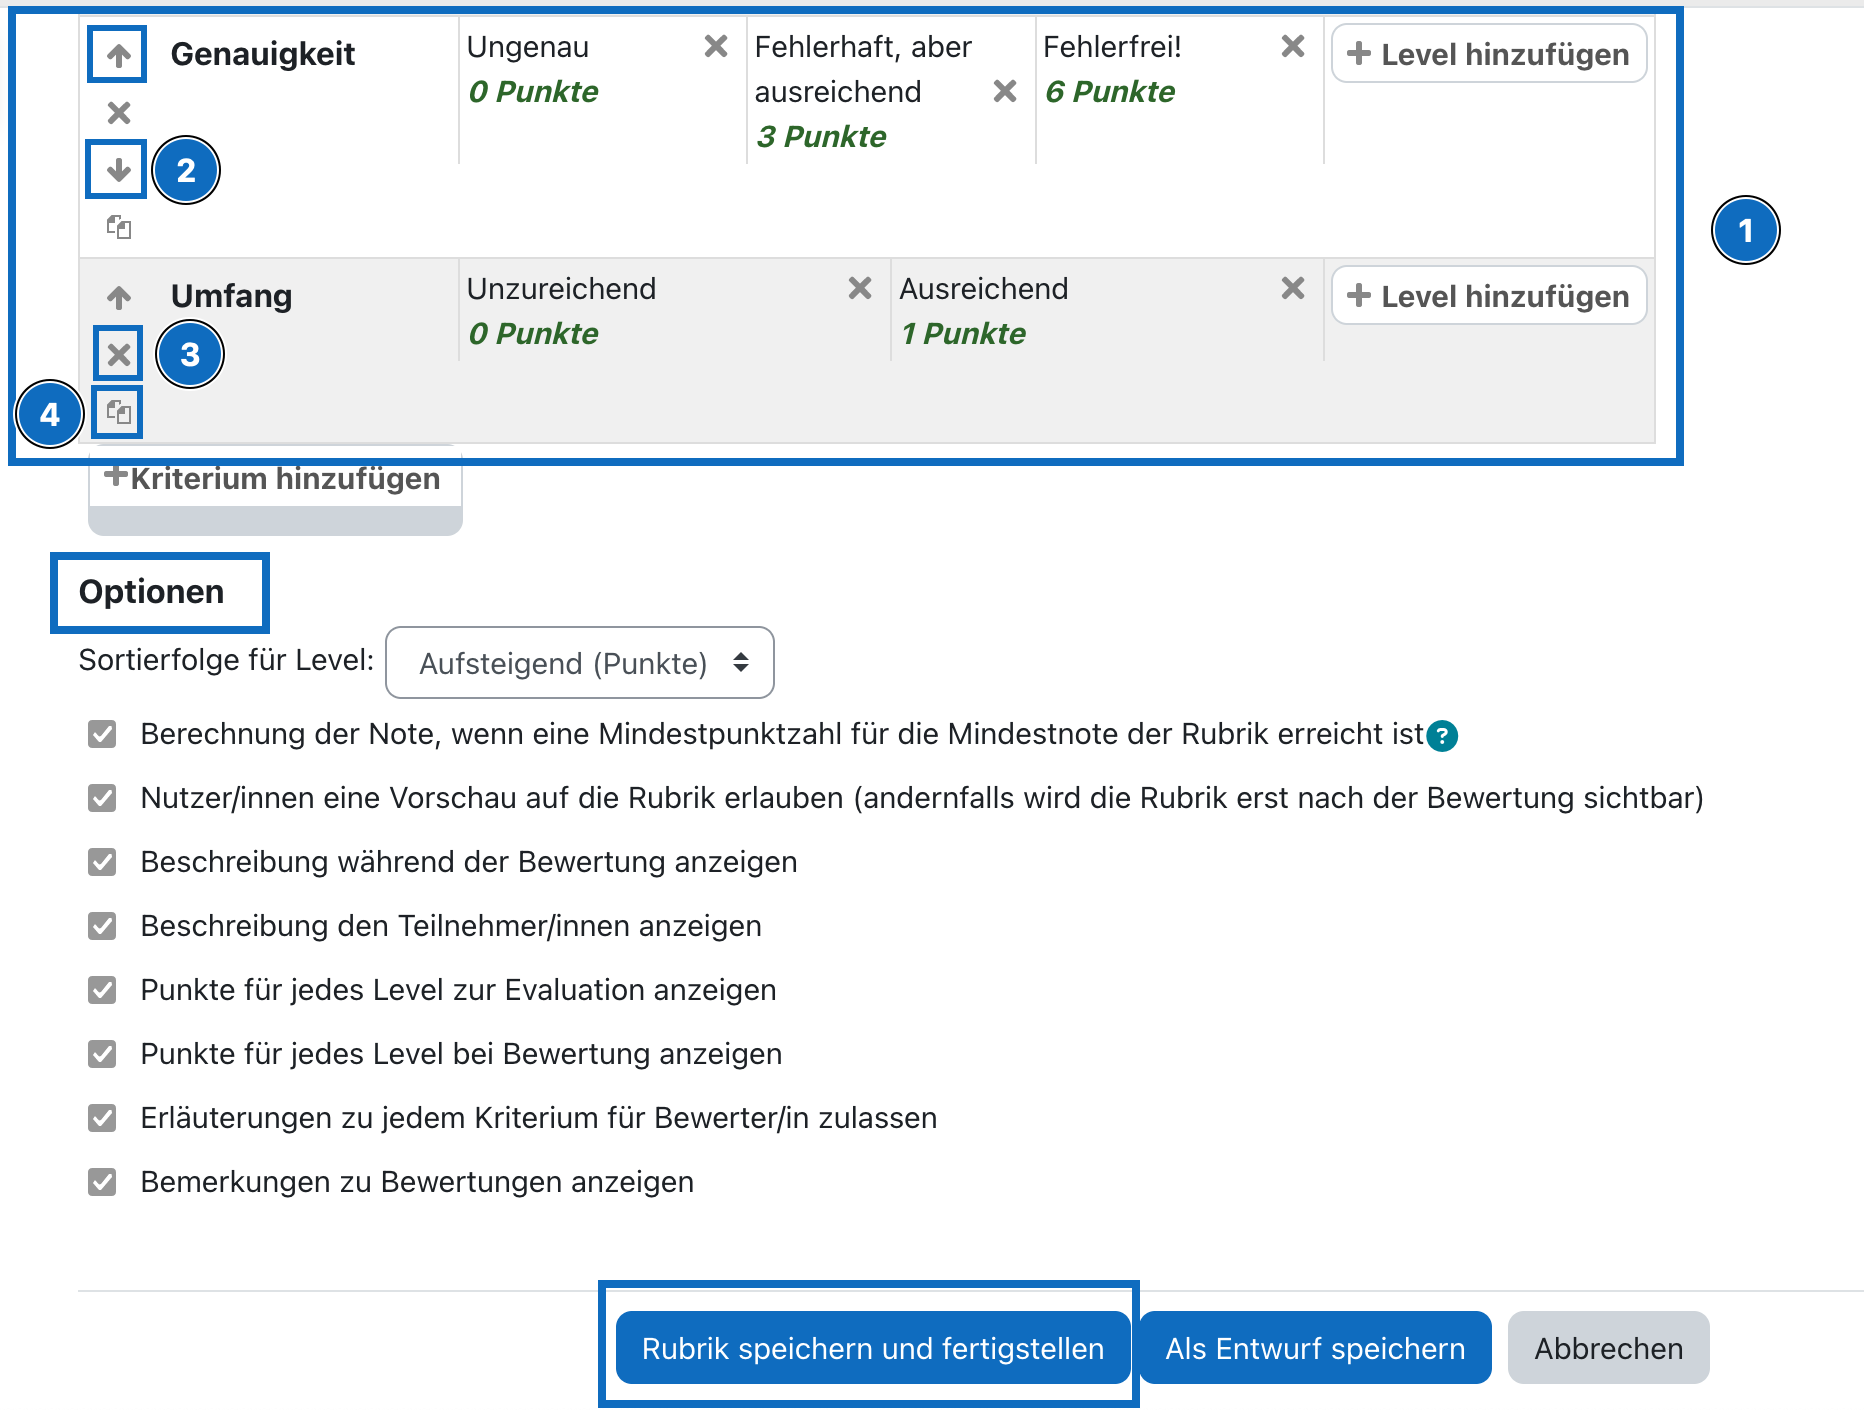
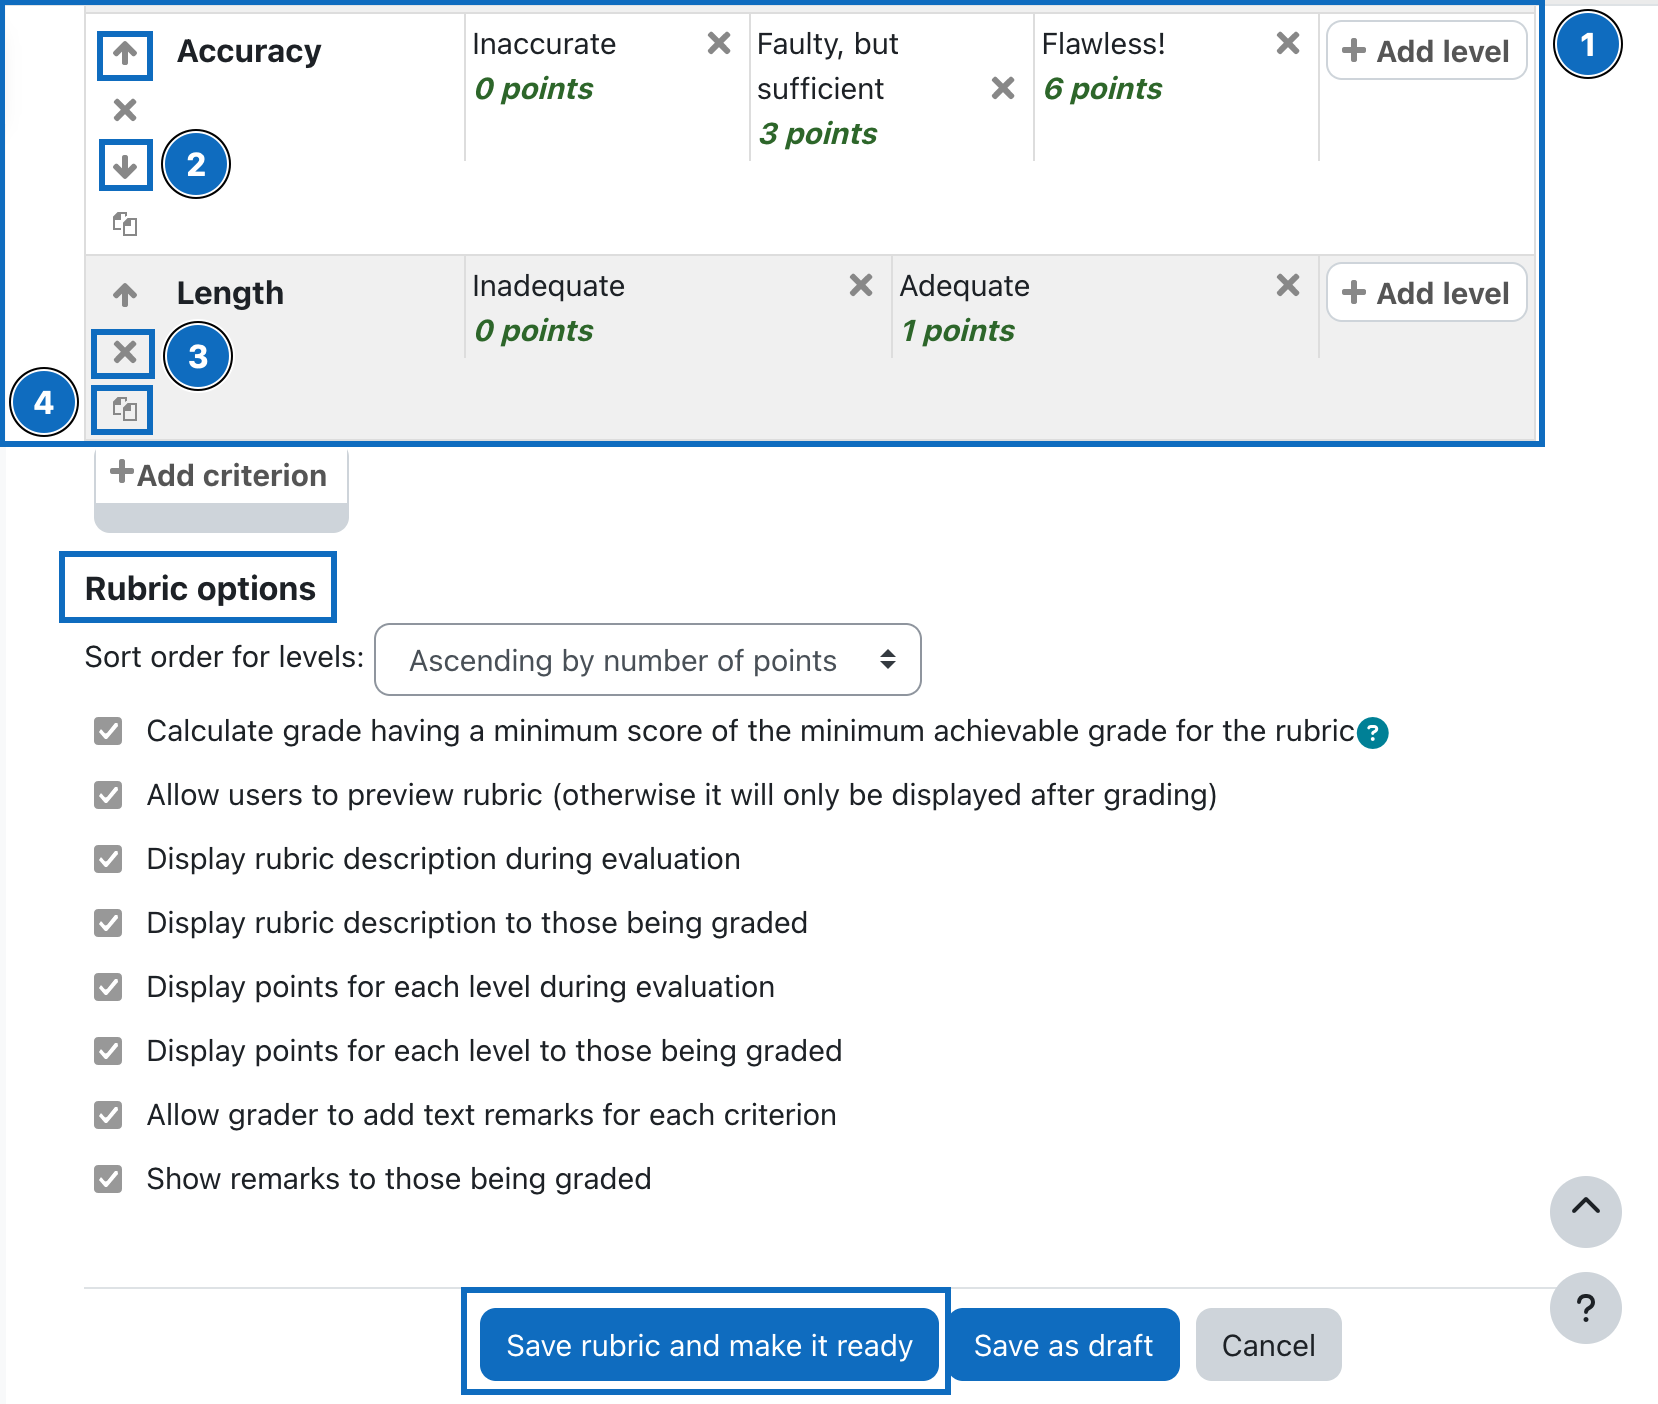
Es wurden nun mehrere Kriterien erstellt (1). Um die Anordnung der Kriterien zu verändert, nützen Sie bitte die Pfeitasten „oben” bzw. „unten” (2). Wenn ein Kriterium gelöscht werden soll, klicken Sie bitte das Löschen-Icon „X” (3). Wenn ein fertig erstelltes Kriterium kopiert werden soll, klicken Sie bitte auf das Kopier-Icon (4).
Der Abschnitt „Optionen" zeigt noch einen Überblick über zusätzliche Einstellungen der Rubrik. Durch Klick auf die Häckchen können die einzelnen Optionen jeweils aktiviert bzw. deaktiviert werden.
Sobald alle Einstellungen getroffen wurden, sichern Sie bitte die Rubrik mittels Klick auf die Schaltfläche „Rubrik speichern und fertigstellen”.
4. Additional settings
Several criteria have now been added (1). To change the order of the criteria, please use the arrow keys "up" or "down" (2). If you want to delete a criterion, please click the delete icon "X" (3). If you want to copy a finished criterion, please click on the copy icon (4).
The section "Options" shows an overview of additional settings of the rubric. By clicking on the checkmarks, the individual options can be activated or deactivated respectively.
Once all settings have been made, please save the rubric by clicking on the button "Save rubric and make it ready".
5. Beispielhafte Bewertung einer Aufgabe mit Rubriken durchführen
Bitte navigieren Sie nun zur Aufgabe und öffnen Sie die Bewertung eines Studierenden (diese Schritte werden in der Anleitung „Das Aufgaben-Modul” ab Schritt 2.1 beschrieben).
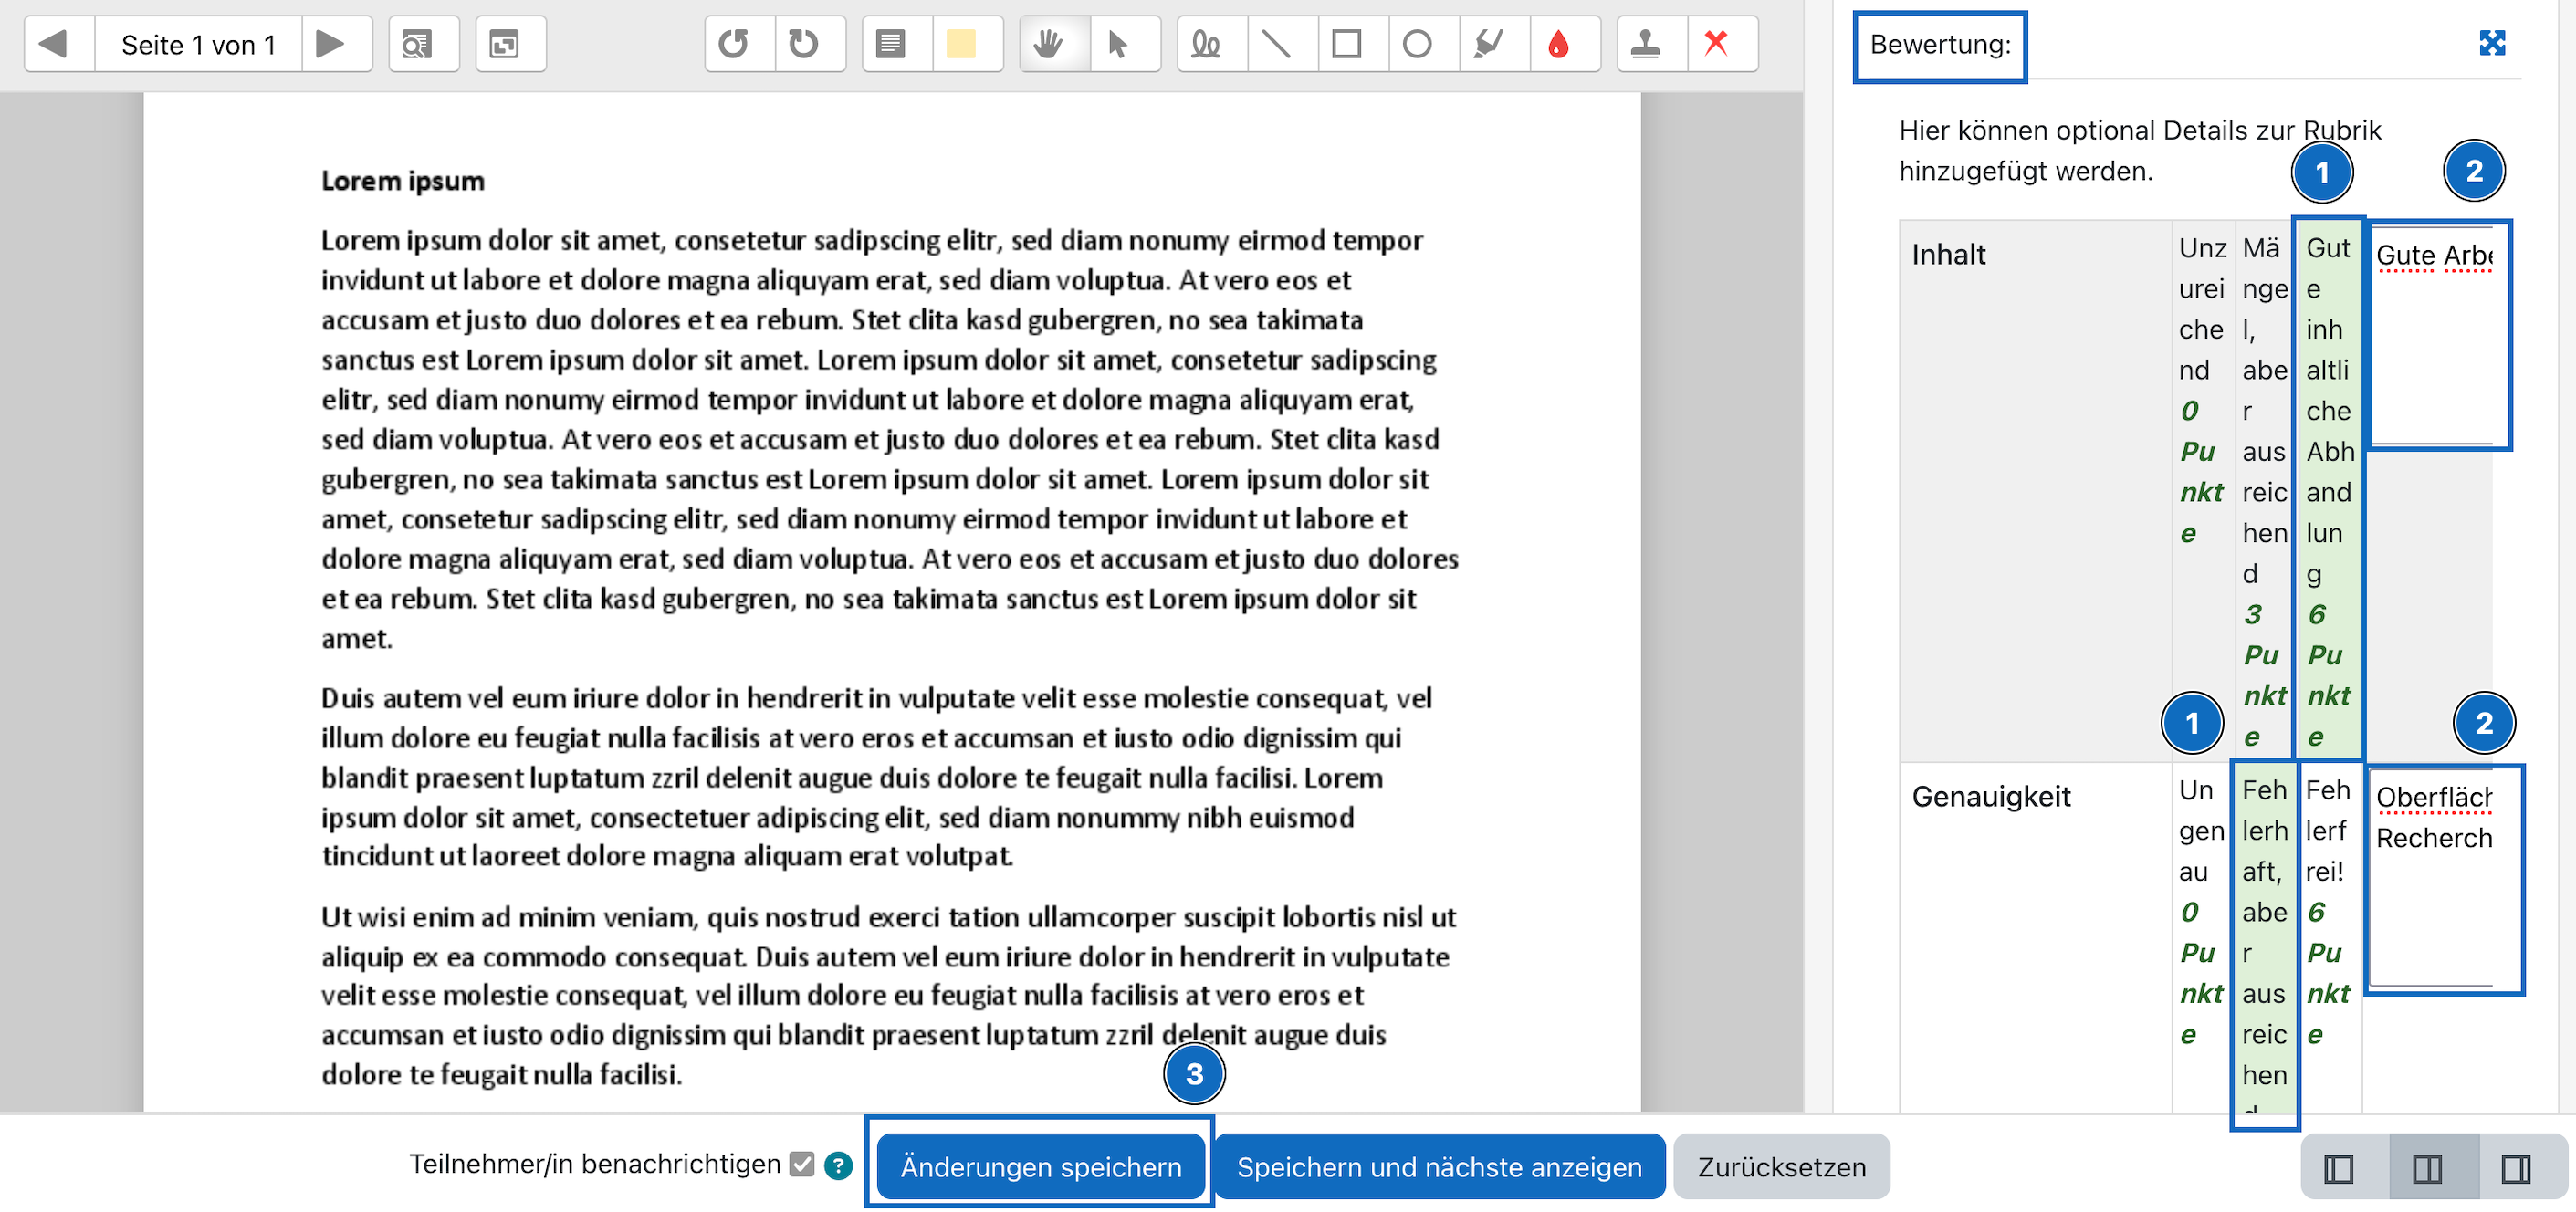
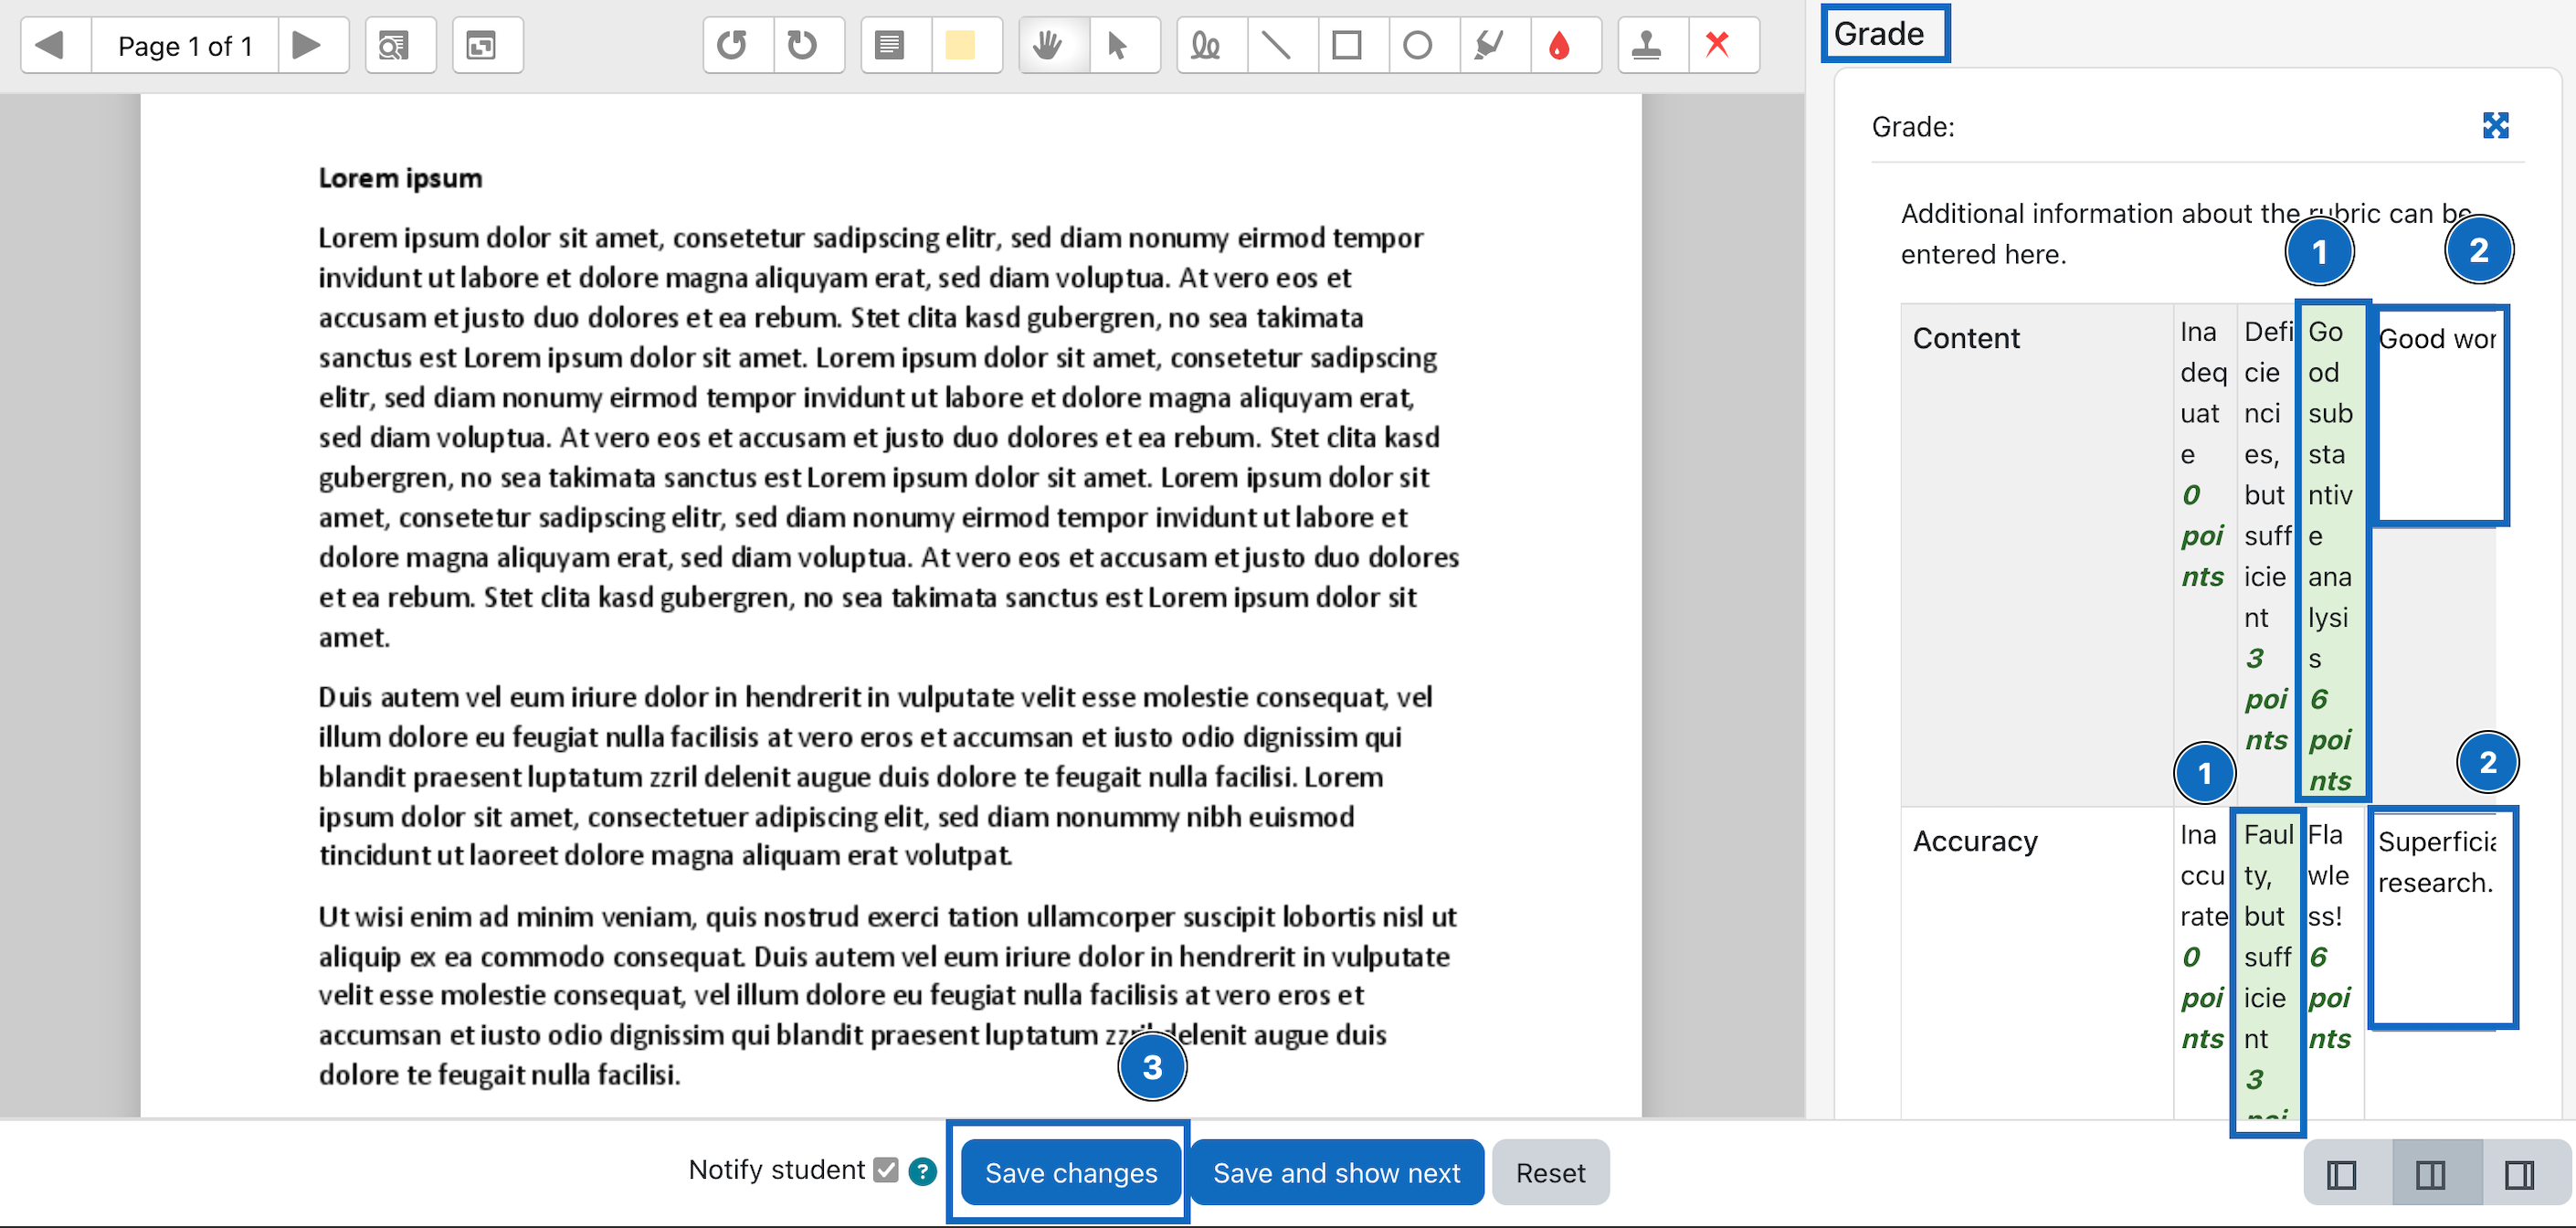
Hier können Sie nun die Bewertung mit den Rubriken durchführen. Wählen Sie rechts im Abschnitt „Bewertung” für jedes Kriterium durch Klick das jeweilige Level aus (1). Ihre Auswahl wird grün hinterlegt. Rechts vom Level können Sie optional einen Kommentar zum Kriterium eintragen (2). Um die Bewertung mit den Rubriken zu speichern, klicken Sie abschließend auf „Änderungen speichern” (3).
5. Perform sample grading using "rubrics"
Please navigate to the assignment and display the grading view of a students submission (these steps are described in the guide "The assignments module" from step 2.1. onwards).
Here you can now grade the assessment with the rubrics. On the right, in the "Assessment" section, select the respective level for each criterion by clicking it (1). Your selection will be highlighted in green. Optionally enter a comment on the criterion to the right of the level (2). To save the grading with the rubrics, finally click on "Save changes" (3).
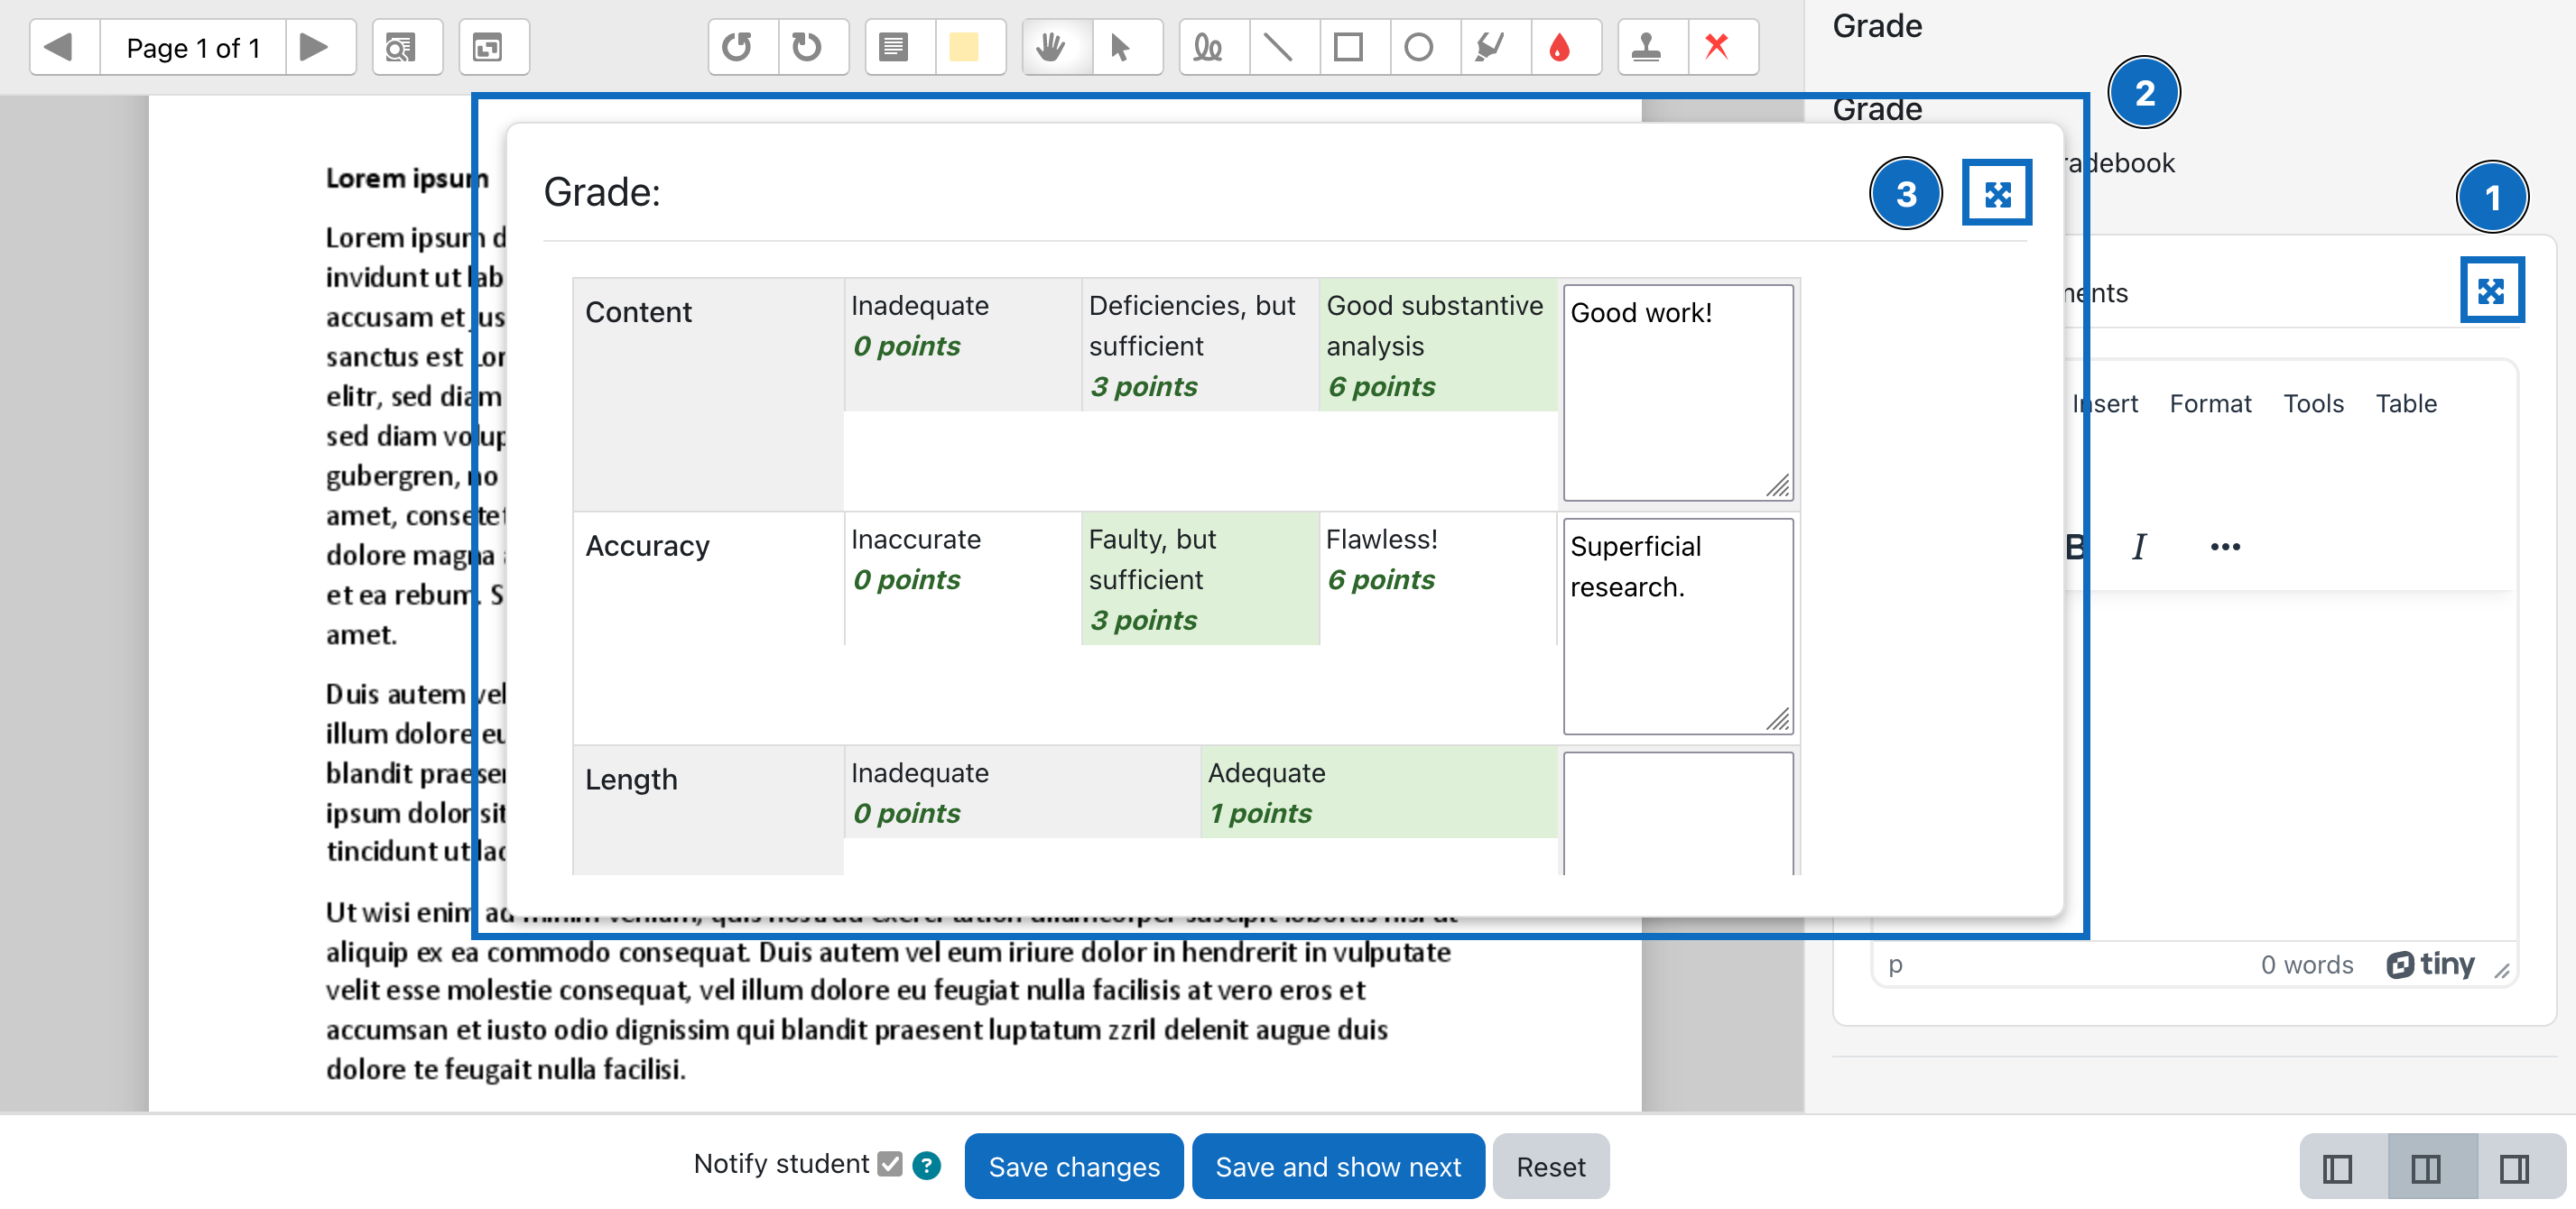
Tipp: Sollte die Darstellung der Rubriken für die Bewertung ungenügend sein, können Sie den Abschnitt mit den einzelnen Rubriken direkt aus der Übersicht durch Klick auf das Symbol mit den „überkreuzten Pfeilsymbolen" (1) herauslösen. Die Rubriken werden dann in einem eigenen Fenster vollständig dargestellt (2). Sobald Sie mit der Bewertung fertig sind, können Sie die Ansicht durch Klick auf dasselbe Symbol (3) wieder in die Bewertungsübersicht einbinden.
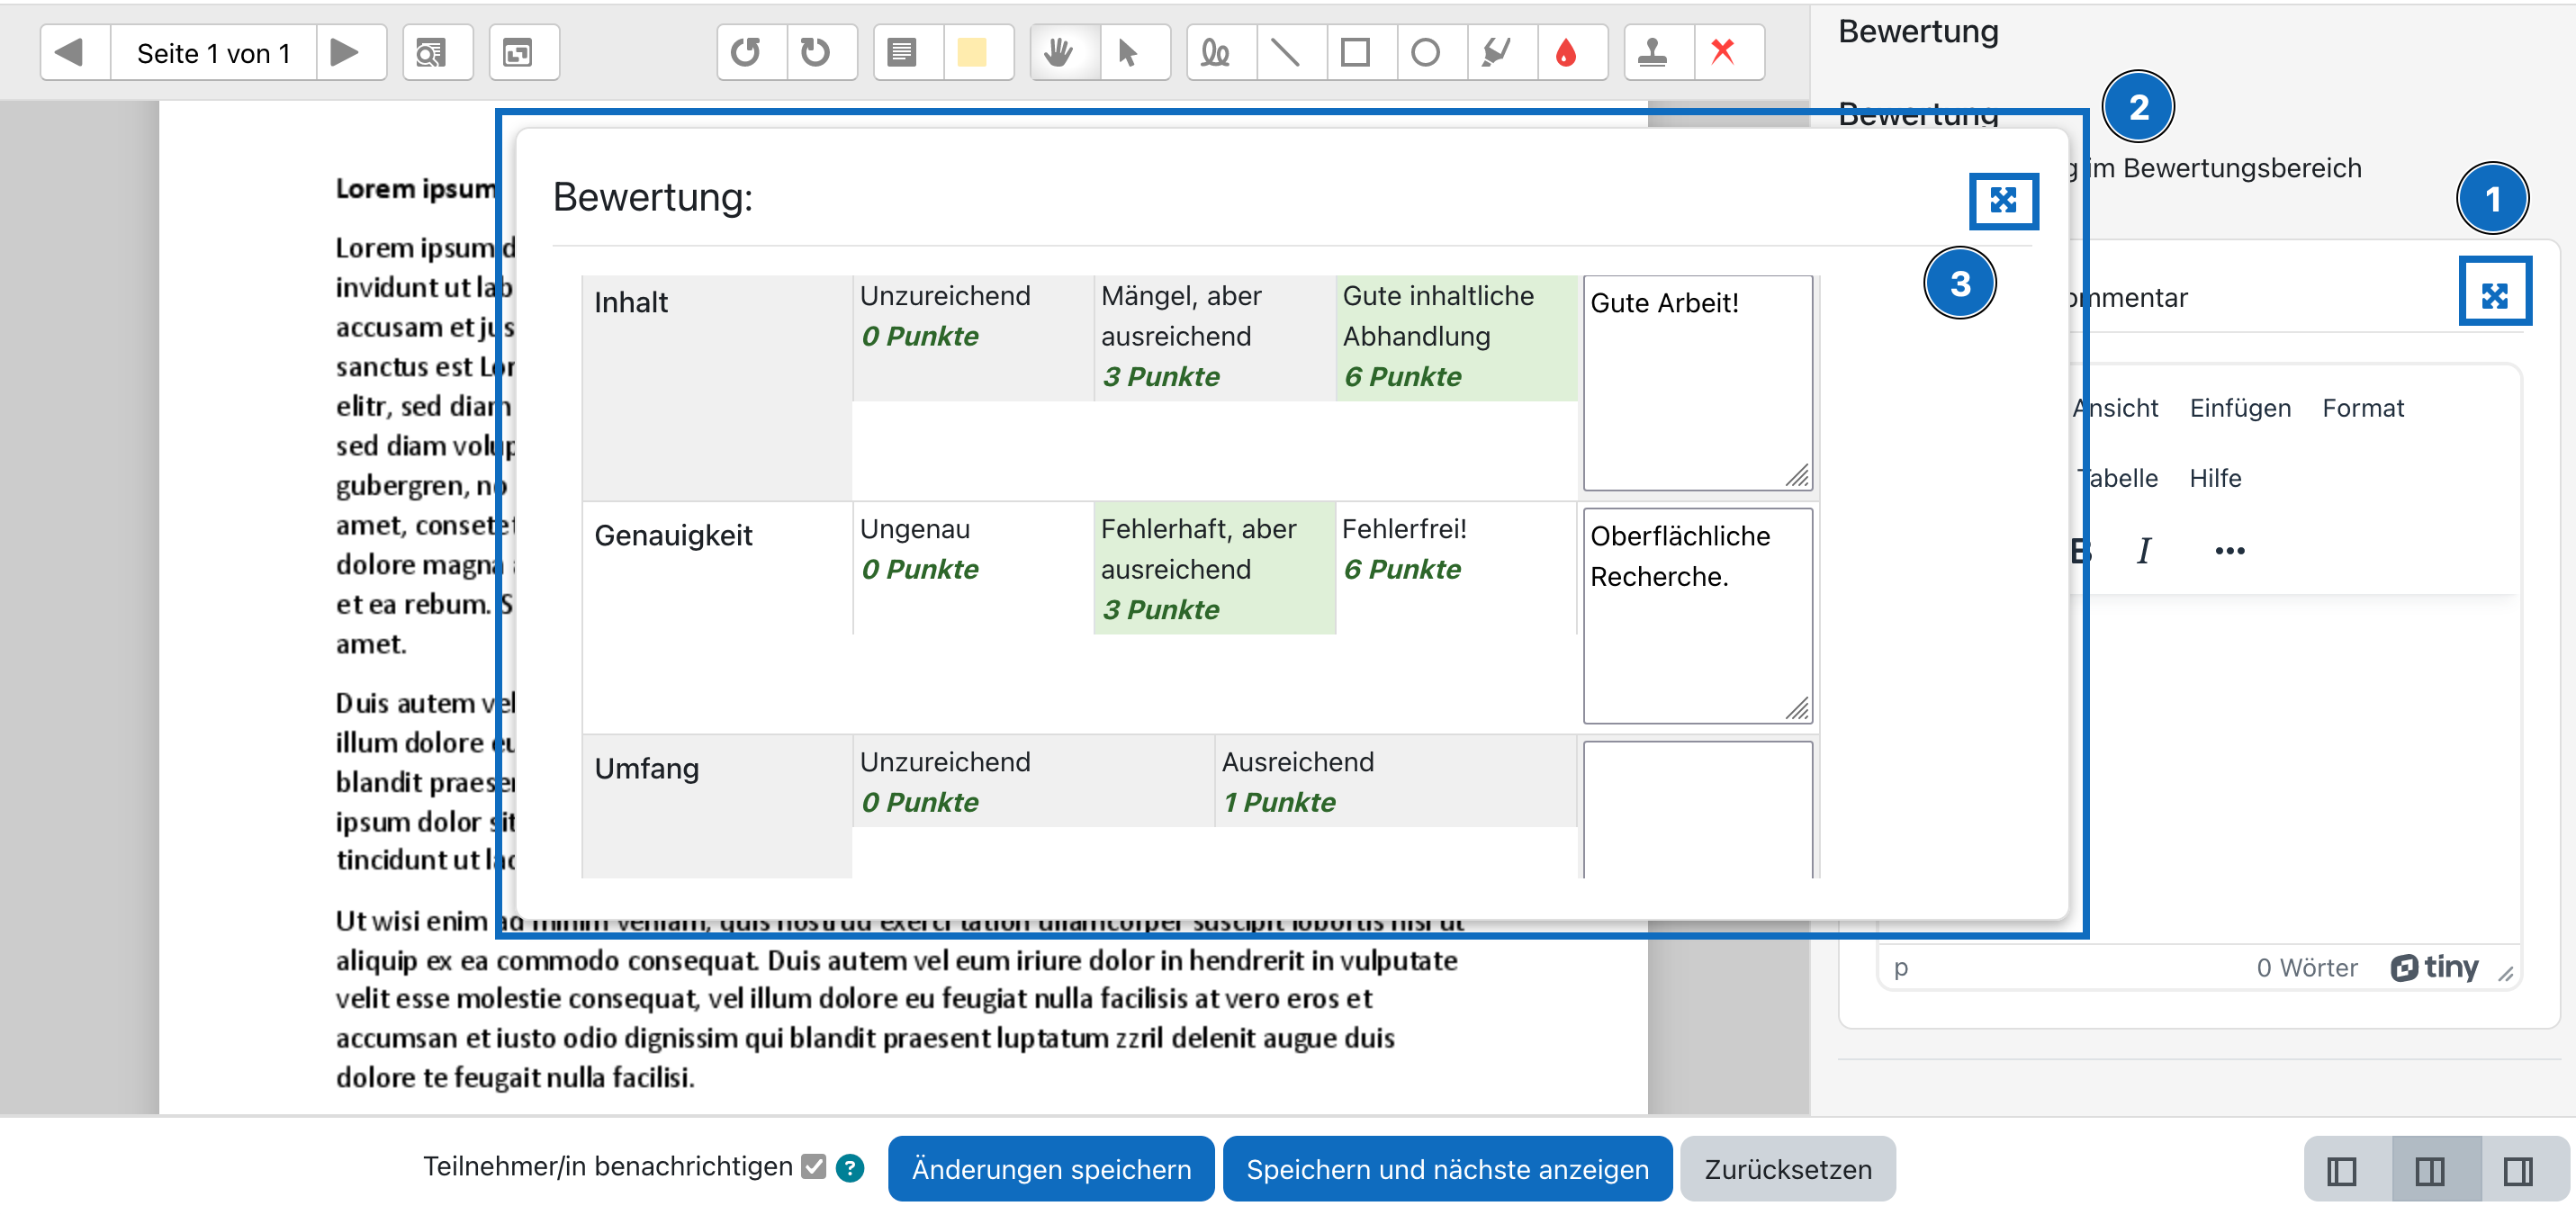
Tip: In case the display of the rubrics is insufficient for the evaluation, you can detach the section with the individual rubrics directly from the overview by clicking on the "crossed arrow" - symbol (1). The rubrics will then be displayed in full in a separate window (2). As soon as you are finished with the grading, you can reintegrate the view into the grading overview by clicking on the same symbol (3).
Weitere Informationen
Bei Fragen zur Barrierefreiheit wenden Sie sich bitte an die entsprechende Supporteinrichtung Ihrer Hochschule.
Dieses Werk steht unter einer Creative Commons Attribution-ShareAlike 4.0 Lizenz:
https://creativecommons.org/licenses/by-sa/4.0/
Further information
If you have any questions regarding accessibility, please contact the relevant support facility at your university.
This work is licensed under a Creative Commons Attribution-ShareAlike 4.0 License:
https://creativecommons.org/licenses/by-sa/4.0/