Lightbox Galerie anlegen
Create a lightbox gallery
Ziele:
Diese Anleitung beschreibt, wie Sie eine Bildergalerie in Ihren Kursen anlegen können. Diese kann z.B. Bilder aus Exkursionen, Projekten oder Mustergrafiken umfassen. Des Weiteren können Sie die Kommentarfunktion für Diskussionen aktivieren.
Schwierigkeit: einfach
Gültig ab Moodle Version 4.3
Goals:
This guide describes how to create an image gallery in your courses. This gallery can include, e.g., pictures from excursions, projects, or sample graphics. Furthermore, you can activate the comment function for discussions.
Difficulty: easy
Valid from Moodle version 4.3
8 Schritte:
Galerie anlegen
Erstellen Sie die Aktivität „Lightbox Galerie“ wie in der Anleitung „Aktivität oder Material anlegen“ beschrieben.
Create Gallery
Create the activity "Lightbox Gallery" as described in the guide "Create an activity or resource".
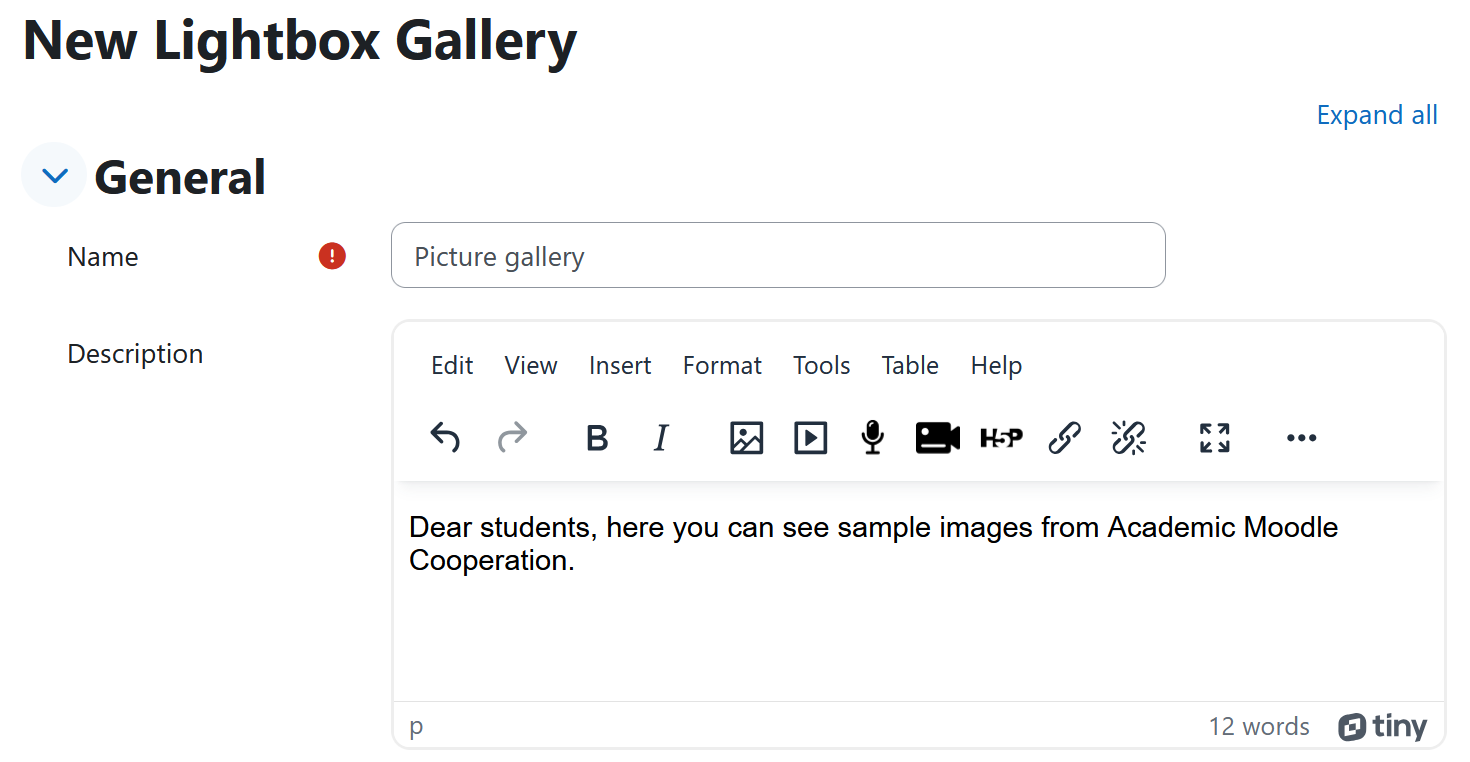
Namen und Beschreibung festlegen
In den Einstellungen tragen Sie zunächst einen Namen für die Galerie ein, z.B. „Bildergalerie“. Optional kann eine zusätzliche Beschreibung ergänzt werden.

Set name and description
Within the settings, enter a name for the gallery, e.g. "Picture Gallery". Optionally an additional description can be added.
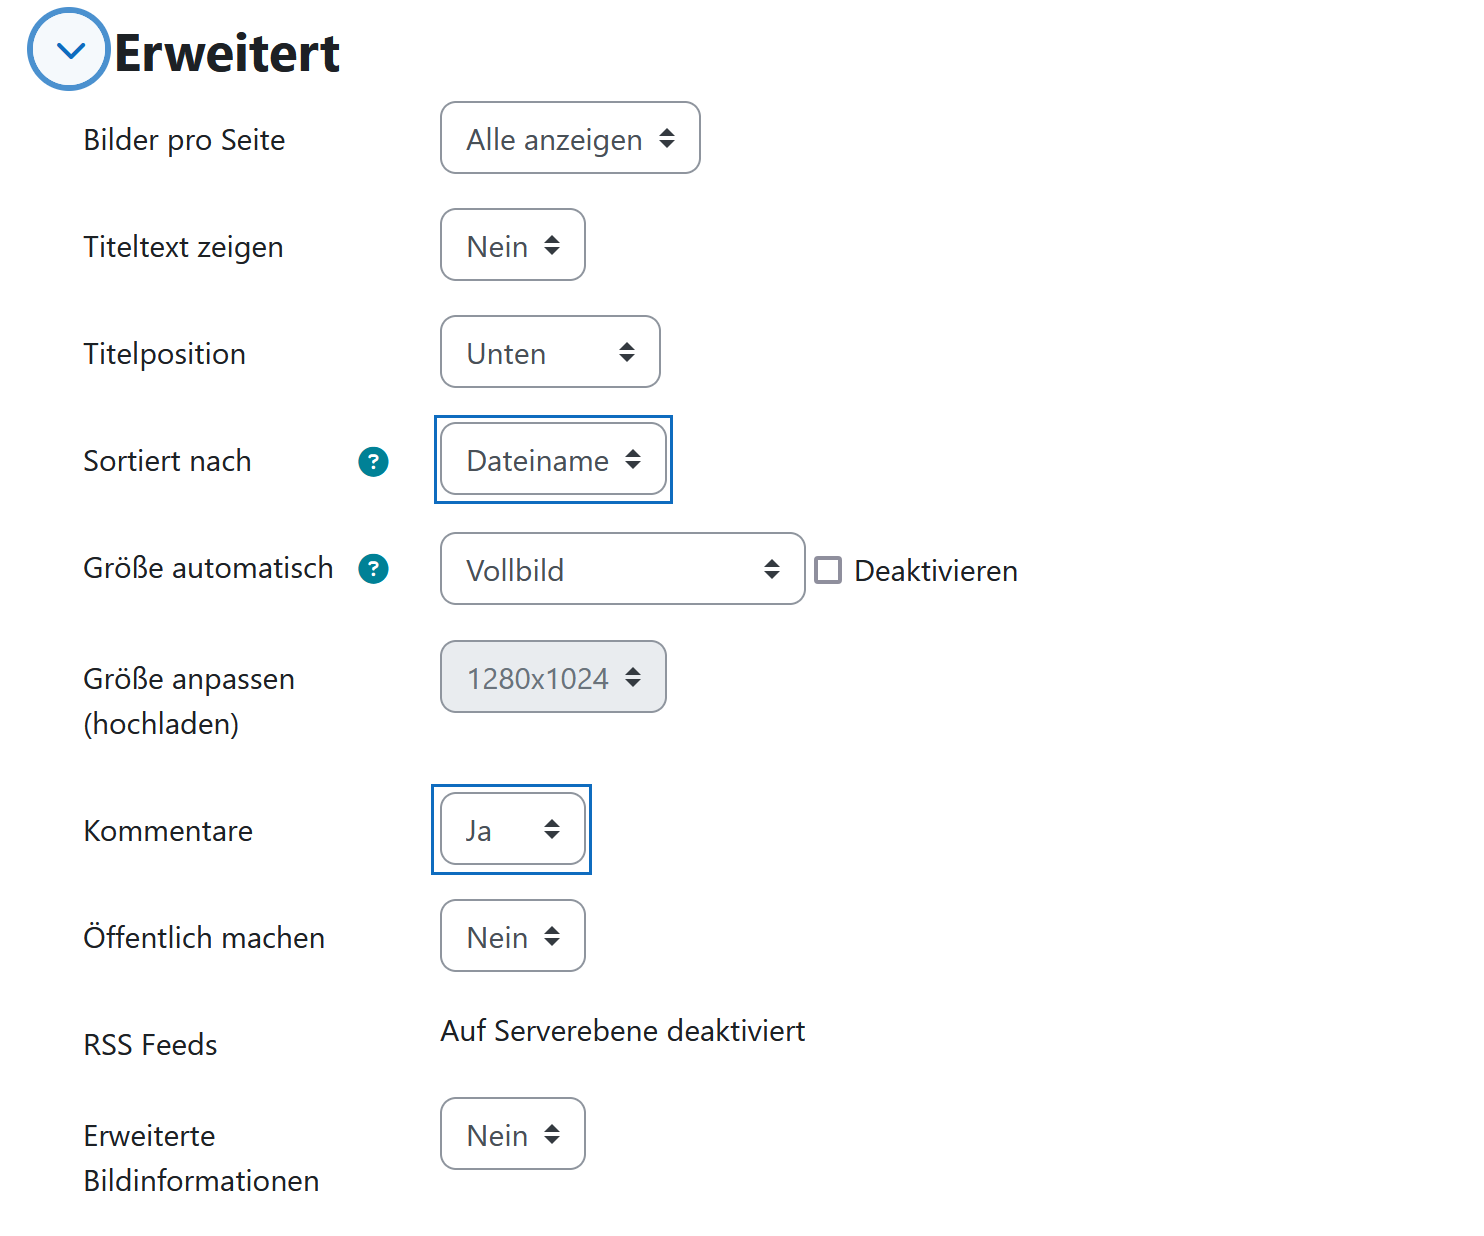
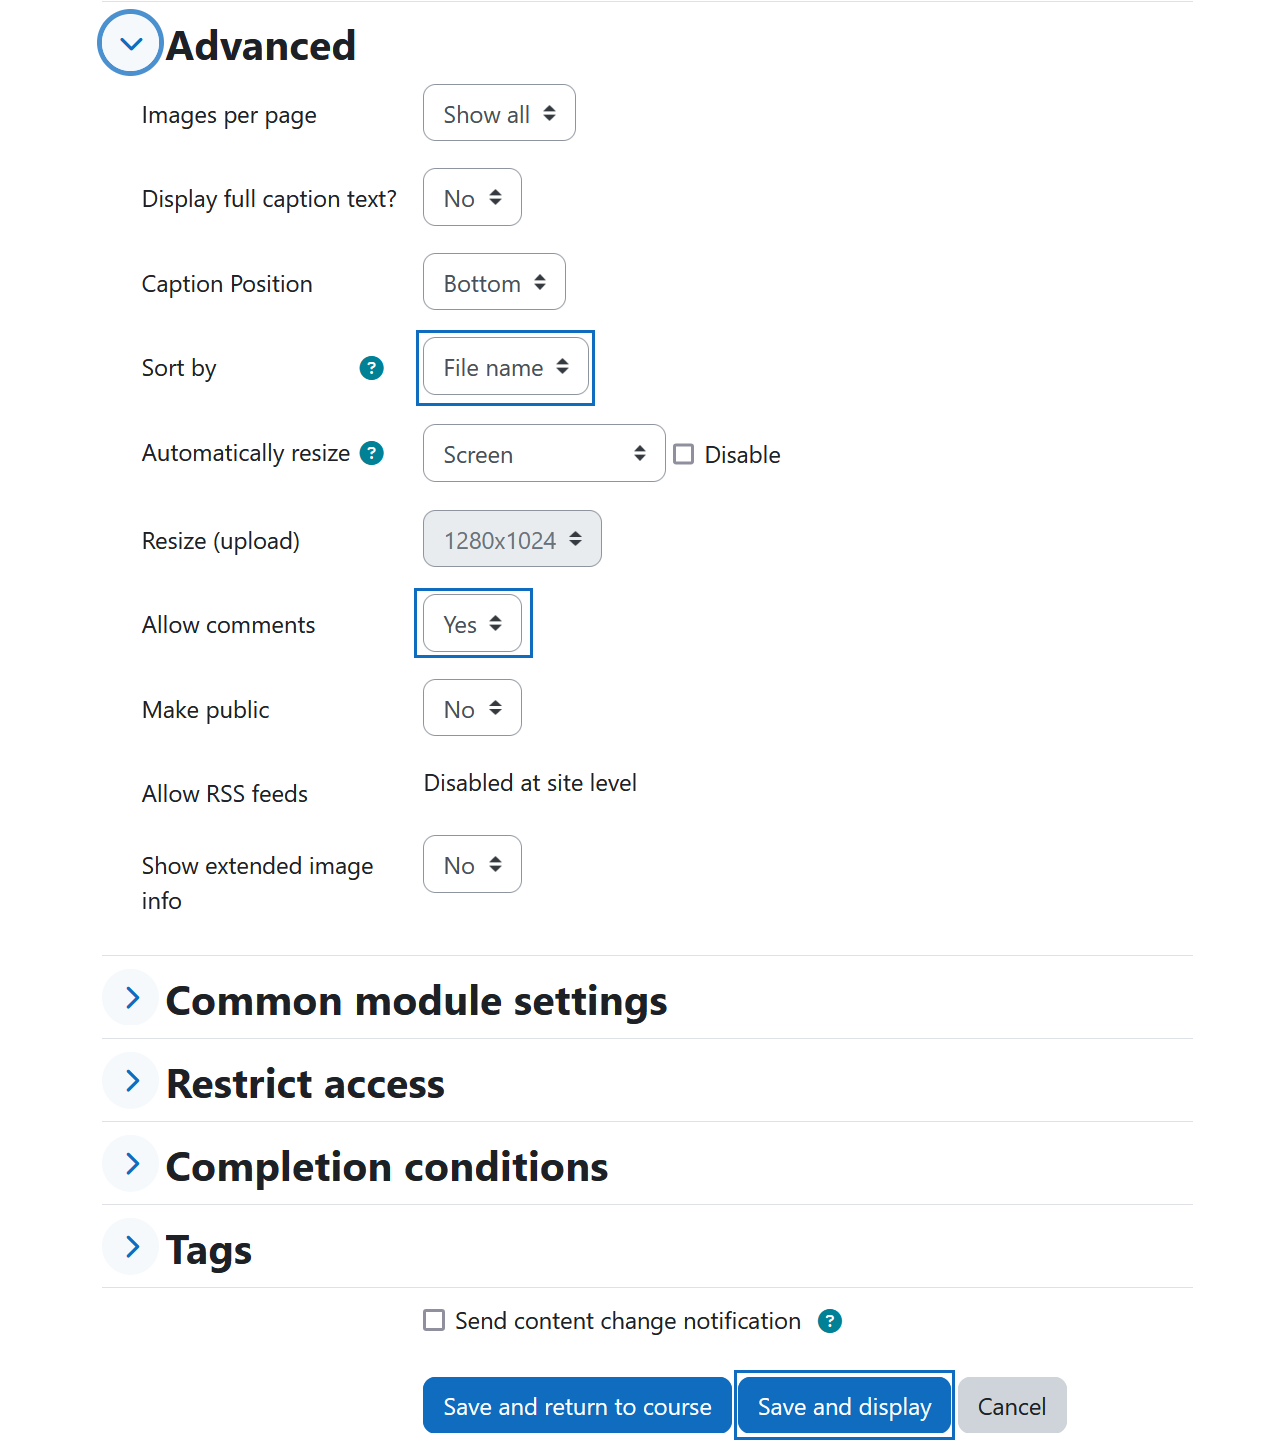
Parameter setzen
Klappen Sie den Abschnitt „Erweitert“ über den links davon befindlichen Pfeil auf. Legen Sie anschließend fest, wie die Bilder in der Lightbox Galerie angezeigt werden sollen.
Sie könne bestimmen ob die Bilder nach "Titel" oder "Dateinamen" sortiert werden sollen.
In der Praxis erweist sich auch die Kommentarfunktion als sehr nützlich, da sie die Kommunikation unter den Studierenden fördert.
Abschließend klicken Sie auf „Speichern und anzeigen“.
Set parameters
Expand the "Advanced" section using the arrow to the left of it. Then, specify how you want the images to be displayed in the Lightbox gallery.
You can determine whether the images should be sorted by "title" or "file name".
In practice, the comment function also proves to be very useful as it encourages communication among students.
Finally, click on "Save and display".
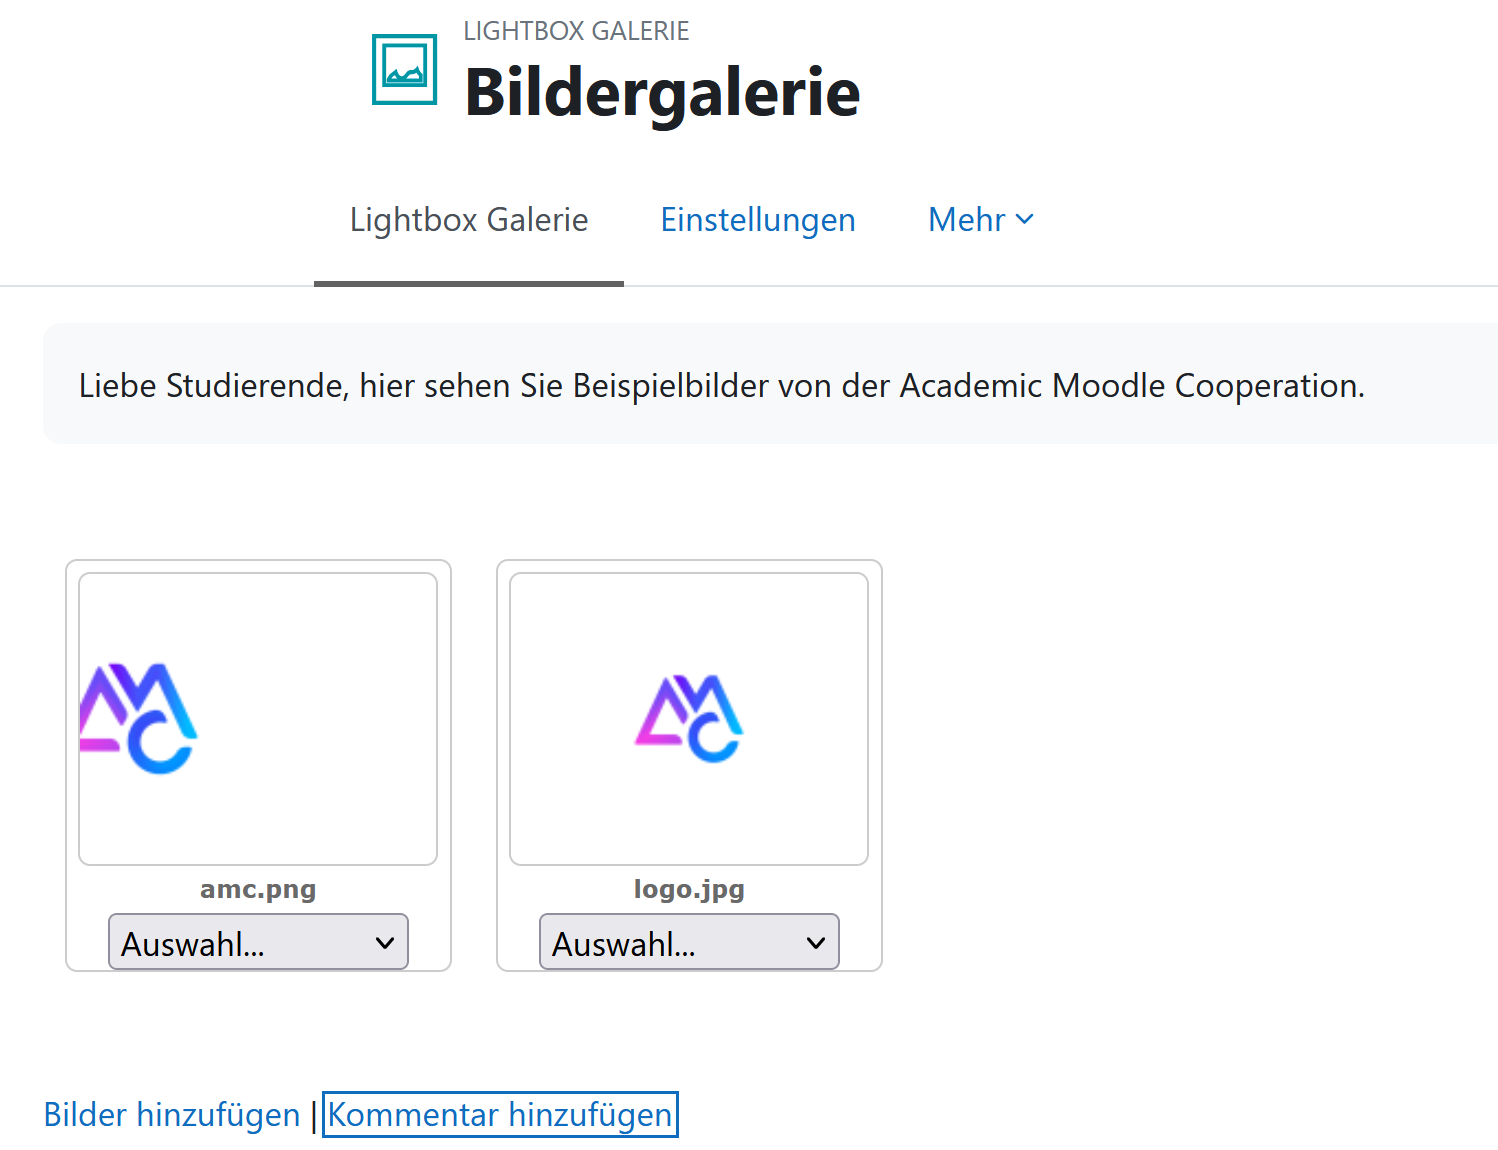
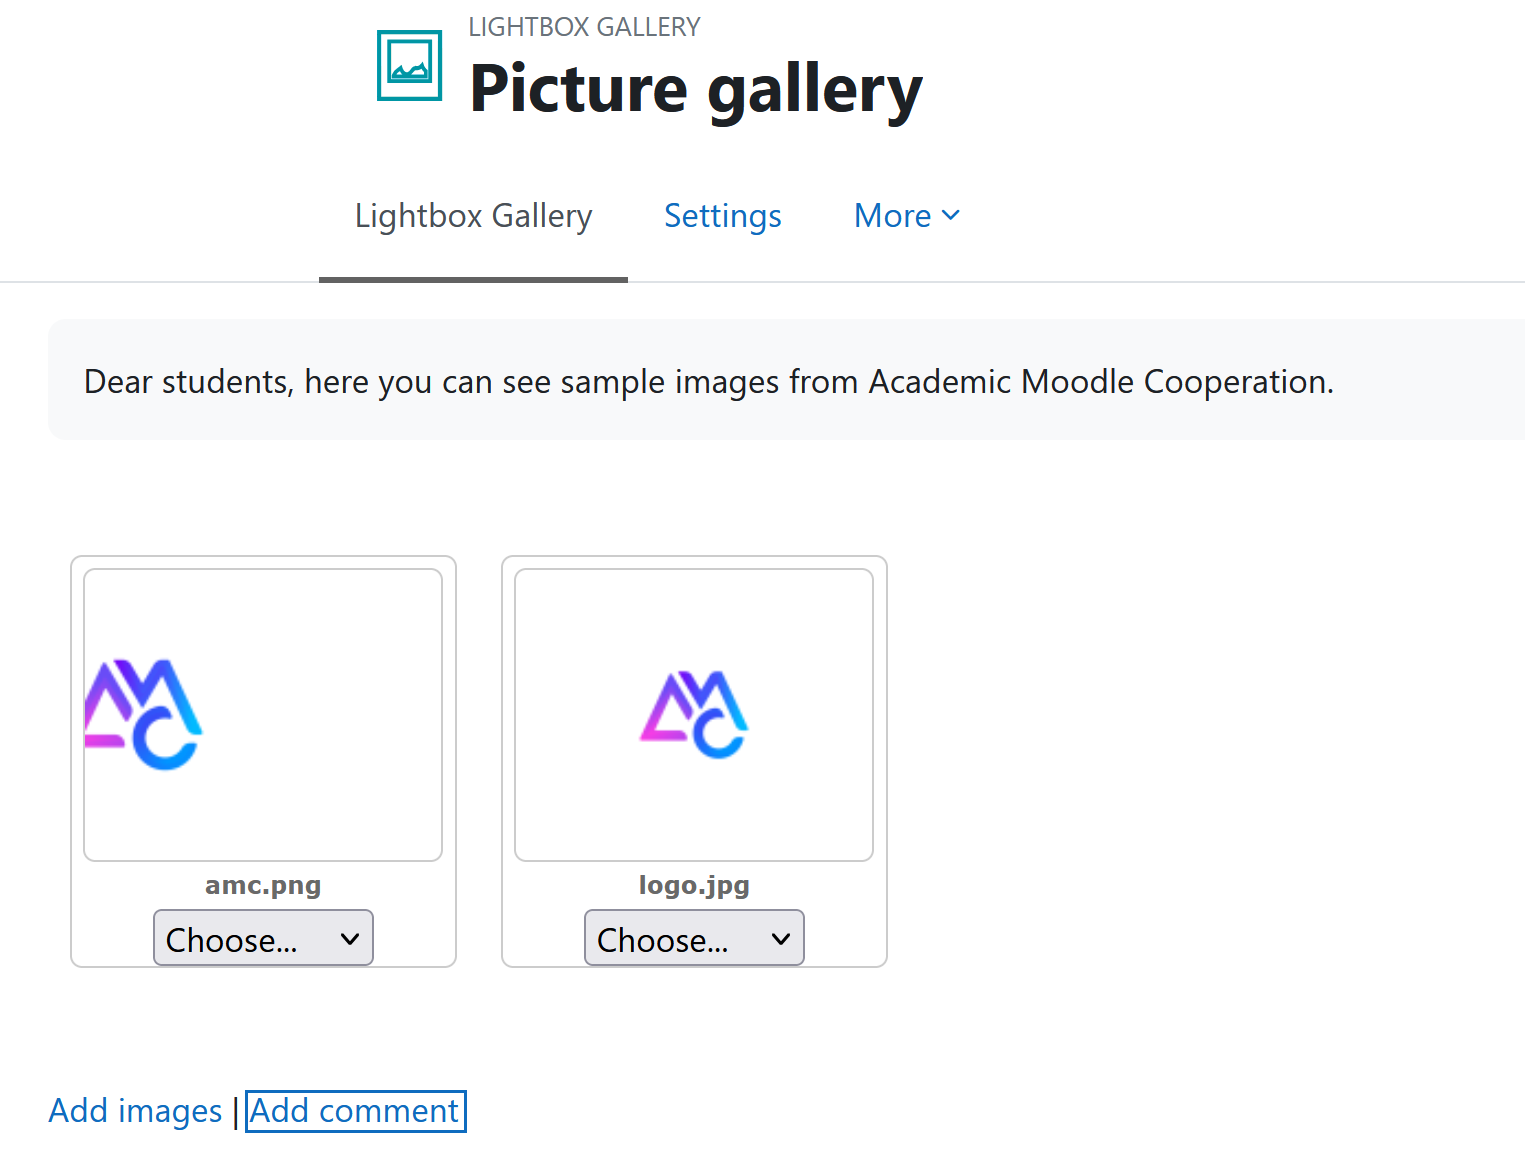
Bildergalerie befüllen
Die leere Galerie ist angelegt und muss nur noch mit Bildinhalten befüllt werden. Um Bilder in die Galerie zu laden, klicken Sie auf „Bilder hinzufügen“.
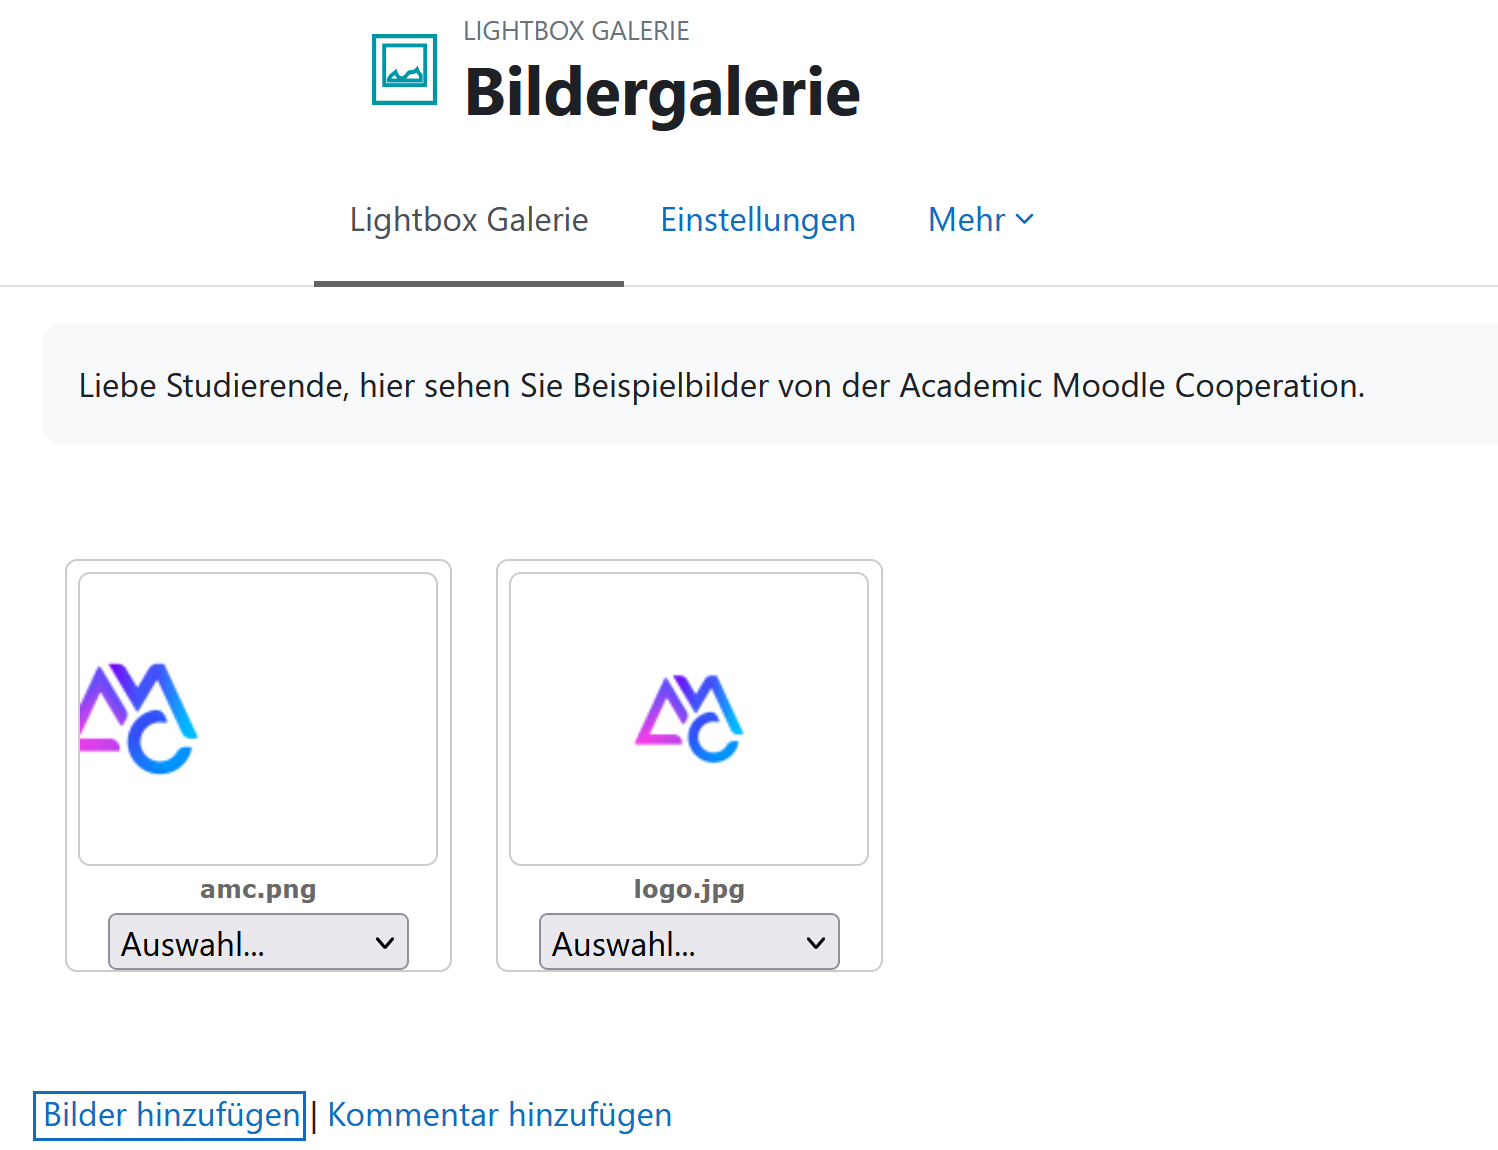
Fill picture gallery
The empty gallery is created and needs to be filled with image content. To load images into the gallery, click on "Add images".
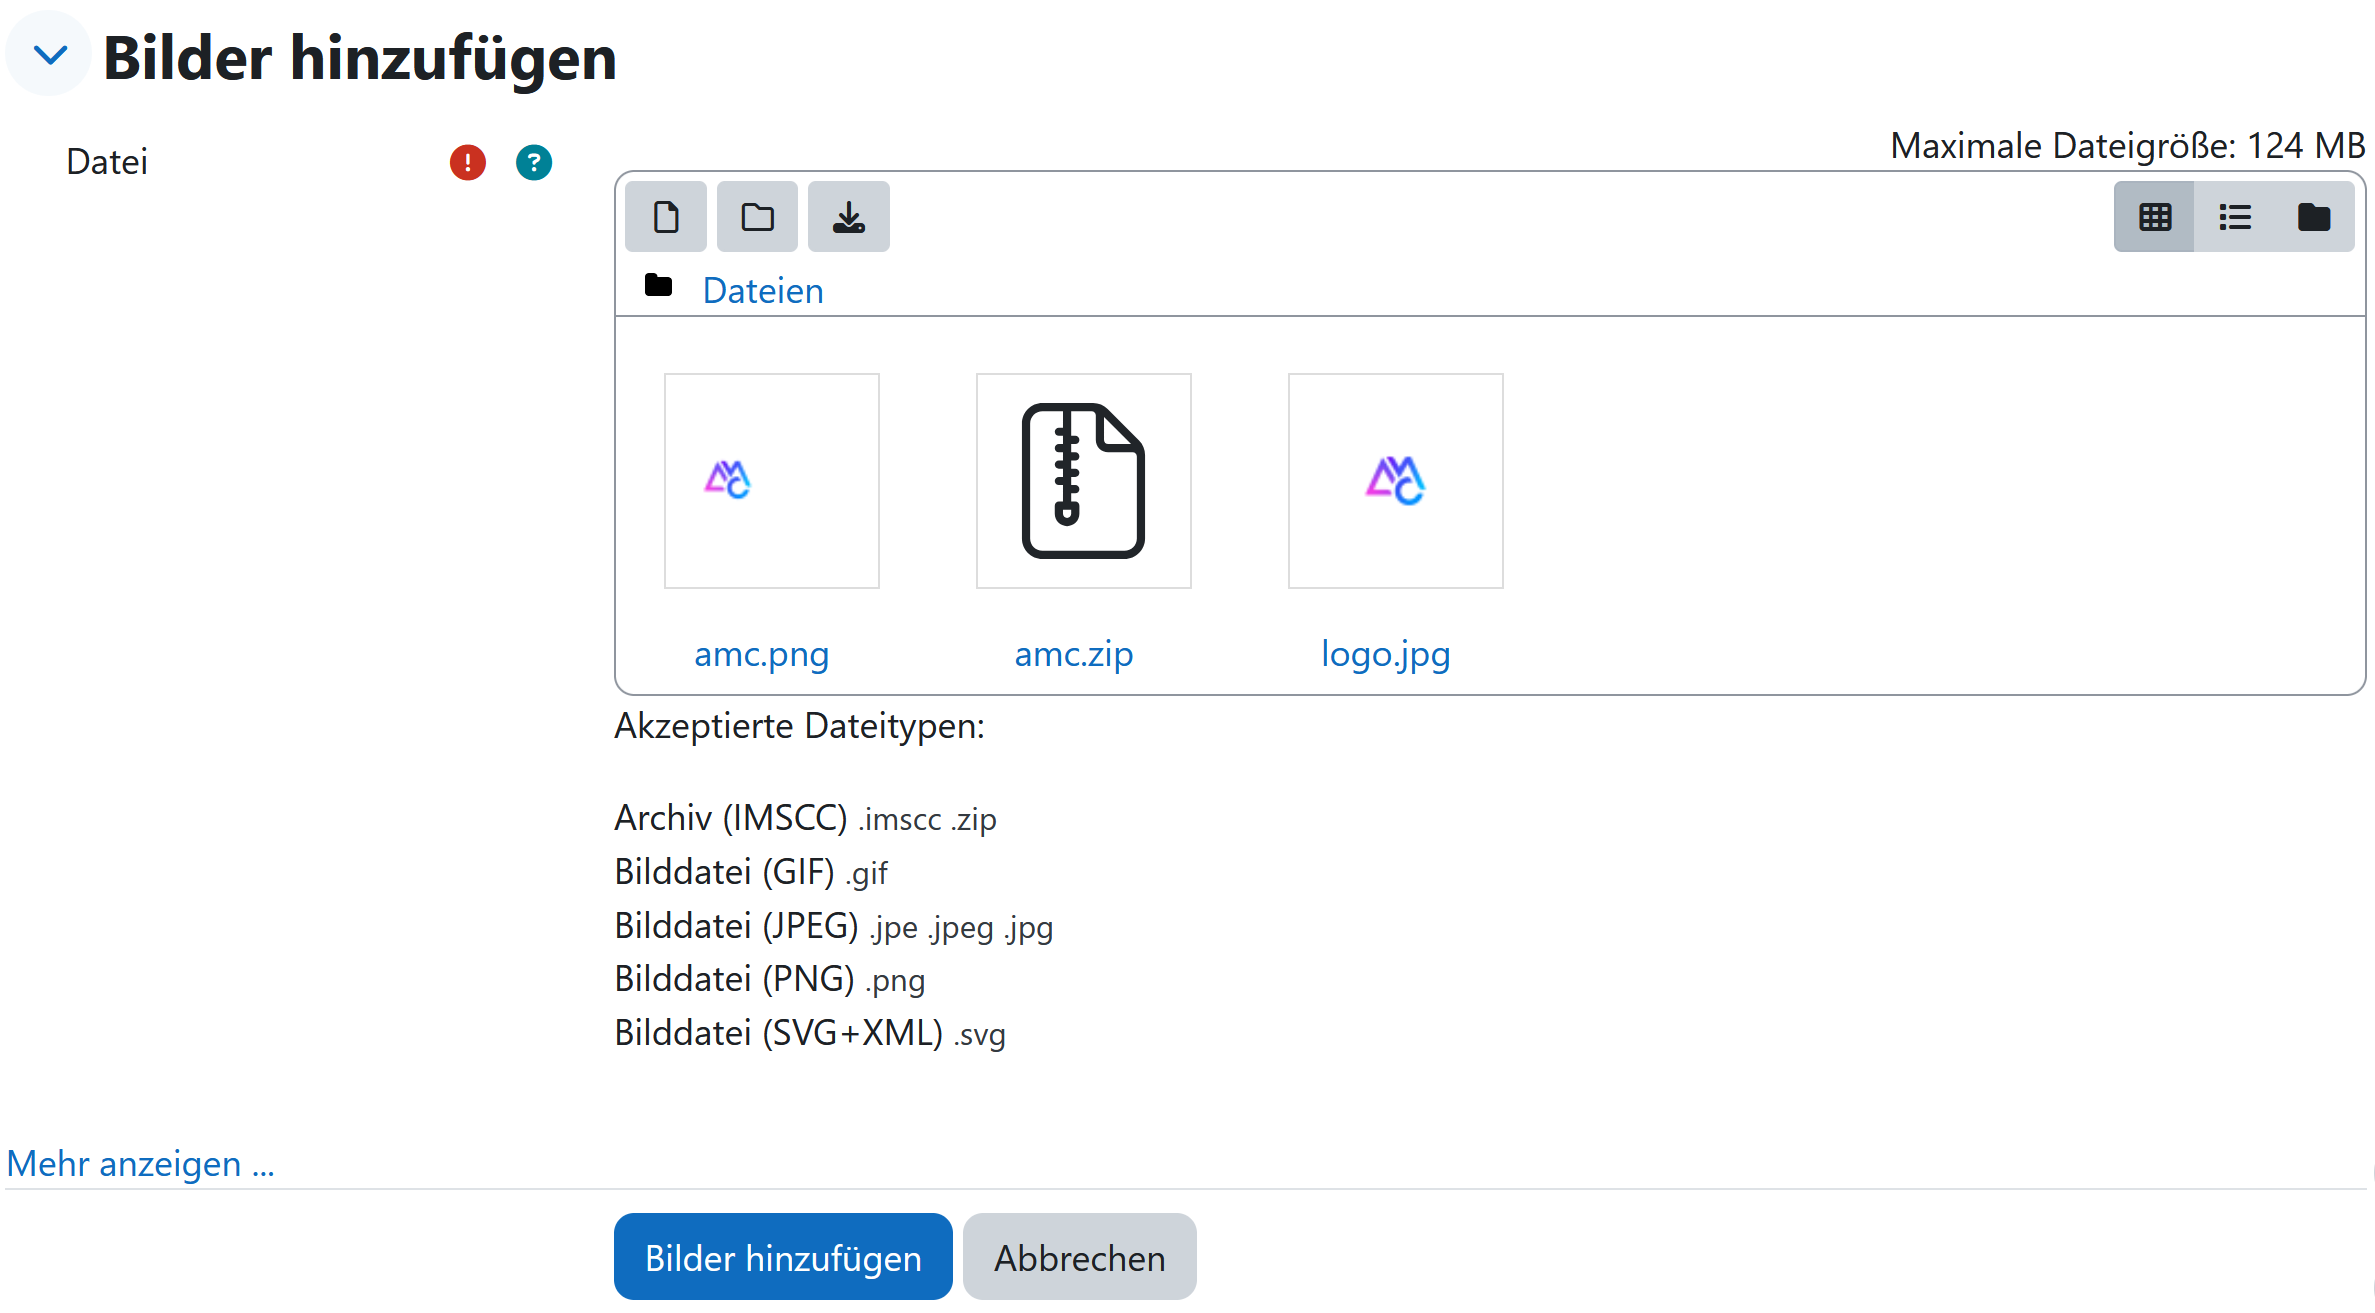
Bilder hochladen
Laden Sie die Bilder hoch, indem Sie diese via drag-and-drop in das Uploadfeld hineinziehen oder einmalig in das Feld hineinklicken. Anschließend öffnet sich ein Kontextmenü mit verschiedenen Möglichkeiten, um den gewünschten Inhalt zu ergänzen.
Wenn Sie alle Bilder hochgeladen haben, klicken Sie auf „Bilder hinzufügen“.
Hinweis 1: Wenn alle Bilder auf die selbe Größe skaliert werden sollen, klappen Sie das Kontextmenü „Mehr anzeigen...“ auf und entfernen Sie den gesetzten Haken neben „Deaktivieren“. Anschließend kann die gewünschte Auflösung aus dem Drop-down-Menü ausgewählt werden.
Hinweis 2: Statt Bilder einzeln hochzuladen, können Sie auch ein gesamtes Archiv ergänzen. Dieses wird in der Ansicht automatisch entpackt. Achten Sie darauf, dass die selben Dateinamen nicht doppelt vorhanden sind, da sich diese sonst überschreiben.
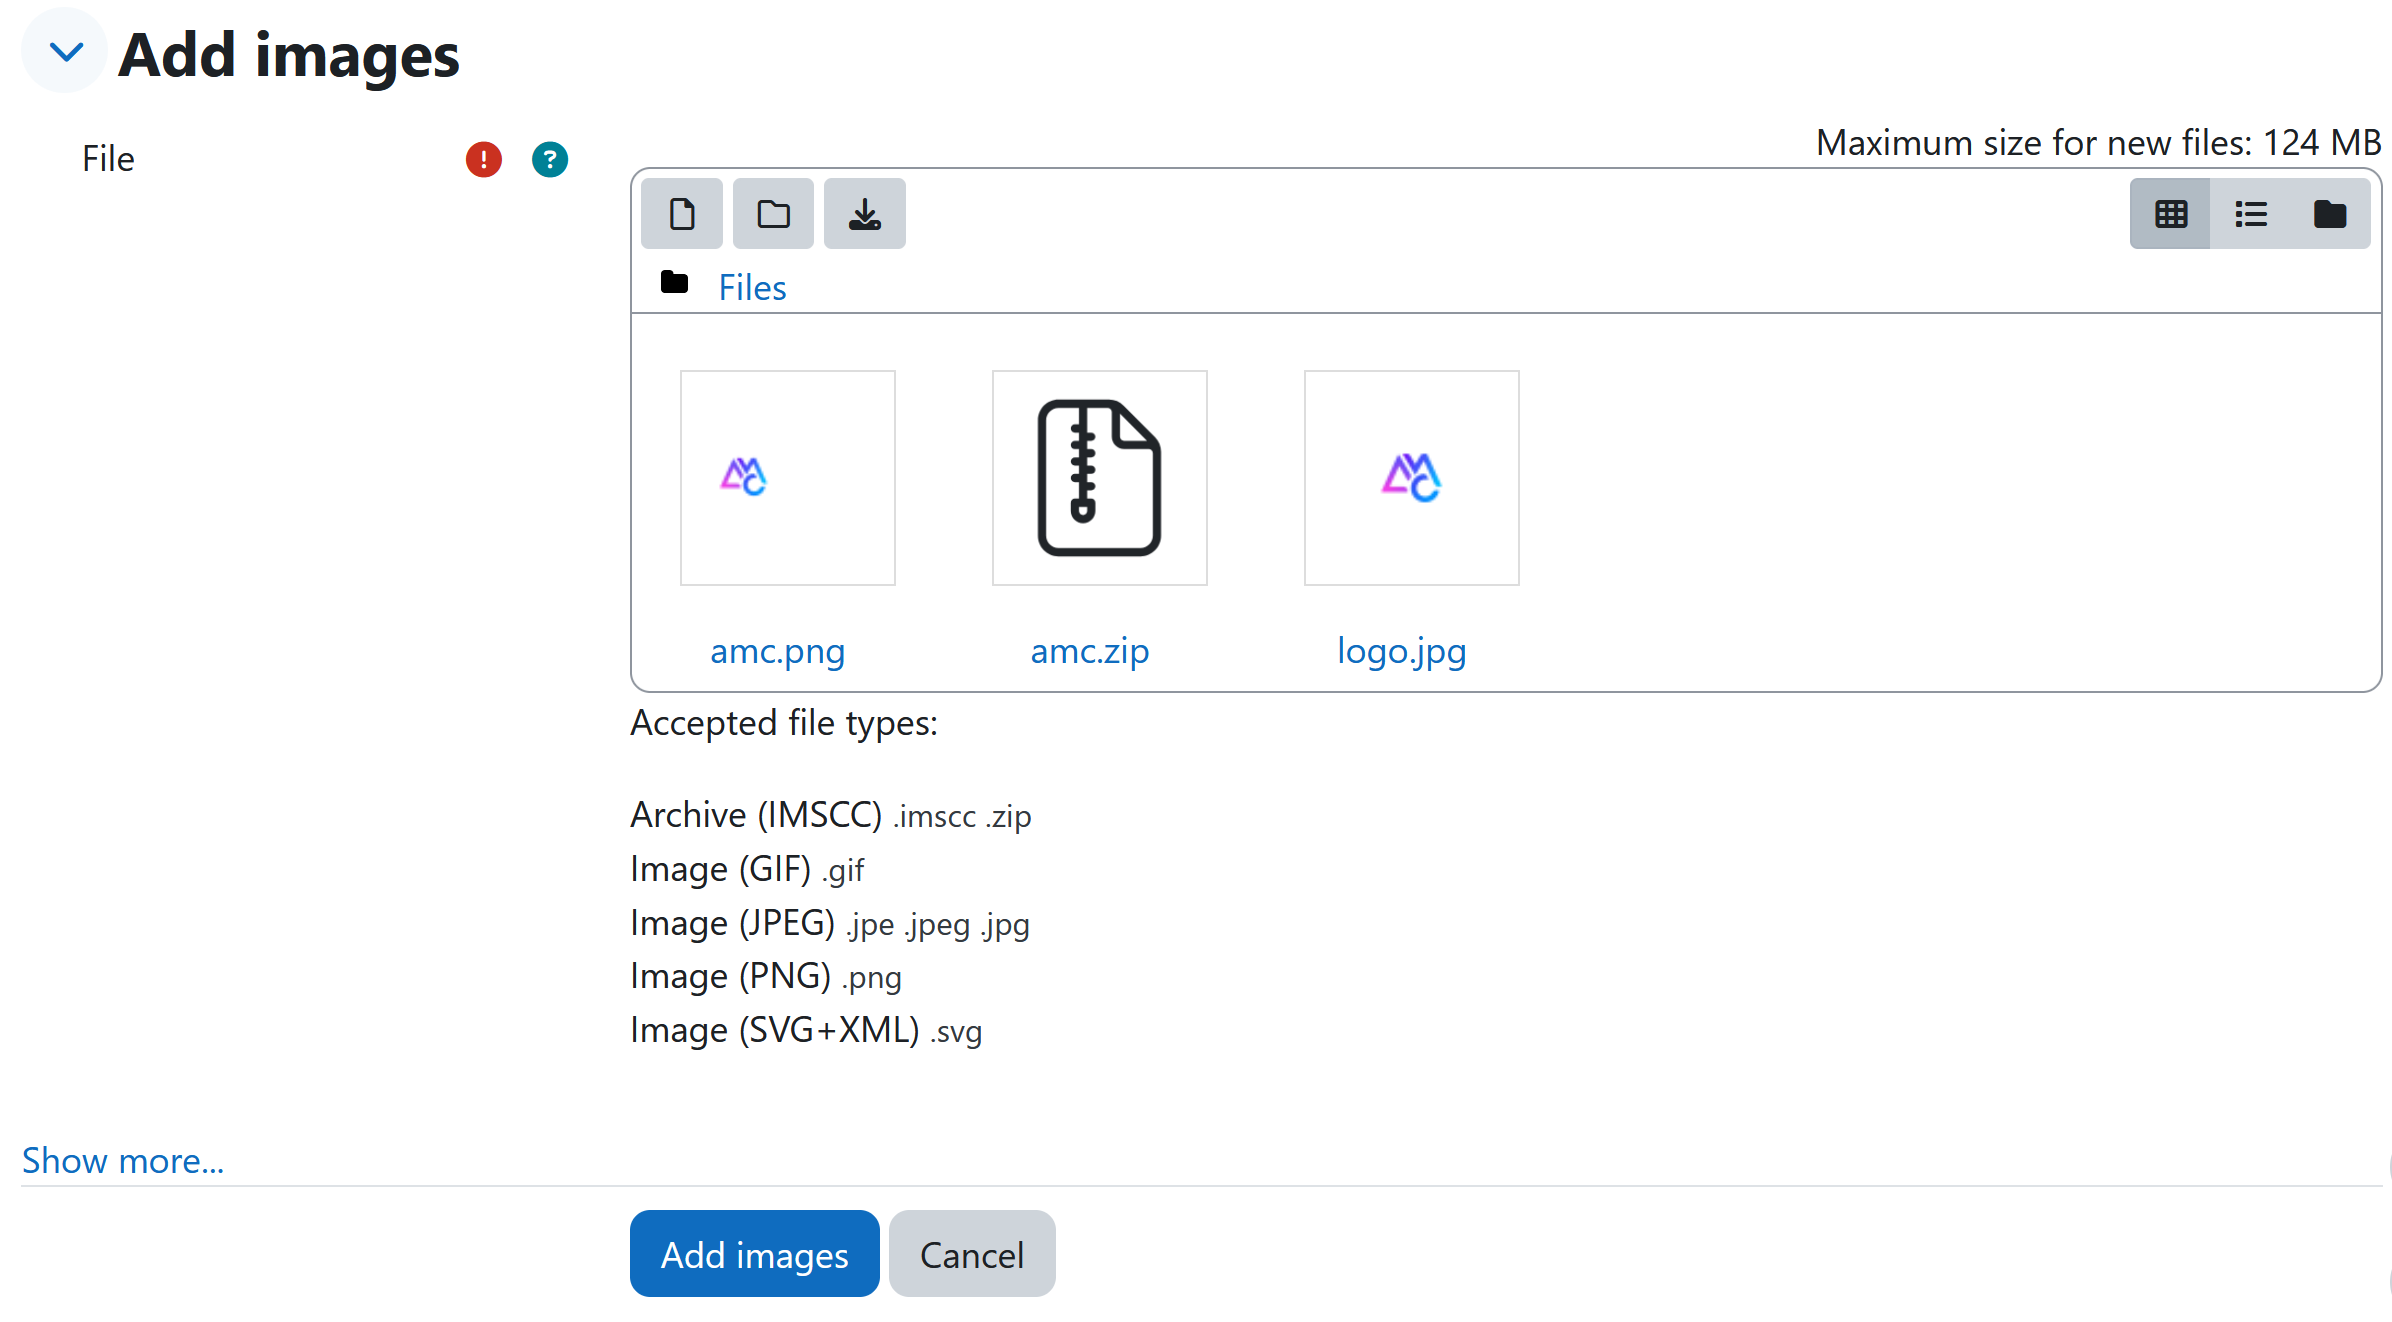
Upload pictures
Upload the images by dragging and dropping them into the upload field or by clicking once within the field. A context menu with various options to add the desired content will be opened.
Once you have uploaded all images, click on "Add images".
Note 1: If all images should be scaled to the same size, open the context menu "Show more..." and remove the check mark next to "Disable". Then you can select the desired resolution from the drop-down menu.
Note 2: Instead of uploading images individually, you can also add an entire archive. This will be automatically unpacked in the overview. Make sure that the same file names are not duplicated, otherwise they will overwrite each other.
Bilder bearbeiten und Kommentar setzen
Wenn Sie auf das Drop-down-Menü der jeweiligen Bilder klicken, erscheinen weitere Bearbeitungsmöglichkeiten.
Darunter zählen: Die Titeländerung, das Löschen des Bildes, das Spiegeln des Bildes, die Anpassung der Bildgröße, das Drehen des Bildes, das Hinzufügen von Schlagwörtern sowie das Bearbeiten des Vorschaubildes.
Kommentare können Sie unter der Auswahl „Kommentar hinzufügen“ ergänzen. Diese sind nach dem Verlassen des Bearbeitungsmodus einsehbar.
Edit images and set comment
If you click on the drop-down menu of the respective images, further editing options appear.
These include: Changing the title, deleting the image, flipping the image, resizing the image, rotating the image, adding keywords, and editing the preview image.
Comments can be added under the "Add comment" selection. These can be viewed after exiting the edit mode.
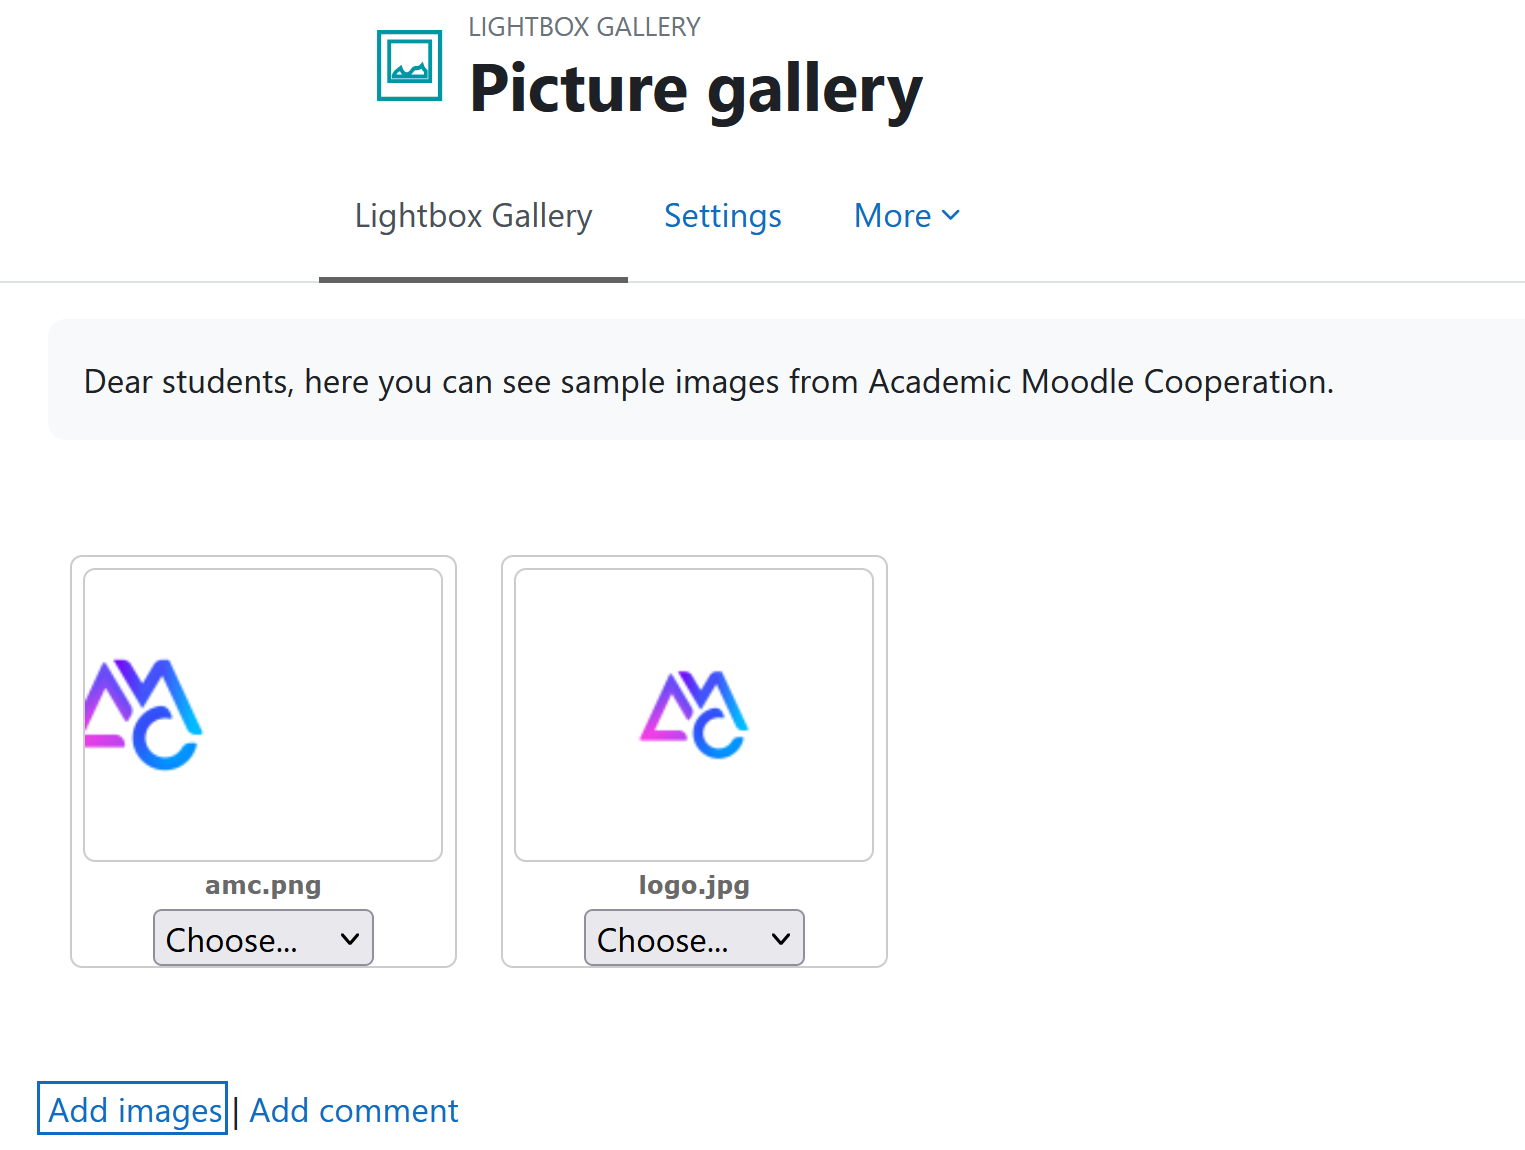
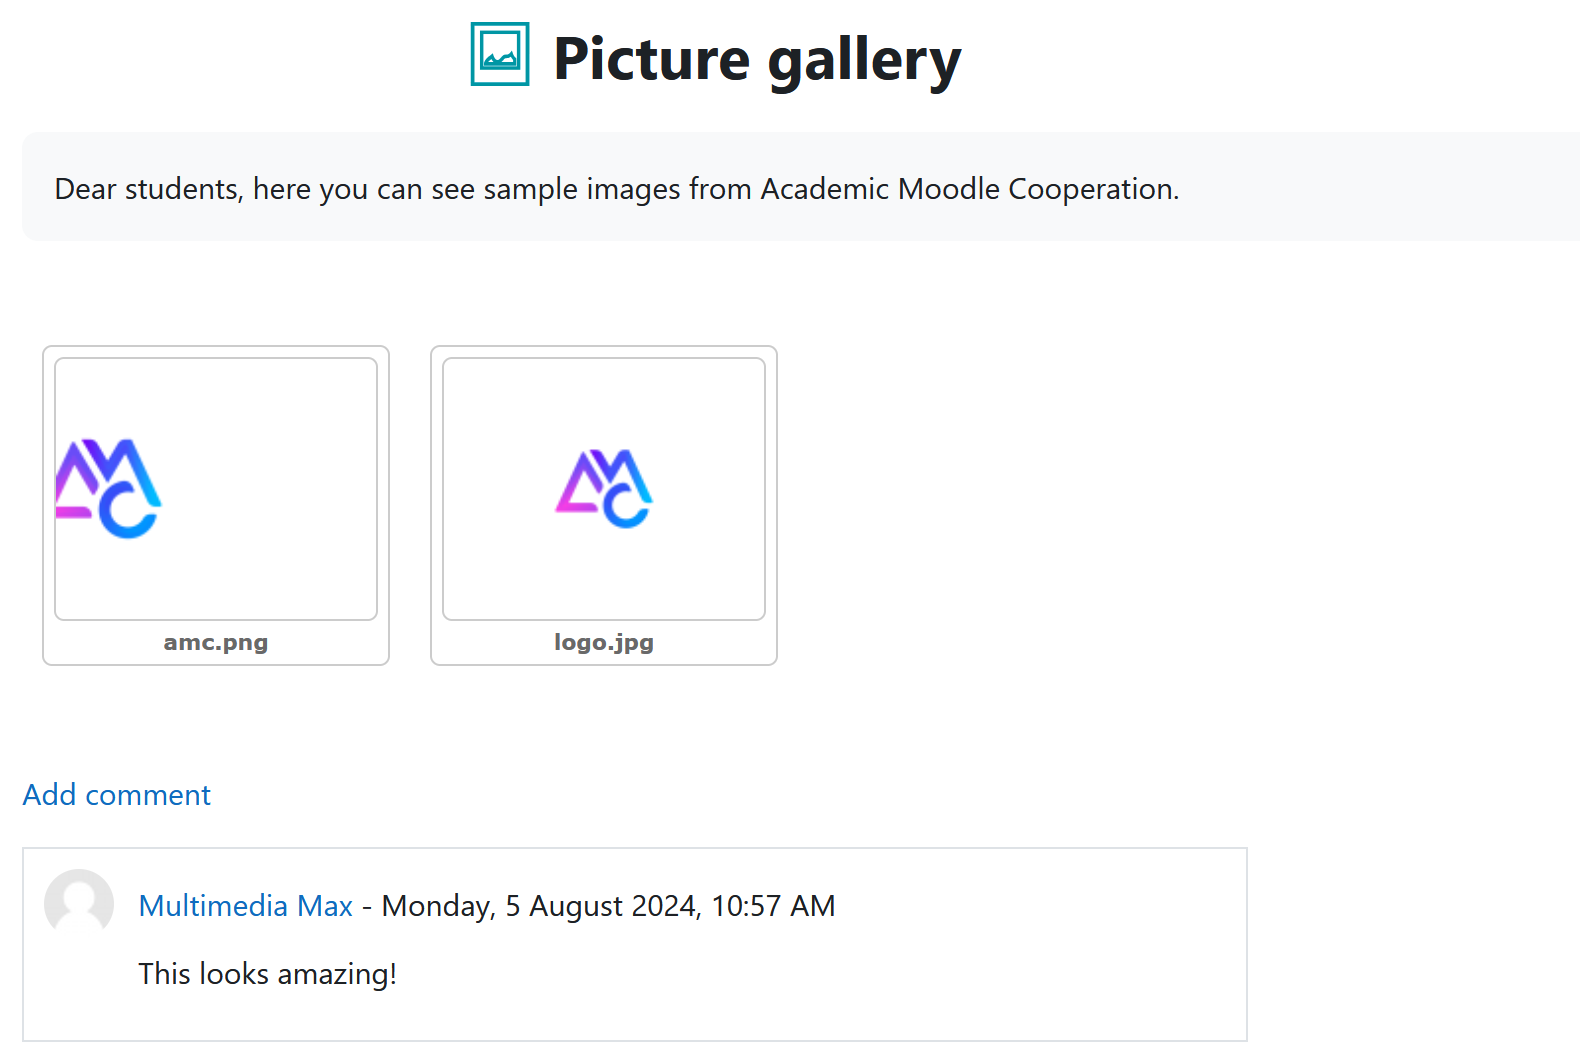
Bilder abrufen
Die Bilder sind nun in der Galerie für die Studierenden zum Abruf bereit. Wenn Bilder angeklickt werden, werden sie in ihrer tatsächlich verfügbaren Größe im Vollbild angezeigt. Studierende bekommen zusätzlich die Möglichkeit, das jeweilige Bild herunterzuladen.
Kommentare können ebenso direkt auf der Galerie-Startseite hinzugefügt werden.
Hinweis: Wenn Sie rechts oben „Bearbeiten“ aktivieren, können Sie Ihre Galerie jederzeit um weitere Bilder erweitern oder bereits bestehende Bilder nachträglich bearbeiten.
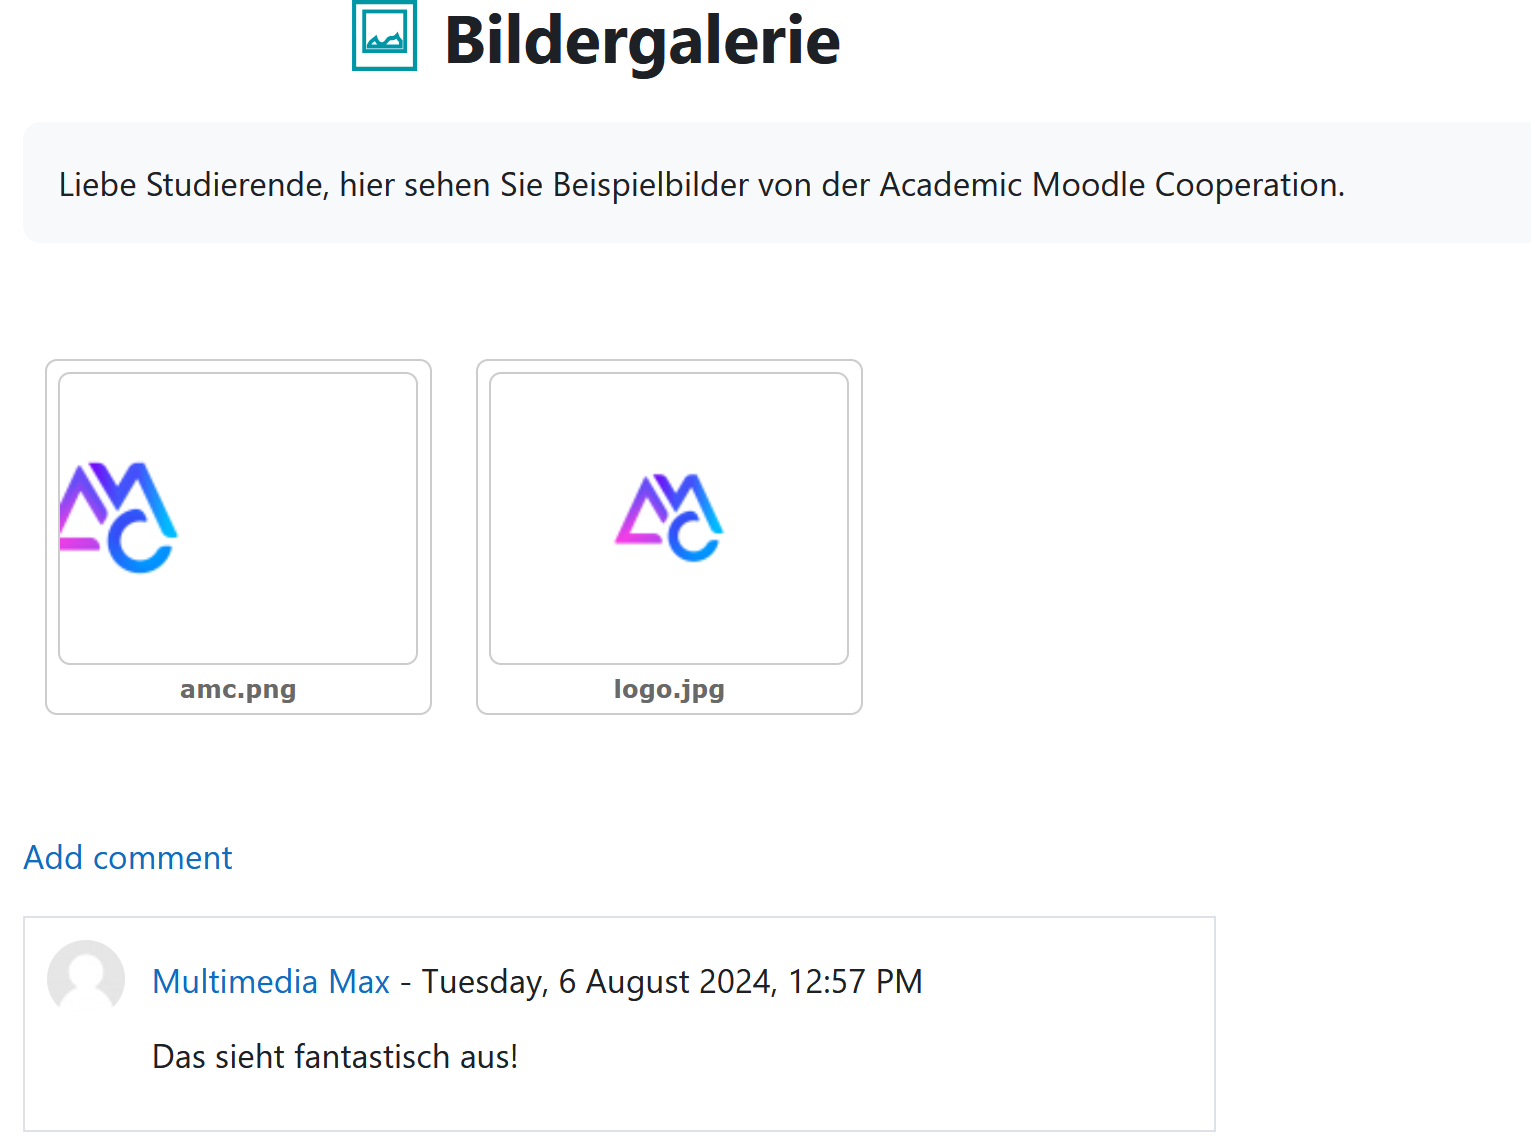
View images
Images are now available in the gallery for students to view. When images are clicked, they are displayed in their actual available size in full screen. Students are additionally given the option to download the respective image.
Comments can be also added directly on the gallery home page.
Note: If you activate "Edit" in the upper right corner, you can add more images to your gallery at any time, or edit existing images afterwards.
Weitere Informationen
Bei Fragen zur Barrierefreiheit wenden Sie sich bitte an die entsprechende Supporteinrichtung Ihrer Hochschule.
Dieses Werk steht unter einer Creative Commons Attribution-ShareAlike 4.0 Lizenz: https://creativecommons.org/licenses/by-sa/4.0/
![]() Lightbox Galerie ist ein 3rd Party Plugin (Das Plugin kann hier im Detail angesehen und heruntergeladen werden)
Lightbox Galerie ist ein 3rd Party Plugin (Das Plugin kann hier im Detail angesehen und heruntergeladen werden)
Further information
If you have any questions regarding accessibility, please contact the relevant support facility at your university.
This work is licensed under a Creative Commons Attribution-ShareAlike 4.0 License: https://creativecommons.org/licenses/by-sa/4.0/
![]() Lightbox Gallery is a 3rd Party Plugin (The plugin can be viewed and downloaded in detail here)
Lightbox Gallery is a 3rd Party Plugin (The plugin can be viewed and downloaded in detail here)