Text- und Medienfeld erstellen
Create text and media area
Ziele:
Diese Anleitung beschreibt wie Sie Hinweise in Ihren Kursseiten anzeigen können. Diese können Sie optional mit z.B. Bildern, Formatierungen, oder Aufzählungszeichen versehen.
Schwierigkeit: einfach
Gültig ab Moodle Version 4.4
Goals:
This guide describes how to display notes on your course pages. You can optionally customize these with, e.g., images, formatting, or bullet points.
Difficulty: easy
Valid from Moodle version 4.4
Text- und Medienfeld anlegen
Erstellen Sie die Aktivität „Text- und Medienfeld“ wie in der Anleitung „Aktivität oder Material anlegen“ beschrieben.
Create the text and media area
Create the activity "Text and media area" as described in the guide "Create an activity or resource".
Text- und Medienfeld mit Inhalt befüllen
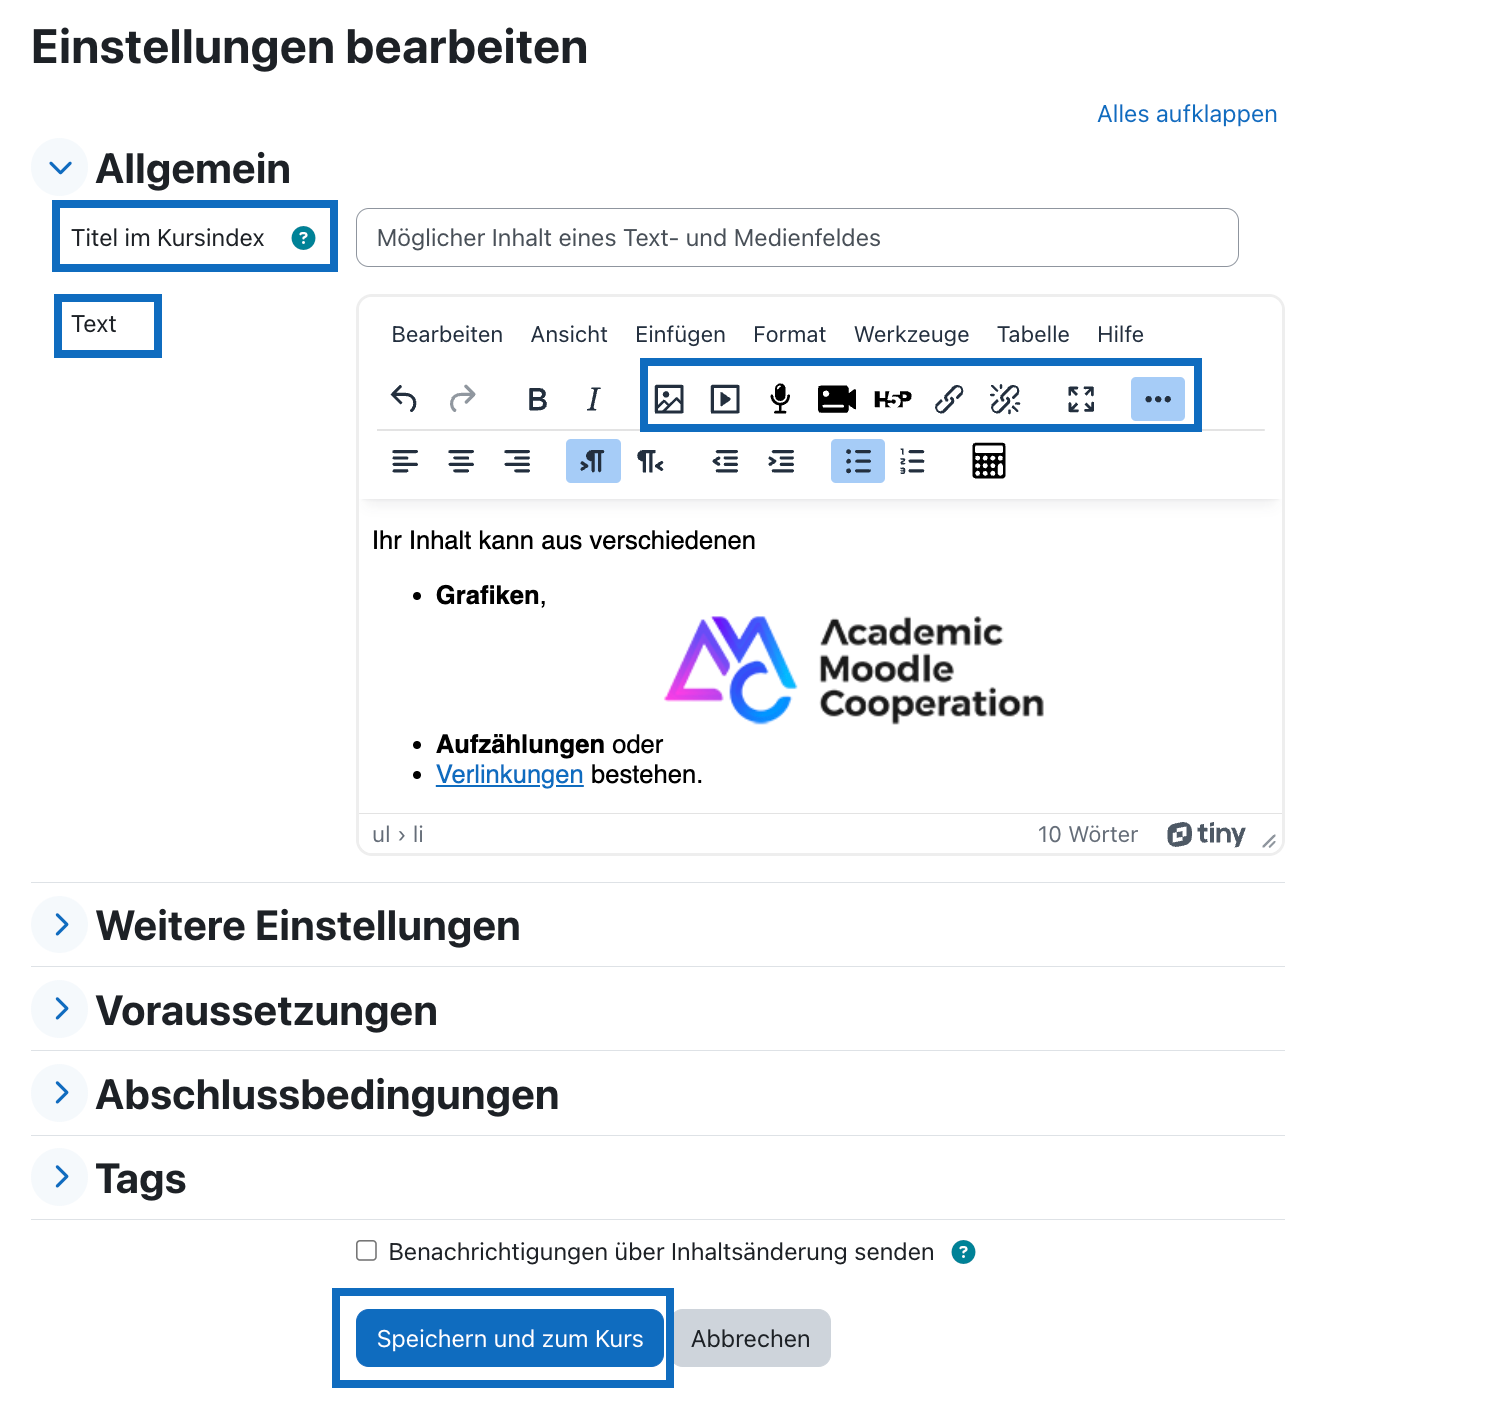
Fügen Sie in das Feld "Titel im Kursindex" zunächst einen aussagekräftigen Titel für Ihr Text- und Medienfeld ein. Dieser Titel wird anschließend im Kursindex angezeigt.
Tragen Sie bitte anschließend in das Feld „Textfeld“ Ihren Hinweis ein. Dieser Hinweis kann aus beliebigen Elementen bestehen, wie Texten, Bildern, Videos, Aufzählungen, diversen Formatierungen etc.
Nutzen Sie für die Zusammenstellung Ihres Hinweises die Werkzeuge des HTML-Editors. Erweiterte Funktionen schalten Sie mit dem rechten oberen Feld „Mehr...” frei.
Sobald Sie mit Ihrem Hinweis fertig sind, klicken Sie auf „Speichern und zum Kurs”.

Fill in text and media area with content
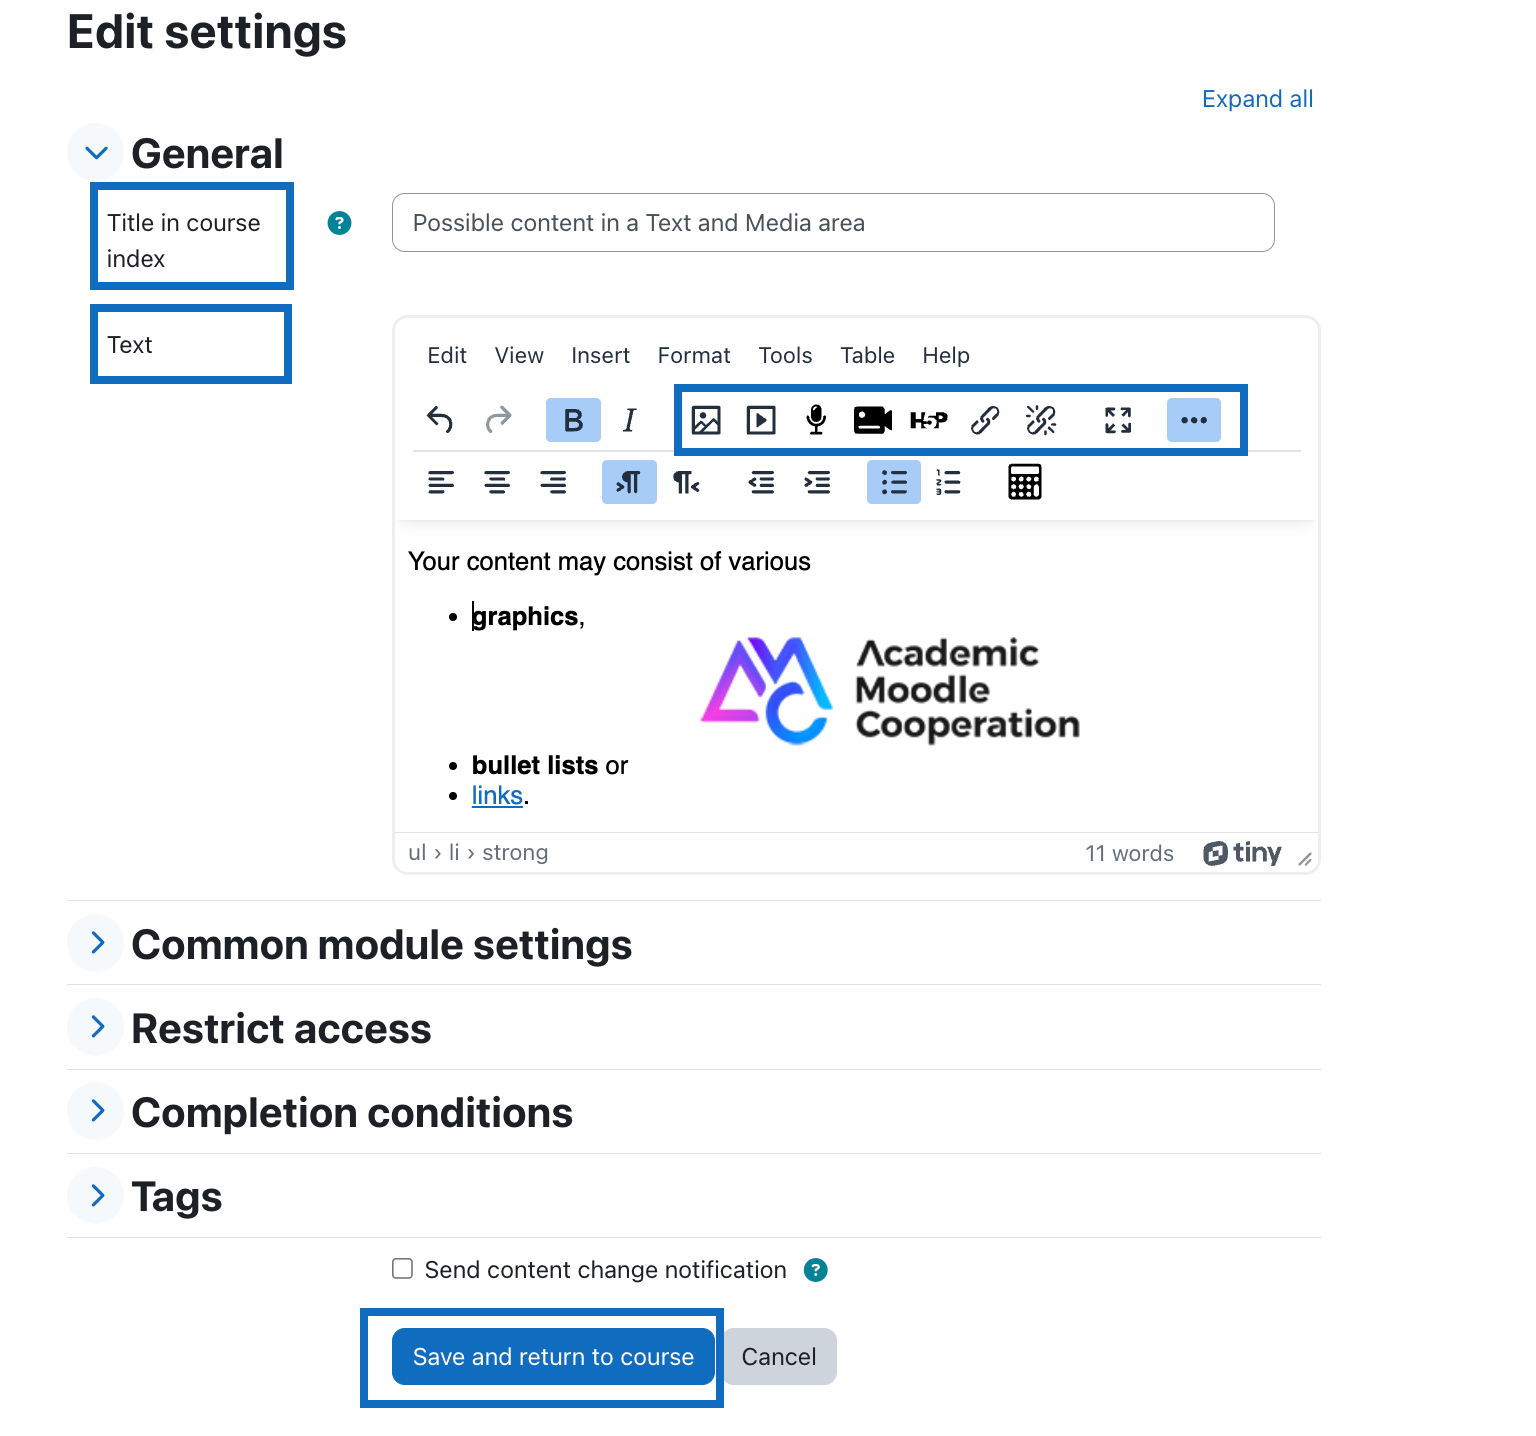
Please enter a name in the field ‘Title in course index’ for your text and media field. This title will then be displayed in the course index.
Next, please enter your information in the field ‘Text field’. The content can consist of any elements, such as text, images, videos, bulleted lists, various formatting etc.
Use the tools of the HTML editor to compose your note. You can activate advanced functions by clicking the "More..." button in the upper right-hand corner.
Once you're done with your note, click "Save and return to course".

Text- und Medienfeld nachträglich bearbeiten
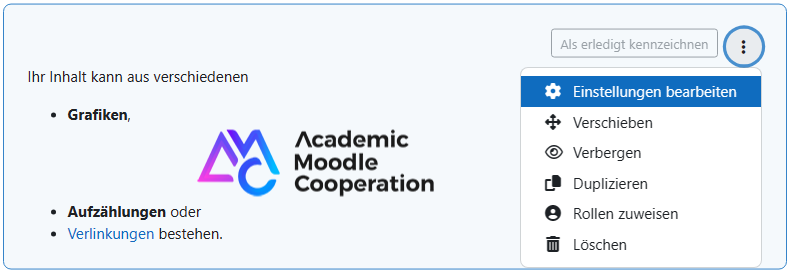
Die Inhalte des Textfeldes werden nun samt allen Formatierungen, multimedialen Elementen etc. direkt auf der Kursseite angezeigt.
Um dieses Feld nachträglich zu bearbeiten, wählen Sie aus dem Optionsmenü im oberen, rechten Feld „Einstellungen bearbeiten” aus.

Edit text and media area afterwards
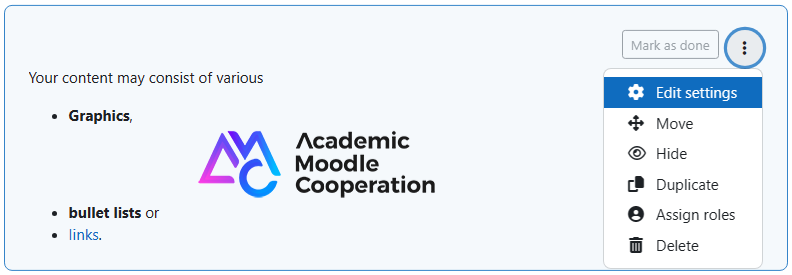
The contents of the text area will now be displayed directly on the course overview along with all the formatting, multimedia elements, etc.
To edit this area afterwards, select "Edit settings" from the options menu in the upper, right field.

Weitere Informationen
Bei Fragen zur Barrierefreiheit wenden Sie sich bitte an die entsprechende Supporteinrichtung Ihrer Hochschule.
Dieses Werk steht unter einer Creative Commons Attribution-ShareAlike 4.0 Lizenz:
https://creativecommons.org/licenses/by-sa/4.0/
Further information
If you have any questions regarding accessibility, please contact the relevant support facility at your university.
This work is licensed under a Creative Commons Attribution-ShareAlike 4.0 License:
https://creativecommons.org/licenses/by-sa/4.0/