Zentralen Kommunikationskanal hinzufügen
Add central communication channel
Ziele:
In dieser Anleitung wird gezeigt, wie in Moodle ein zentraler Kommunikationskanal per URL in einem Kurs hinterlegt werden kann. Der Kommunikationskanal kann z.B. ein präferiertes Forum des Moodle-Kurses oder ein hochschulinternes Tool (wie etwa Matrix) sein. Auch ist ein gänzlich externes Kommunikationsmedium möglich.
Hinweis: Funktion nicht an allen Hochschulen verfügbar.
Schwierigkeit: einfach
Gültig ab Moodle Version 5.0
Goals:
This guide shows how a central communication channel can be added to a Moodle course via a URL. The communication channel can be, for example, a preferred forum of the Moodle course or an internal university tool (such as Matrix). A completely external communication medium is also possible.
Note: Function not available at all universities.
Difficulty: easy
Valid from Moodle version 5.0
Kommunikation öffnen
Um den Kommunikationskanal eintragen zu können, klicken Sie im Kurs auf dem Register „Mehr“ und dann auf Kommunikation.
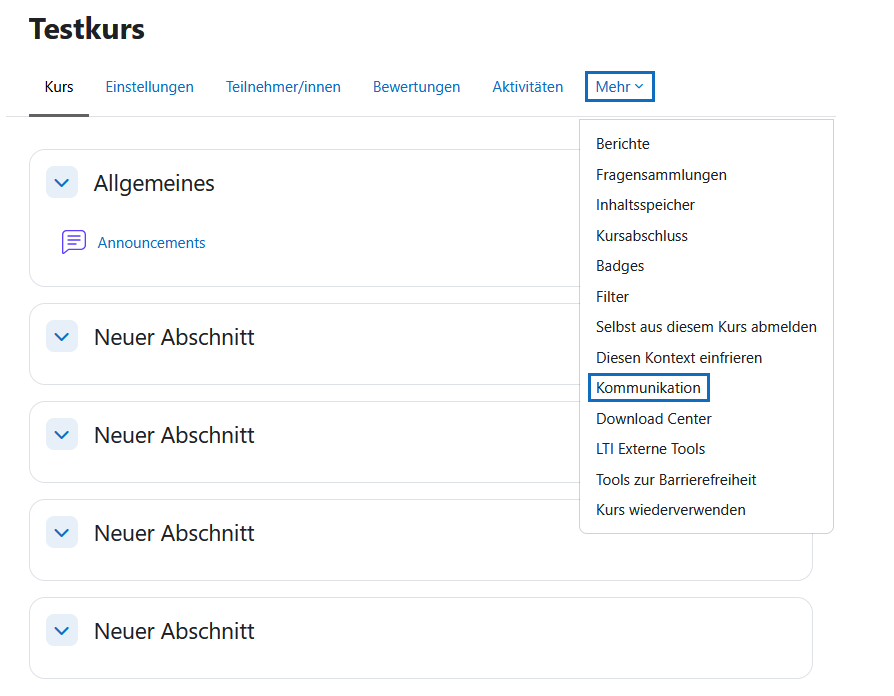
Open communication
To add the communication channel, click on the “More” tab in the course and then on “Communication”.

Provider auswählen
Wählen Sie beim Parameter „Provider” den gewünschten Anbieter aus. In diesem Fall wäre dies „Nutzerdefinierter Link“.
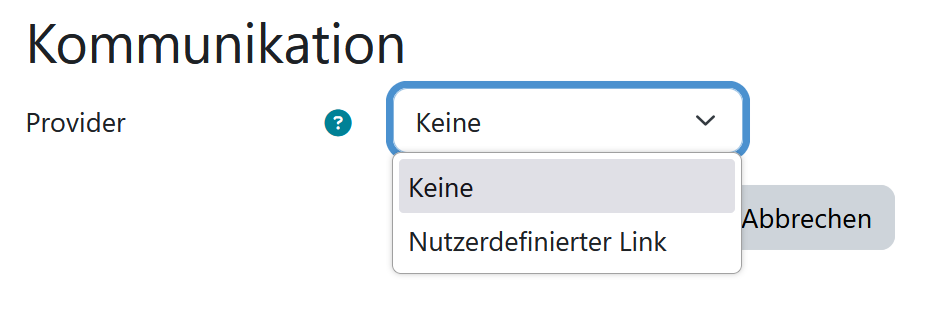
Choosing a provider
Select the desired provider under the ‘Provider’ parameter. In this case, this would be ‘Custom link’.
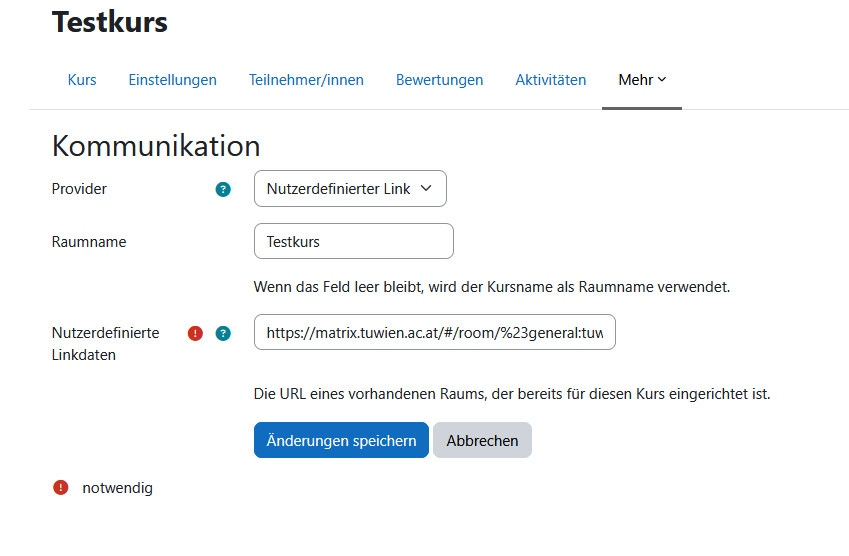
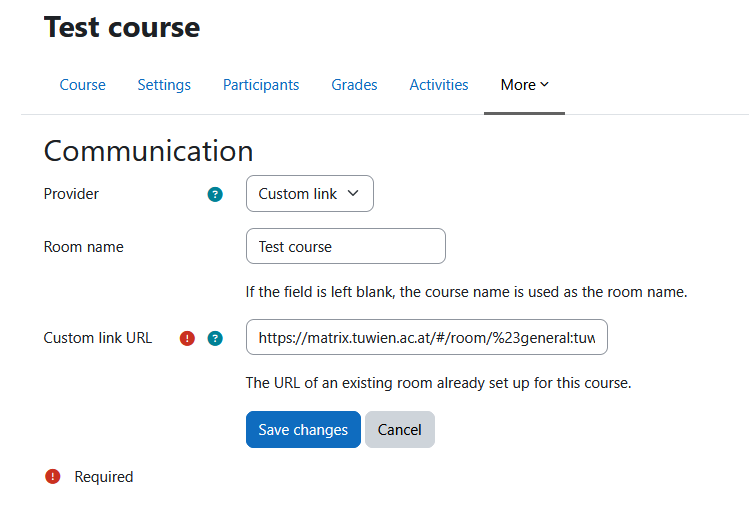
Kanaleinstellungen setzen
Für ihren Kommunikationskanal sind folgende Einstellungen zu setzen:
- Wählen sie einen entsprechenden Raumnamen.
-
Fügen Sie die gewünschte Webadresse als URL ein.
Abschließend speichen Sie Ihre Eingaben mit „Änderungen speichern".
Hinweis: Die Verlinkung mit dem bekannten Tool „Matrix“ funktioniert grundsätzlich, beachten Sie jedoch, dass derzeit noch keine weitergehenden Funktionen (z.B. Kanal‑Einschreibung, Übernahme von Gruppen‑Informationen, Anlegen von Unterräumen etc.) unterstützt werden. Aktuell ist nur die reine Verknüpfung möglich. Beim Hinzufügen eines öffentlichen Matrix‑Kanals müssen Lehrende die zweite Raute (#) durch „%23“ ersetzen.
Set channel settings
The following settings must be configured for your communication channel:
- Select an appropriate room name.
- Enter the desired web address as a URL.
Finally, save your entries by clicking “Save changes.”
Note: The link to the well-known tool ‘Matrix’ works basically, but please note that no further functions (e.g. channel registration, transfer of group information, creation of subspaces) are currently supported. Currently, only the weblink is possible. When adding a public Matrix channel, teachers must replace the second hash symbol (#) with ‘%23’.
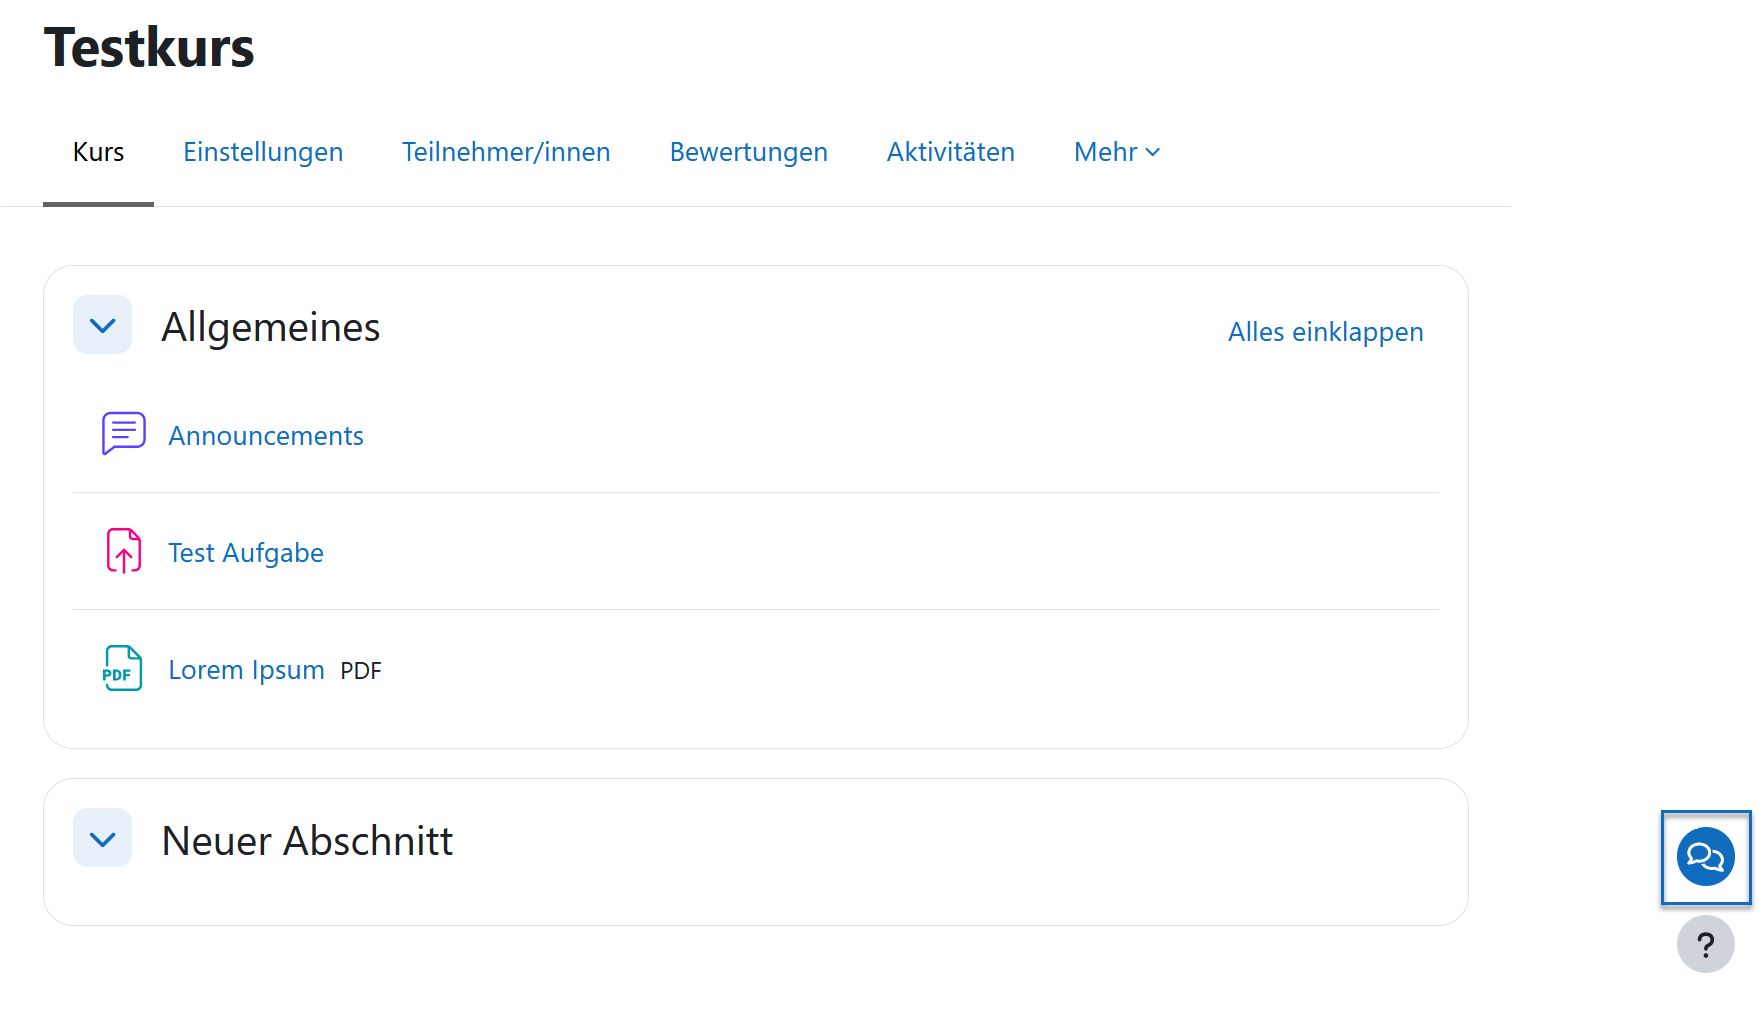
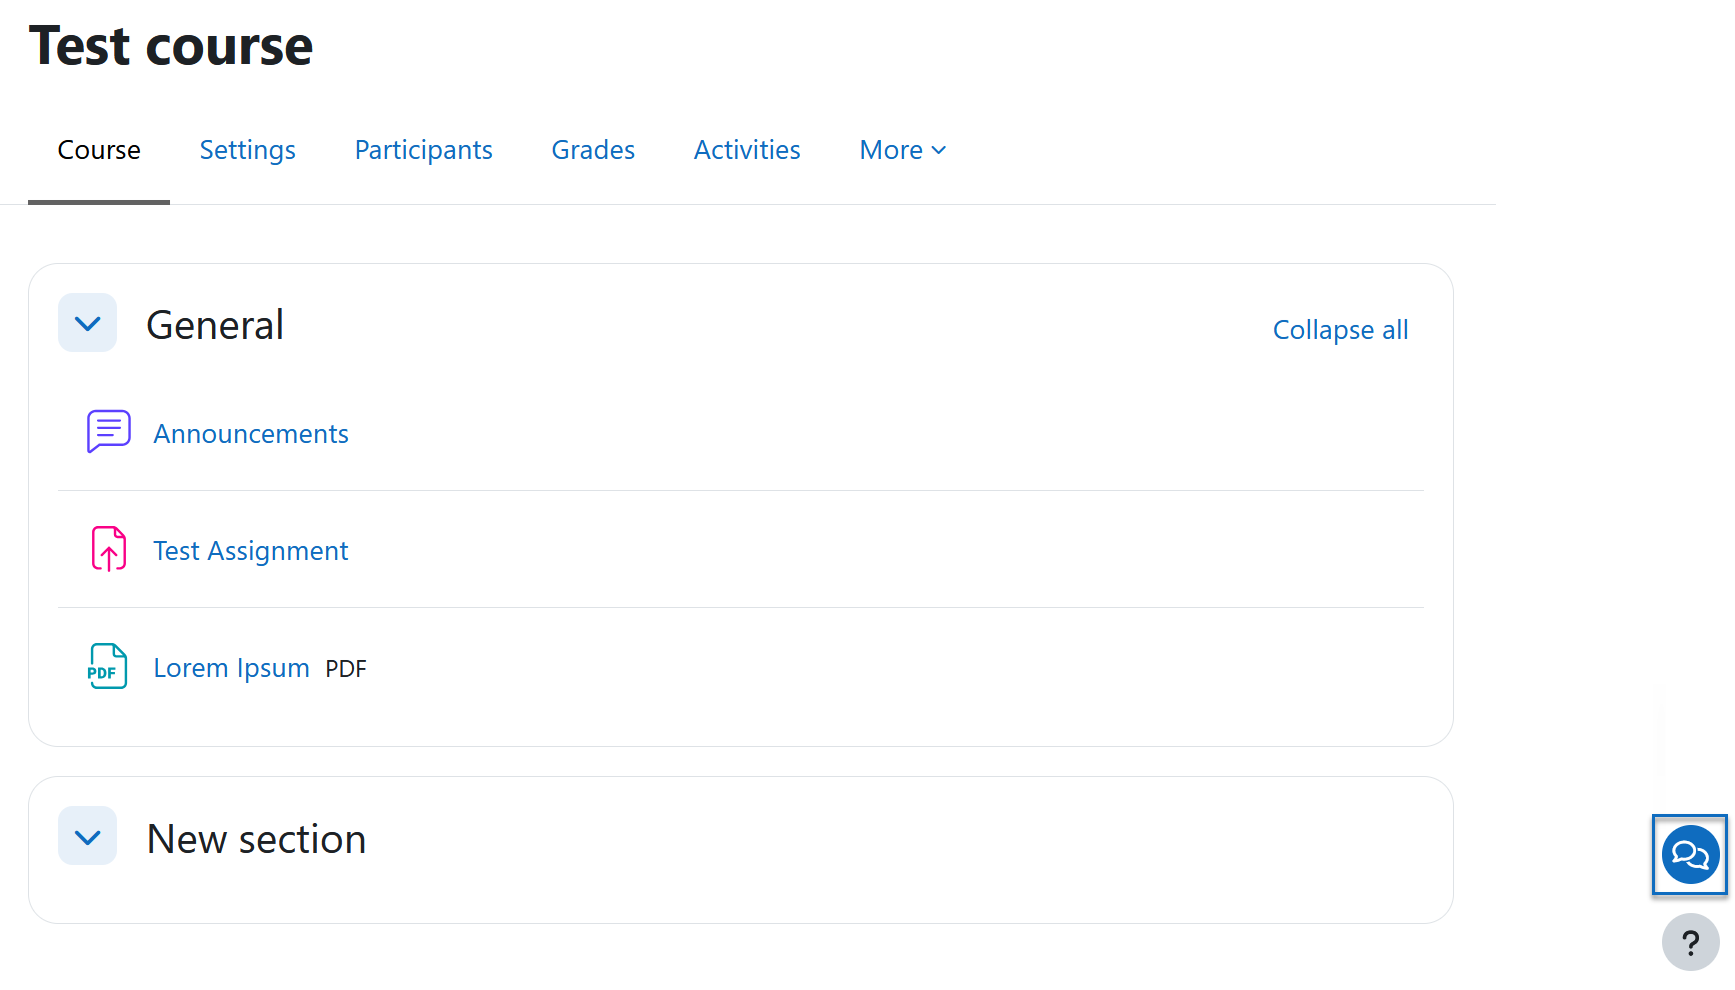
Ansicht im Kurs
Der Kanal ist im Kurs eingebunden und lässt sich unkompliziert öffnen. Sie können ihn über das Sprechblasen-Symbol rechts unten im Kurs erkennen.
Tipp: Dieser Button ist besonders auf Mobilgeräten leicht zu erreichen und gut sichtbar.
View in course
The channel is integrated into the course and can be opened easily. You can recognise it by the speech bubble icon at the bottom right of the course.
Tip: This button is particularly easy to reach and clearly visible on mobile devices.
Weitere Informationen
Bei Fragen zur Barrierefreiheit wenden Sie sich bitte an die entsprechende Supporteinrichtung Ihrer Hochschule.
Dieses Werk steht unter einer Creative Commons Attribution-ShareAlike 4.0 Lizenz: https://creativecommons.org/licenses/by-sa/4.0/
Further information
If you have any questions about accessibility, please contact the relevant support service at your university.
This work is licensed under a Creative Commons Attribution-ShareAlike 4.0 License: https://creativecommons.org/licenses/by-sa/4.0/