Aktivitäten verfolgen mit Aktivitätssupport
Track activities with activity support
Ziele:
Diese Anleitung zeigt Ihnen, wie Sie Nutzungsinformationen Ihrer Studierenden für ausgewählte Aktivitäten eines beliebigen Zeitfensters einsehen können und wie Sie aktive, inaktive oder alle Studierende gesammelt per E-Mail anschreiben.
Schwierigkeit: einfach
Gültig ab Moodle Version 4.2
Goals:
This guide shows you how to view student usage information for selected activities of any time slot and how to email active, inactive, or all students collectively.
Difficulty: easy
Valid from Moodle Version 4.2
6 Schritte:
1. Aktivität anlegen
Erstellen Sie die Aktivität „Activity Support“ wie in der Anleitung „Aktivität oder Material anlegen“ beschrieben.
1. Create activity
Create the activity "Activity Support" as described in the guide "Create an activity or resource".
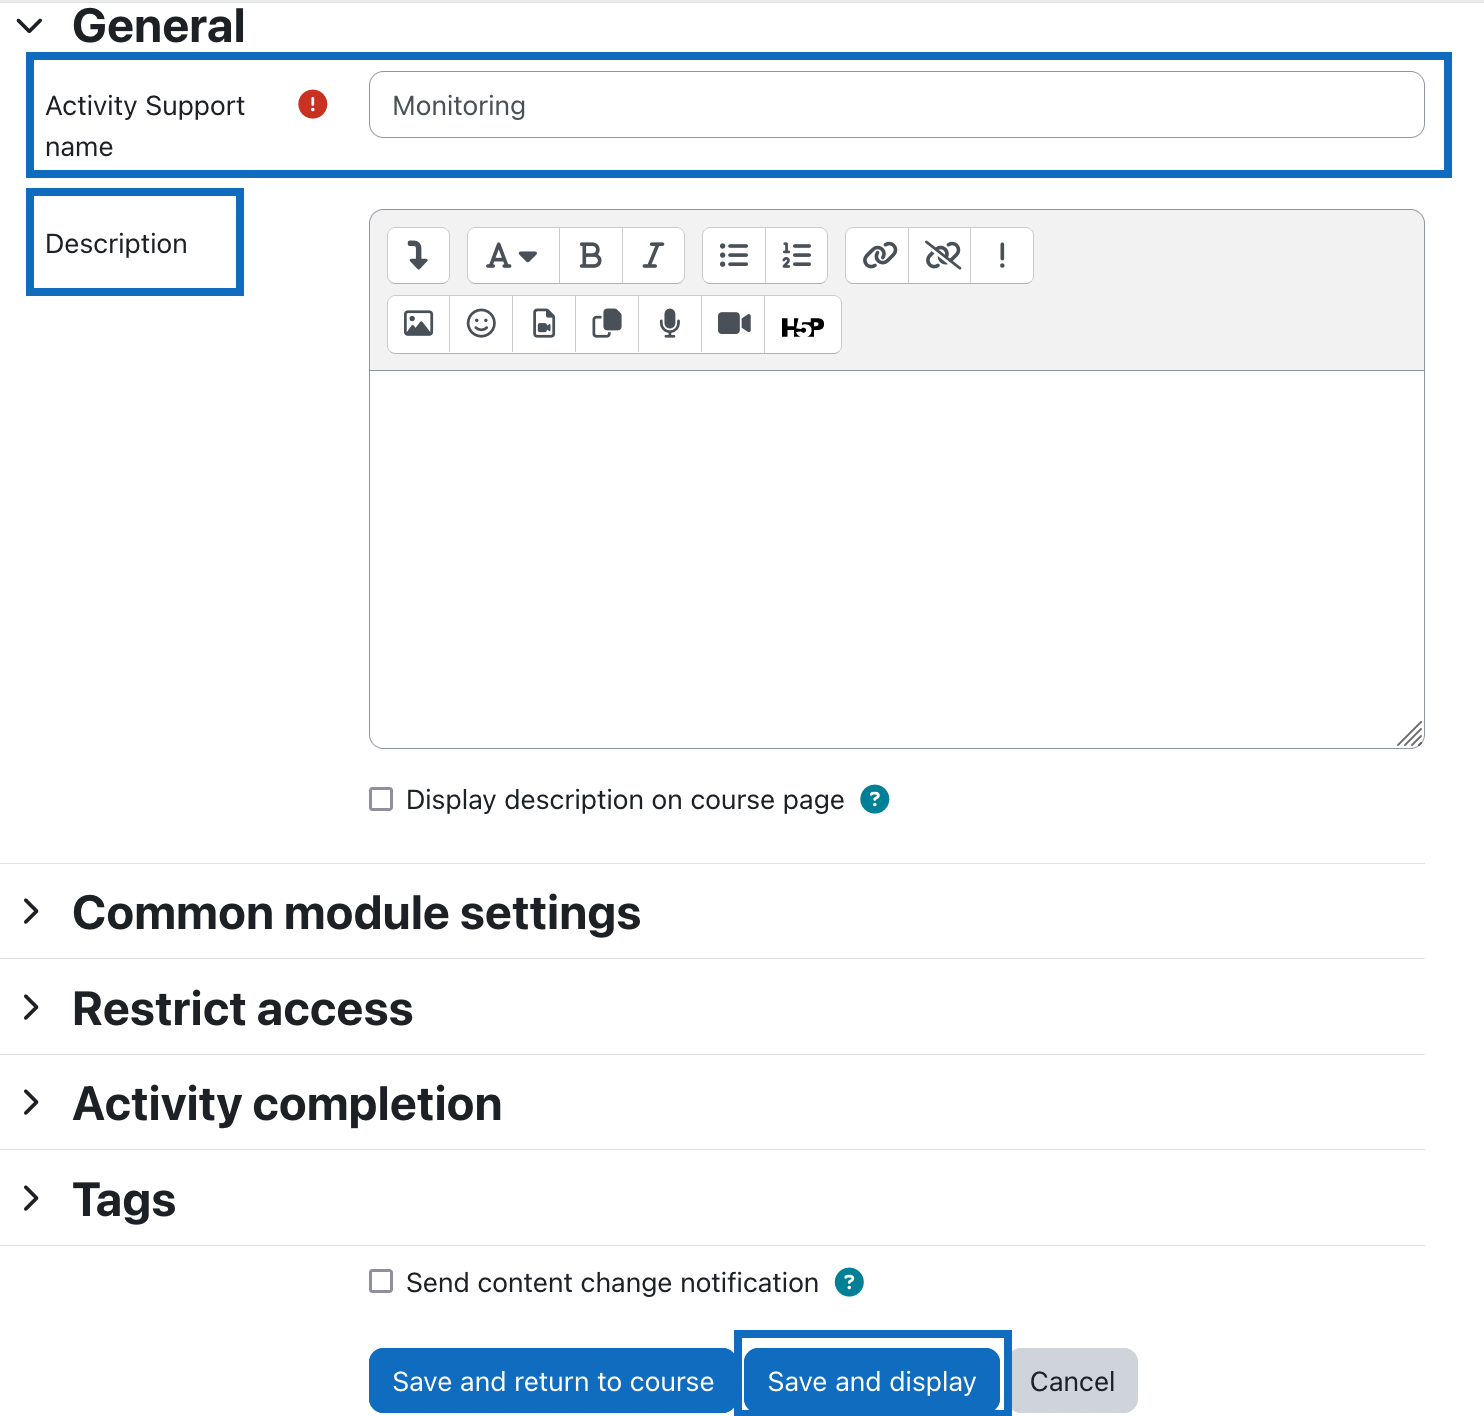
2. Namen eintragen und speichern
Tragen Sie zunächst den „Namen” sowie die „Beschreibung” der Aktivität ein und klicken Sie anschließend auf die Schaltfläche „Speichern und anzeigen”.
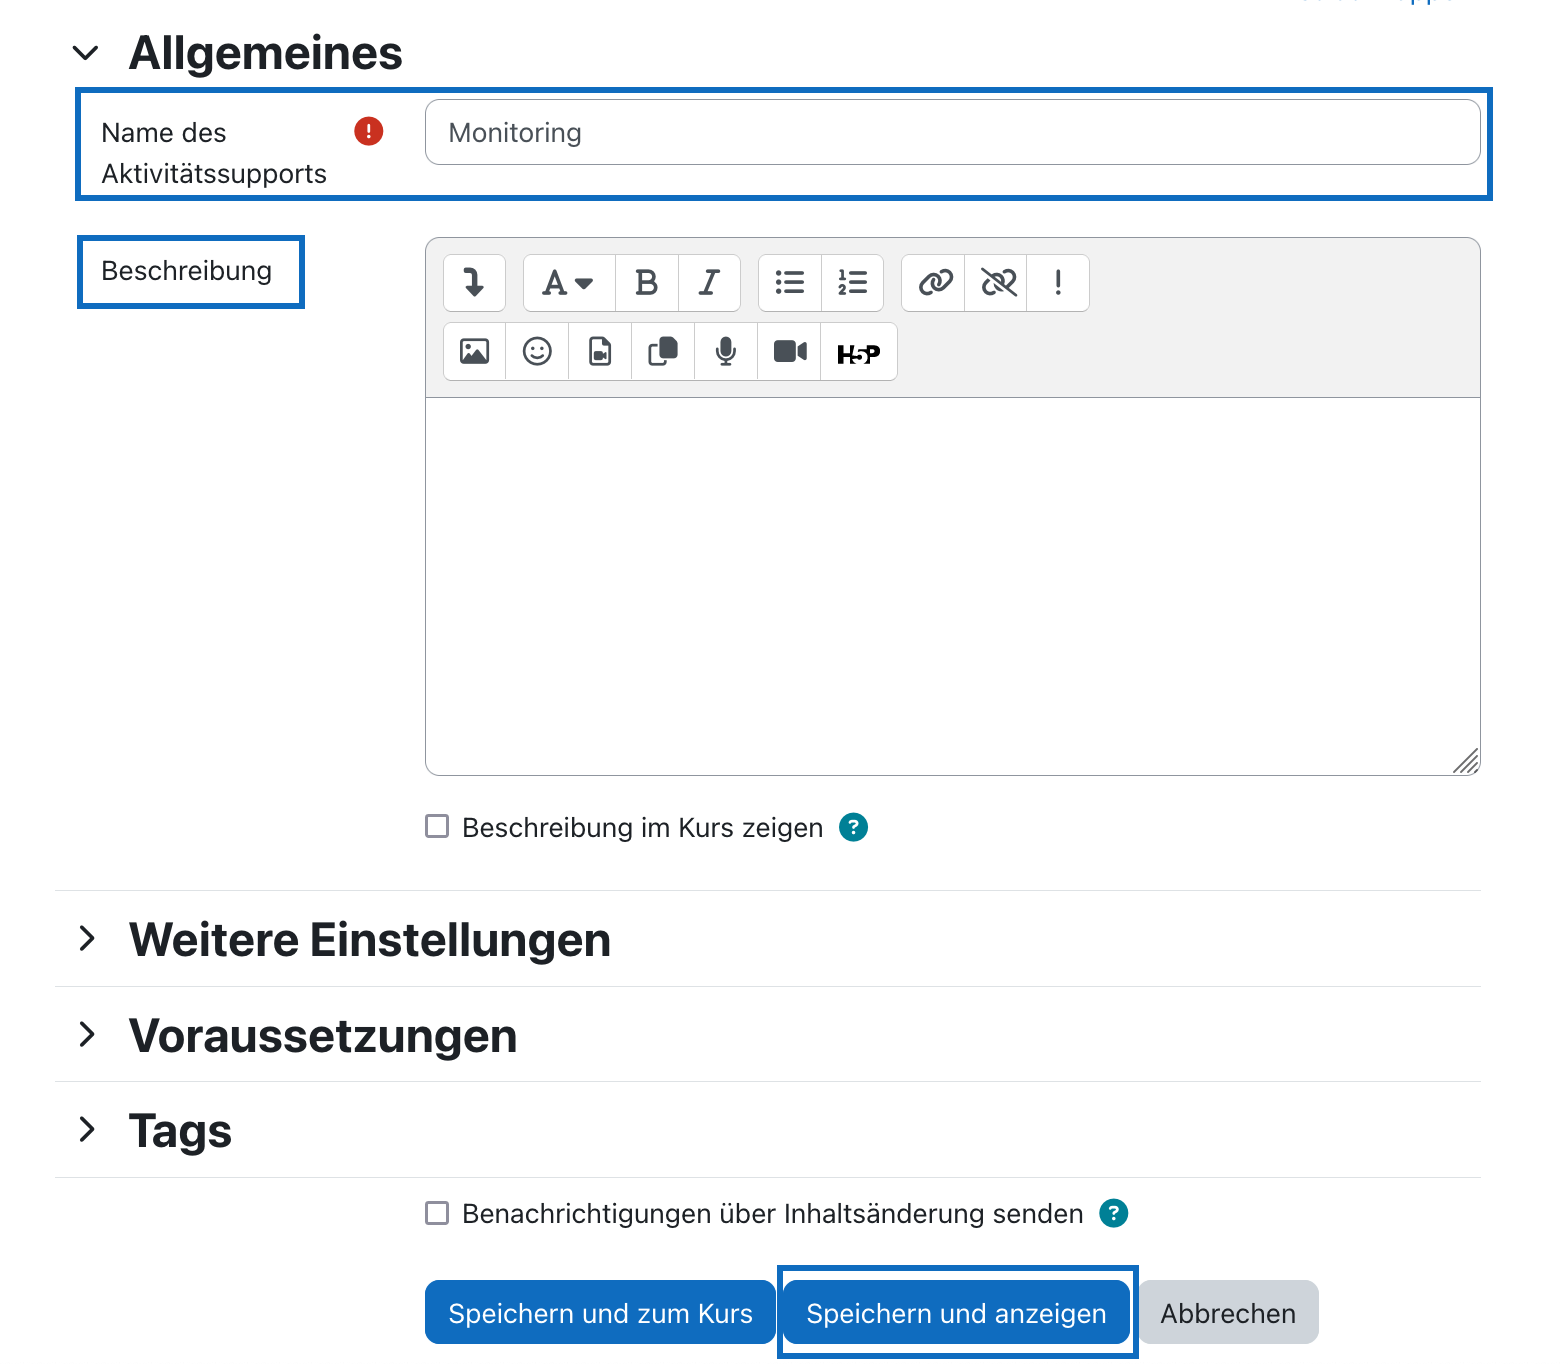
2. Enter the name and save the activity
First enter the "Name" and the "Description" of the activity and save the settings by clicking the button "Save and display".
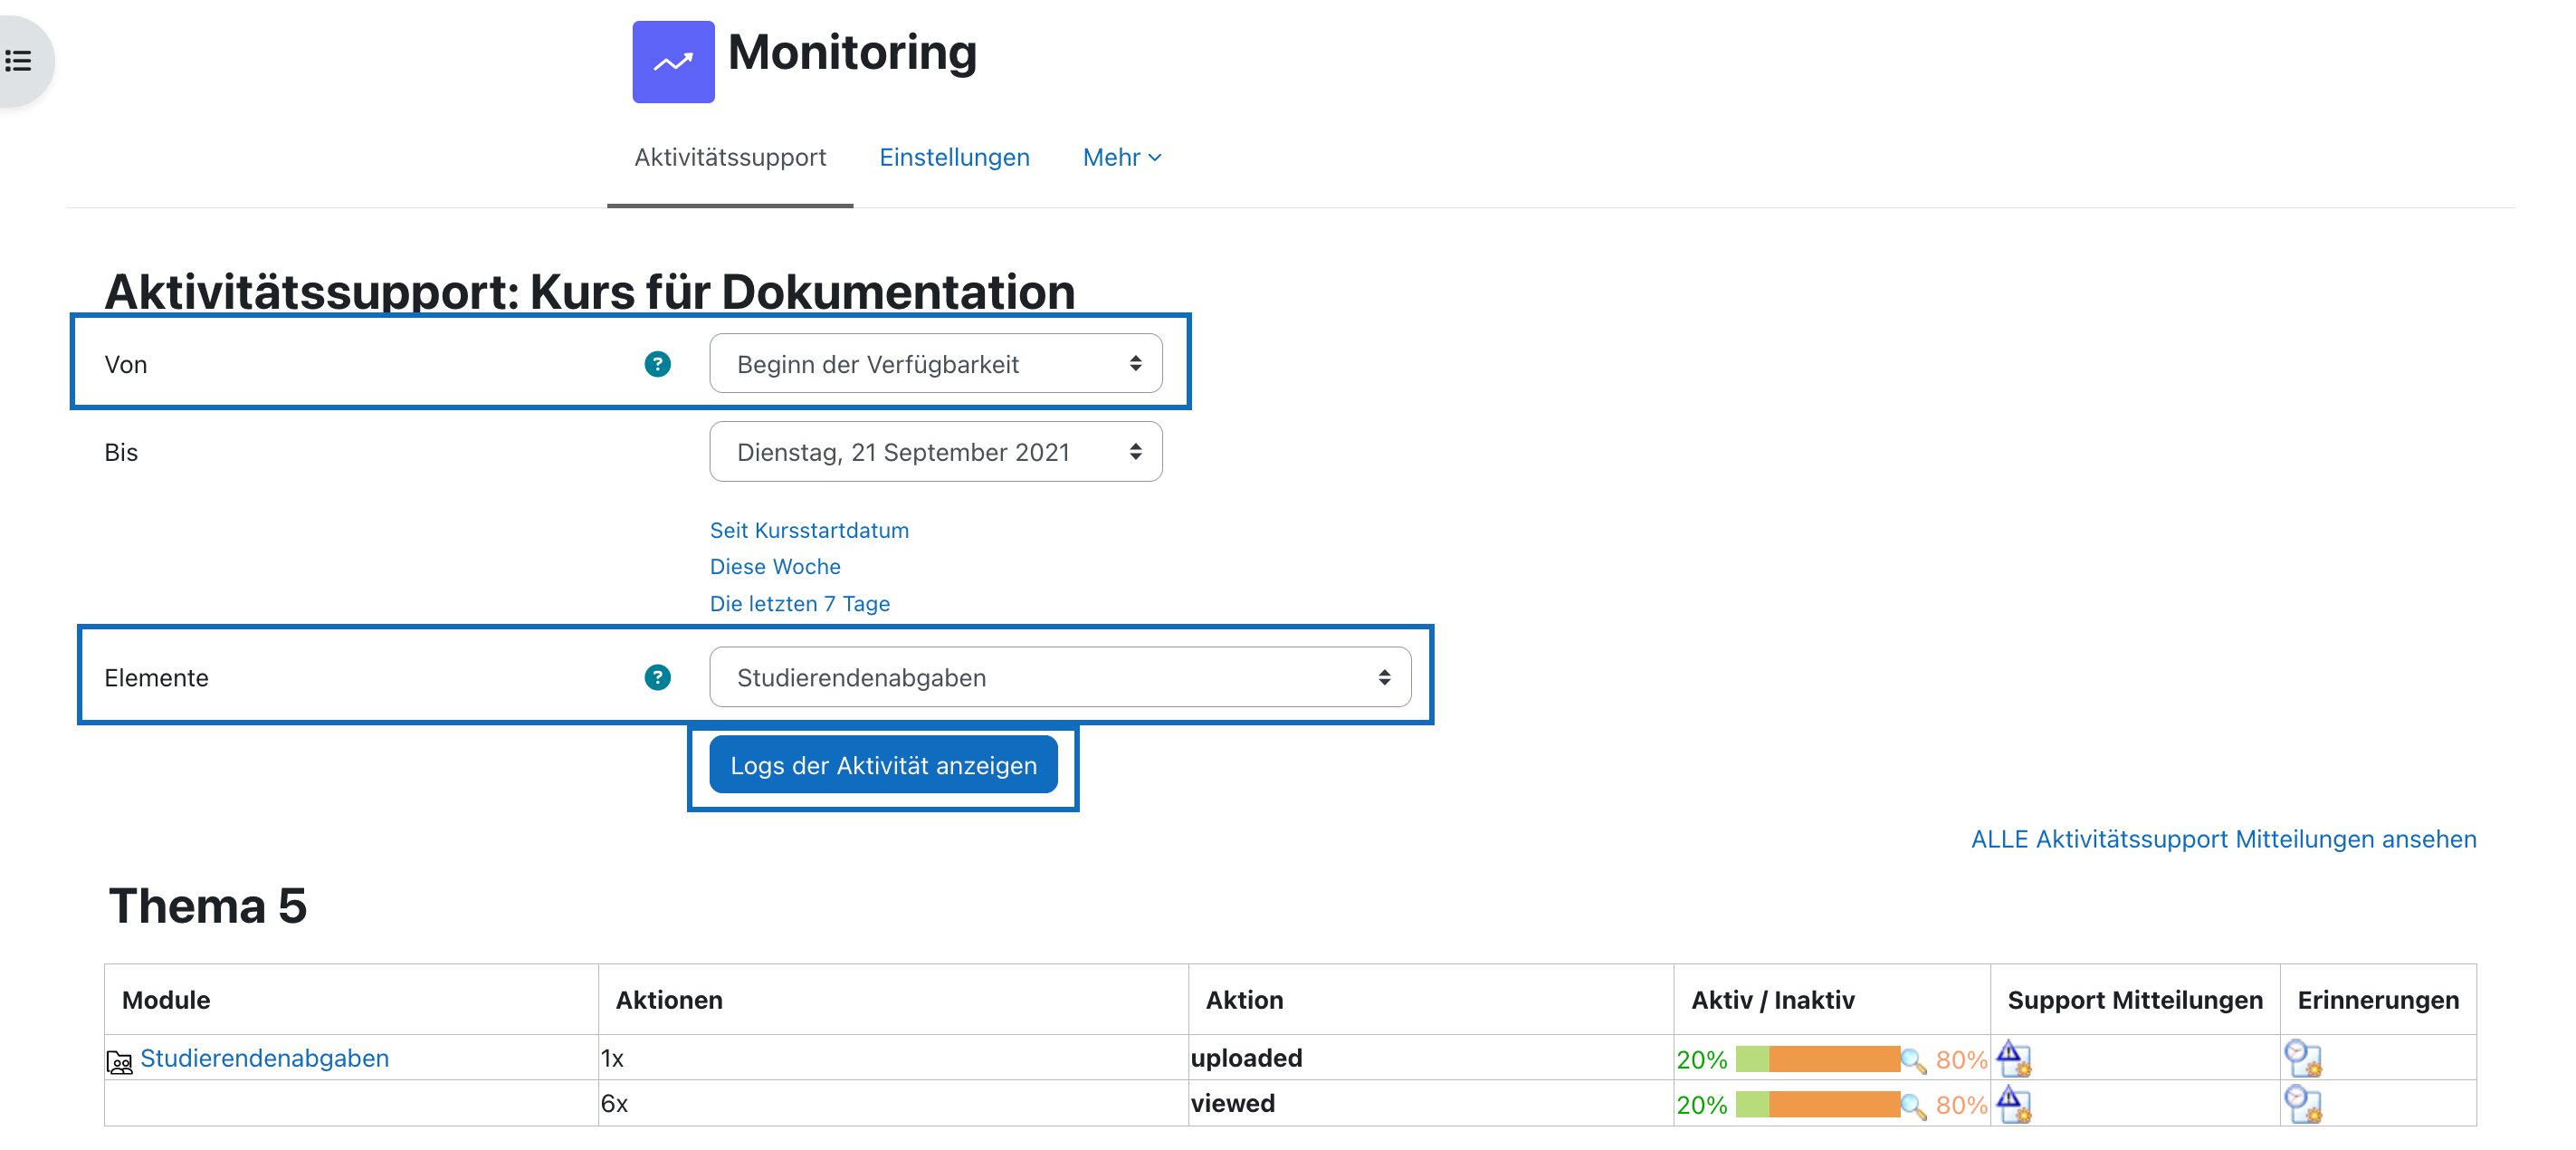
3. Zeitfenster eintragen und Logs anzeigen
Unter „Element“ kann „Aktivität“, „Arbeitsmaterial“ oder „Kursabschnitt“ bei Bedarf ausgewählt werden.
Tipp: Unter dem Drop-down-Element „Von” kann auch ein Erstellungsdatum der Aktivität angezeigt werden, ohne dass dieses langwierig unter den Einstellungen der jeweiligen Aktivität gesucht werden muss.
Um diese Option auswählen zu können, muss jedoch das benötigte Element unter dem Drop-down-Menü „Elemente” ausgewählt werden und einmalig der Button „Logs der Aktivität anzeigen” geklickt werden.
Welche Module und Parameter unterstützt werden, finden Sie in dieser Aufstellung:
- Abstimmung: „Antworten zulassen ab”
- Aufgabe: „Abgabetermin”
- Datenbank: „Verfügbar ab”
- Feedback: „Antworten erlauben ab”
- Kreuzerlübung: „Abgabebeginn“
- Lektion: „Verfügbar ab“
- Lernpaket: „Verfügbar ab“
- Offline- Test: „Testdatum“
- Studierendenordner: „Von“
- Test: „Testöffnung“
- Workshop: „Einreichungen ab“
3. Enter time a window and display logs
In the generated table you can now view the information on the accesses that took place during the relevant period as well as on other activity-specific actions.
In "Element", an "Activity", a "Work material" or a "Course section" can be selected if required.
Tip:
In the drop-down element "From", a creation date of the activity can also be displayed without having to search for it tediously in the settings of the respective activity.
In order to be able to select this option, however, the required element must be selected in the drop-down menu "Elements" and then the button "Show logs of the activity" must be clicked once.
Which modules and parameters are supported can be found in this table:
- Choice: “Allow responses from”
- Assignment: “Allow submissions from”
- Database: “Available from“
- Feedback: “Allow answers from”
- Kreuzerlübung: “Allow submissions from“
- Lesson: “Available from“
- SCORM package: “Available from“
- Offline- Quiz: “Date of offline quiz“
- Student folder: “from“
- Quiz: „Open the quiz“
- Workshop: „Open for submissions from“
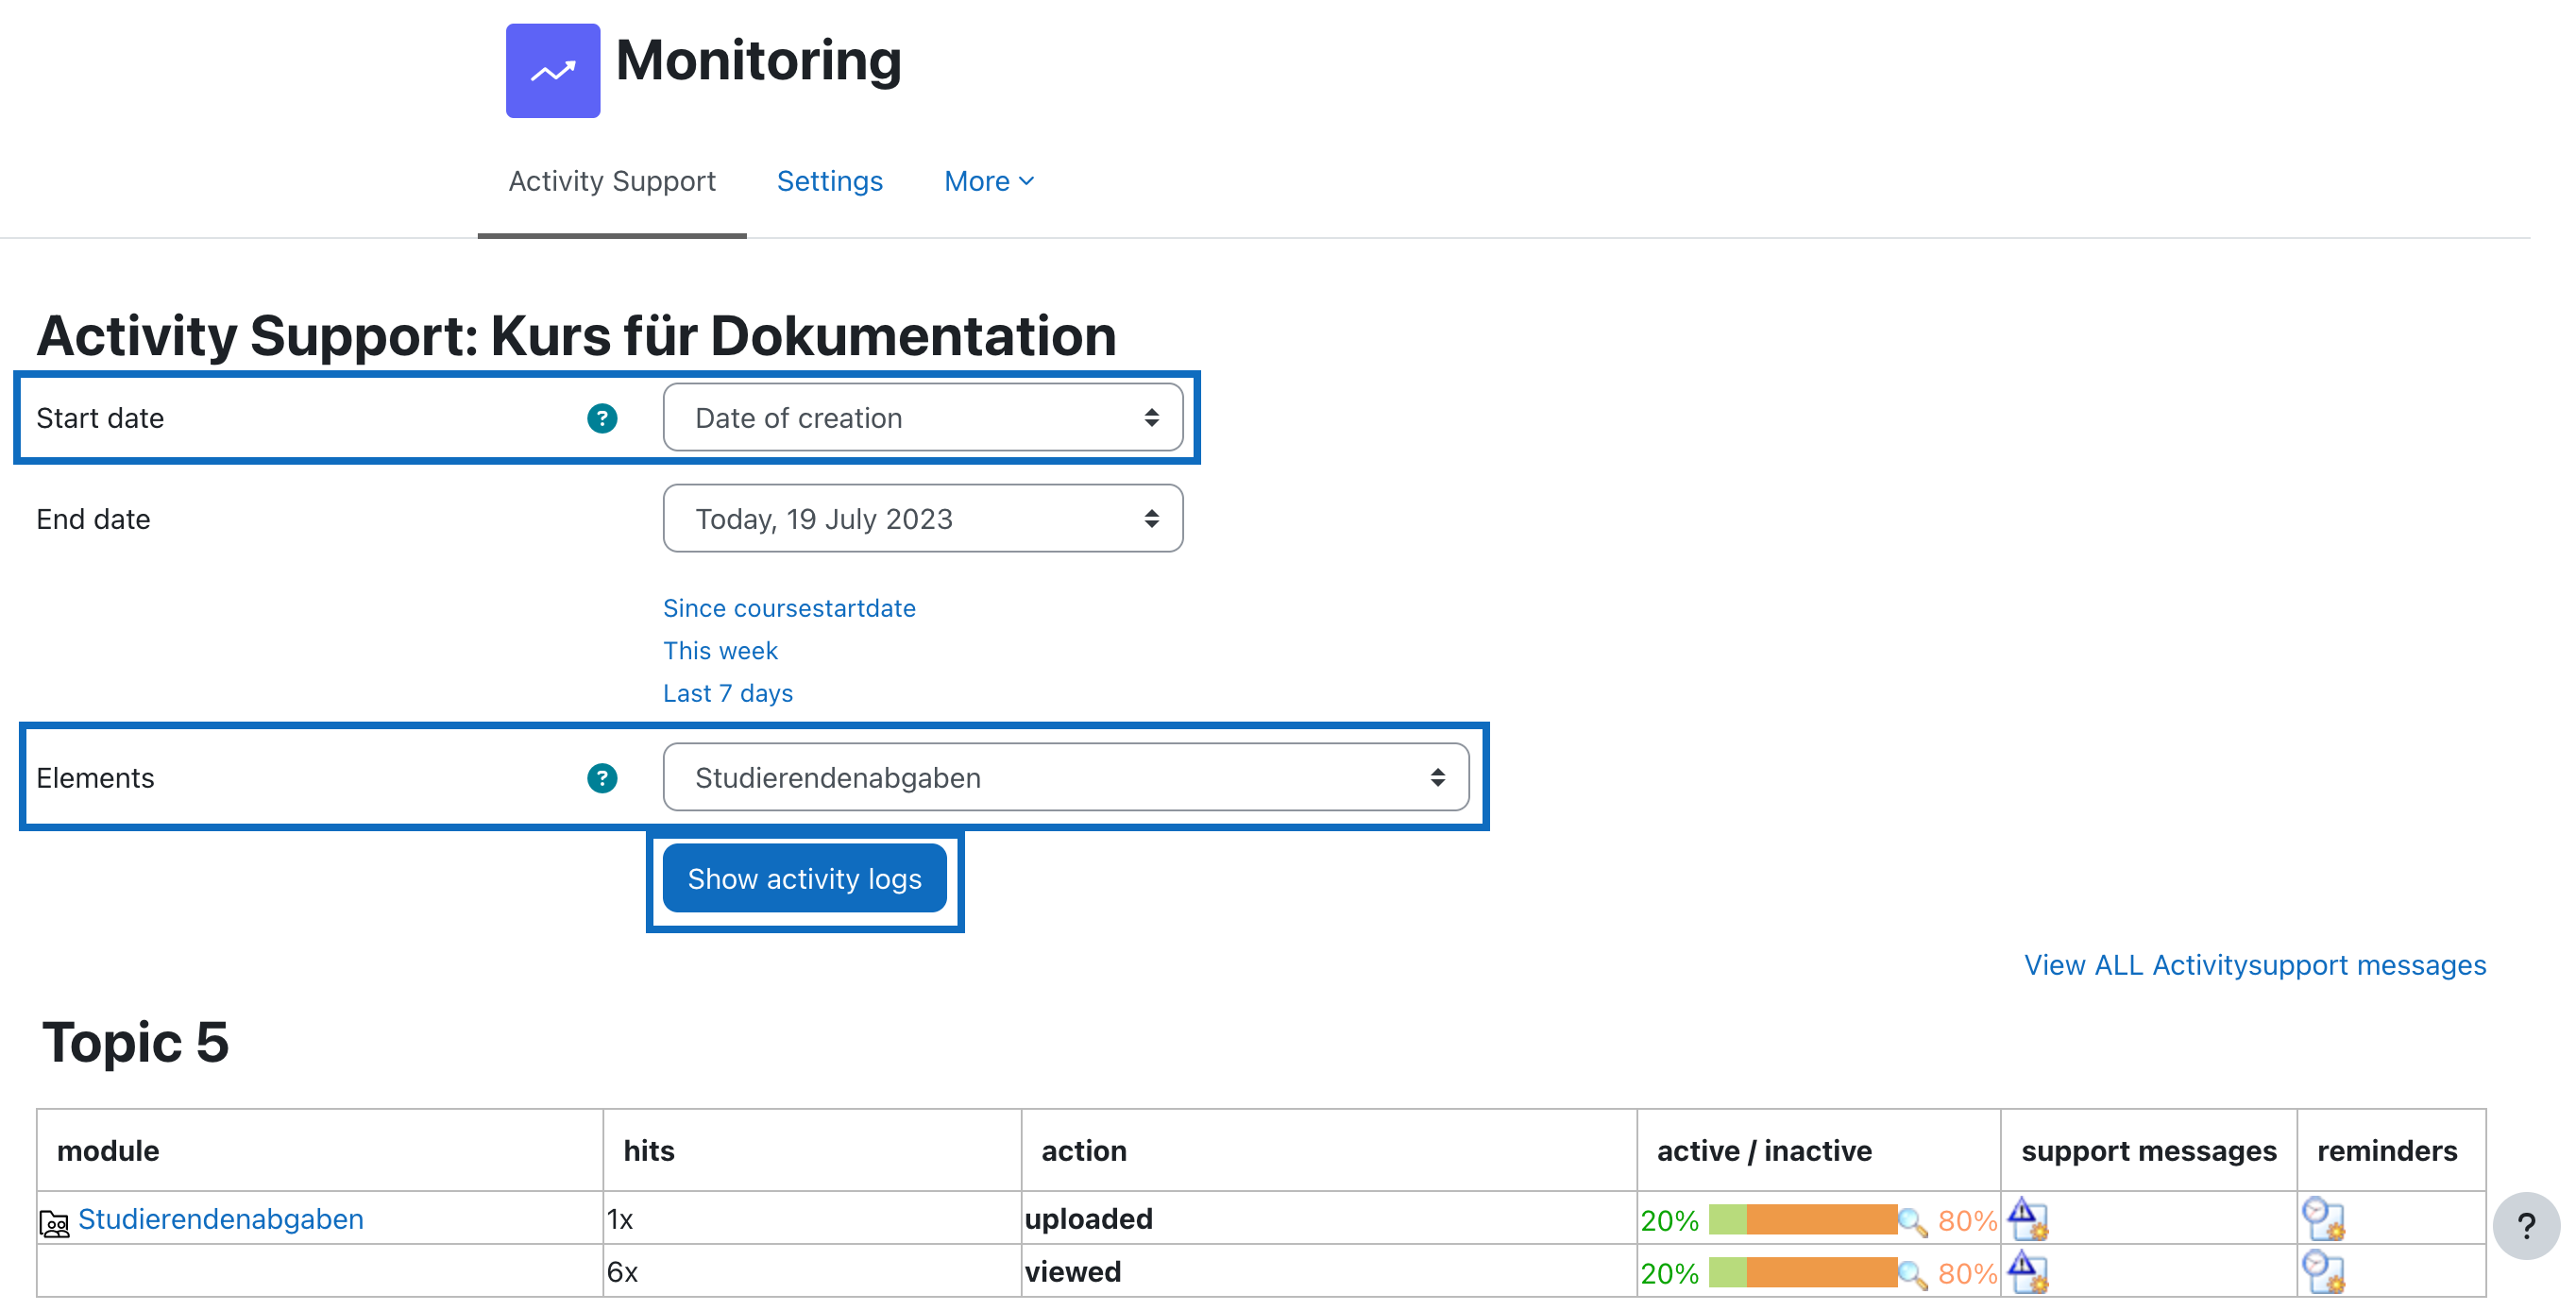
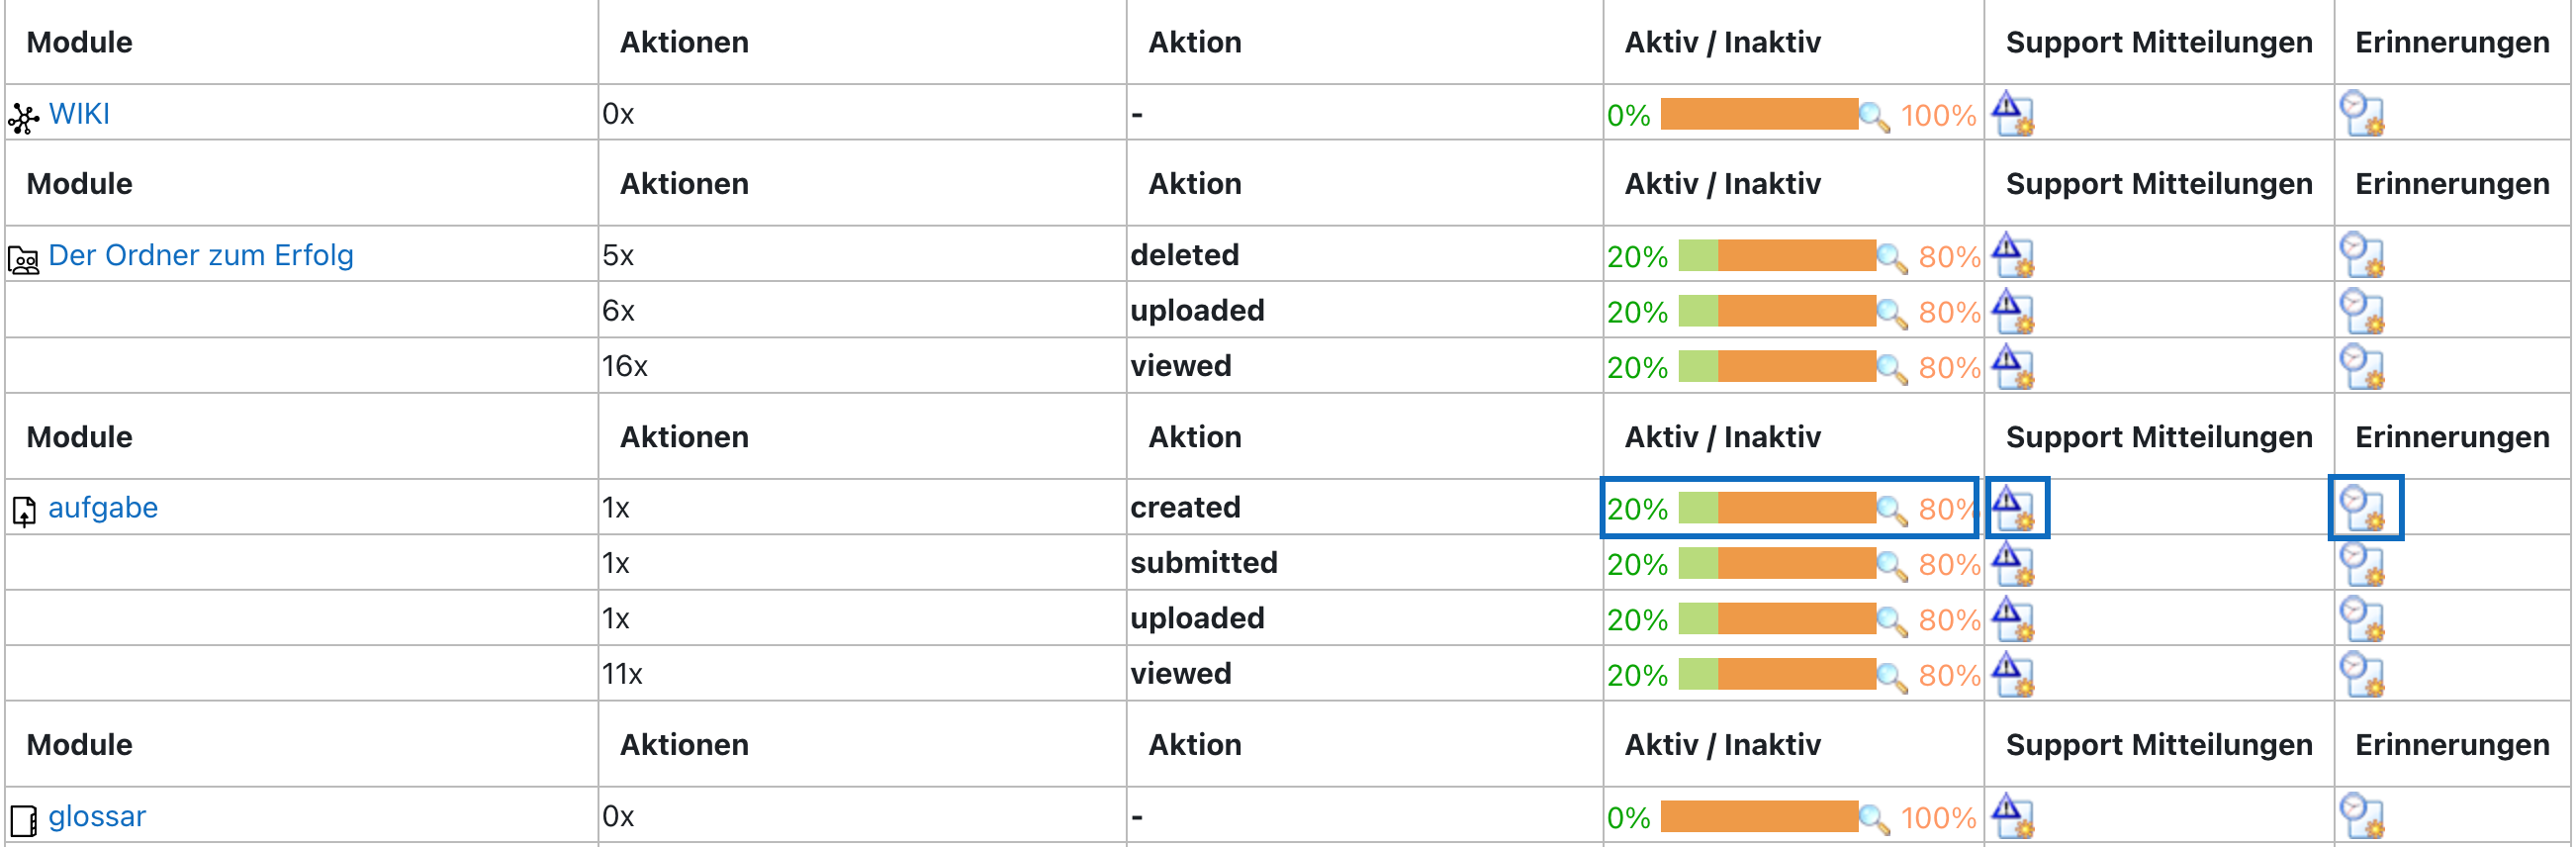
4. Informationen zu Aktivitätszugriffen etc. eintragen
In der generierten Tabelle können Sie nun Informationen zu den im betreffenden Zeitraum erfolgten Zugriffen sowie zu weiteren aktivitätsspezifischen Aktionen einsehen.
Um Detailinformationen zu den einzelnen Aktionen abzurufen, klicken Sie bitte in der Spalte „Aktiv / Inaktiv” oder unter „Support Mitteilungen“ auf das entsprechende Diagramm bzw. Symbol.
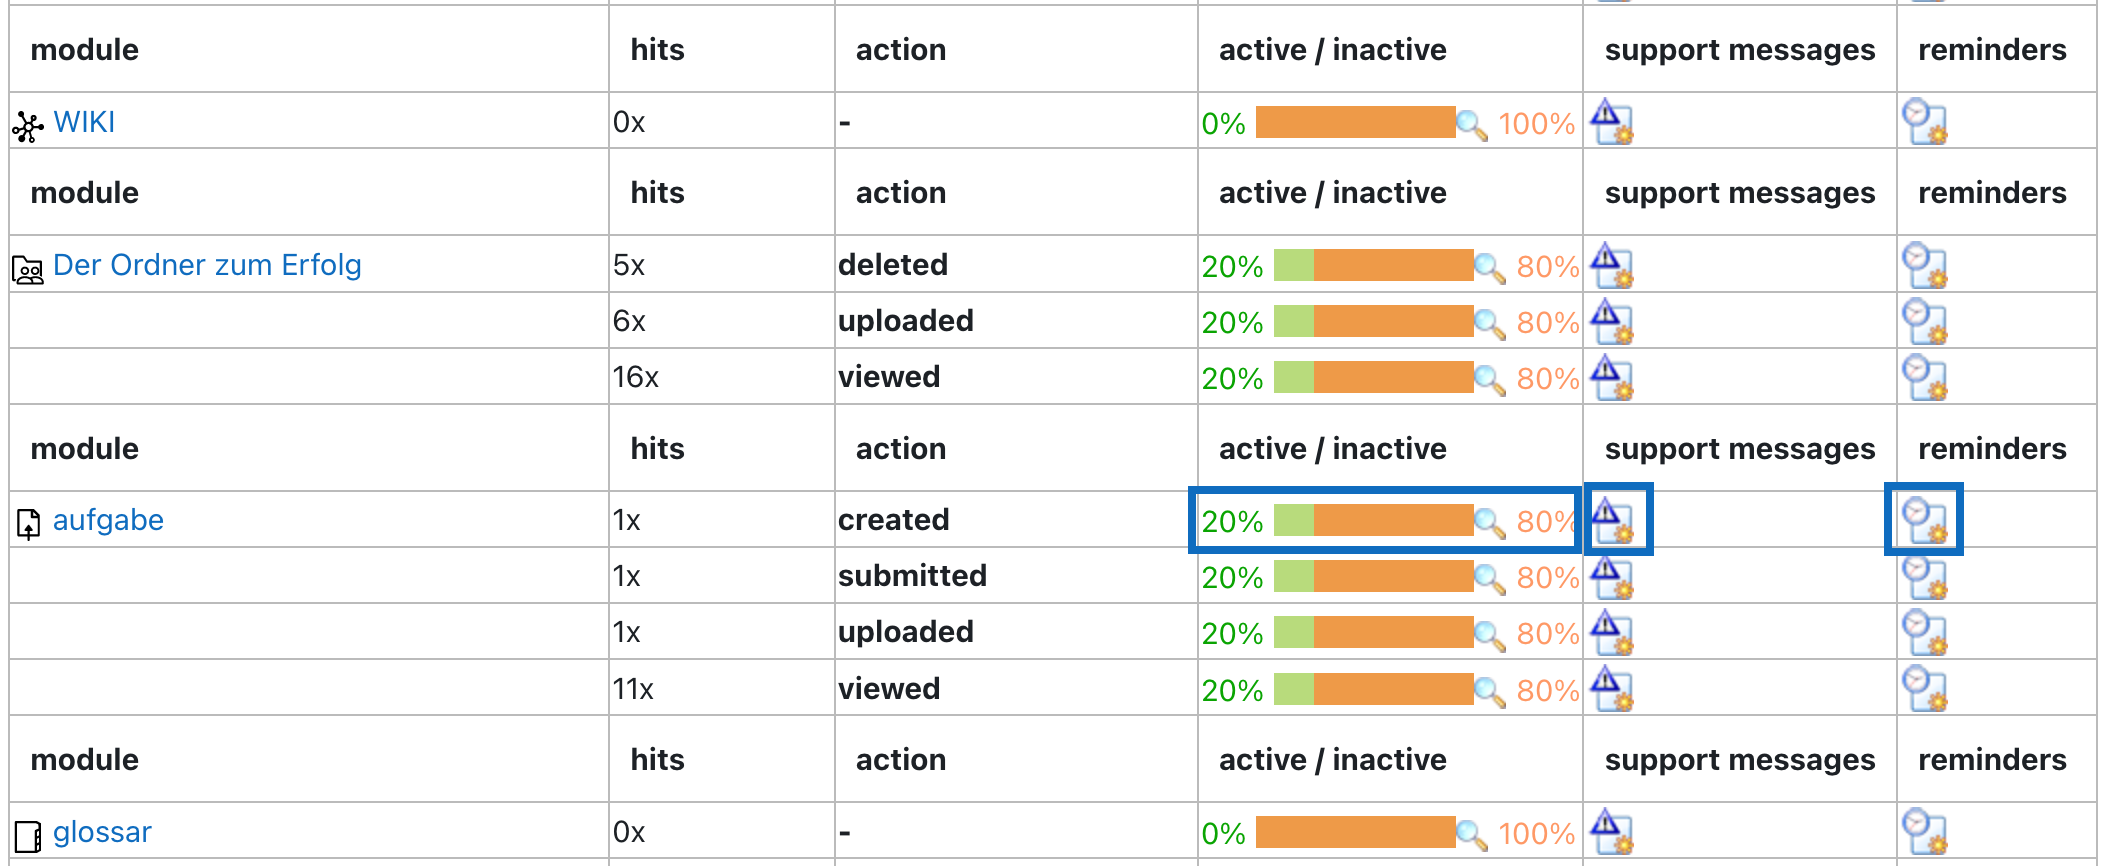
4. Enter information on activity accesses etc.
In the generated table you can now view the information on the accesses that took place during the period in question as well as on other activity-specific actions.
To access detailed information on the individual actions, click on the corresponding diagram or symbol in the column "Active / Inactive" or in "Support Messages".
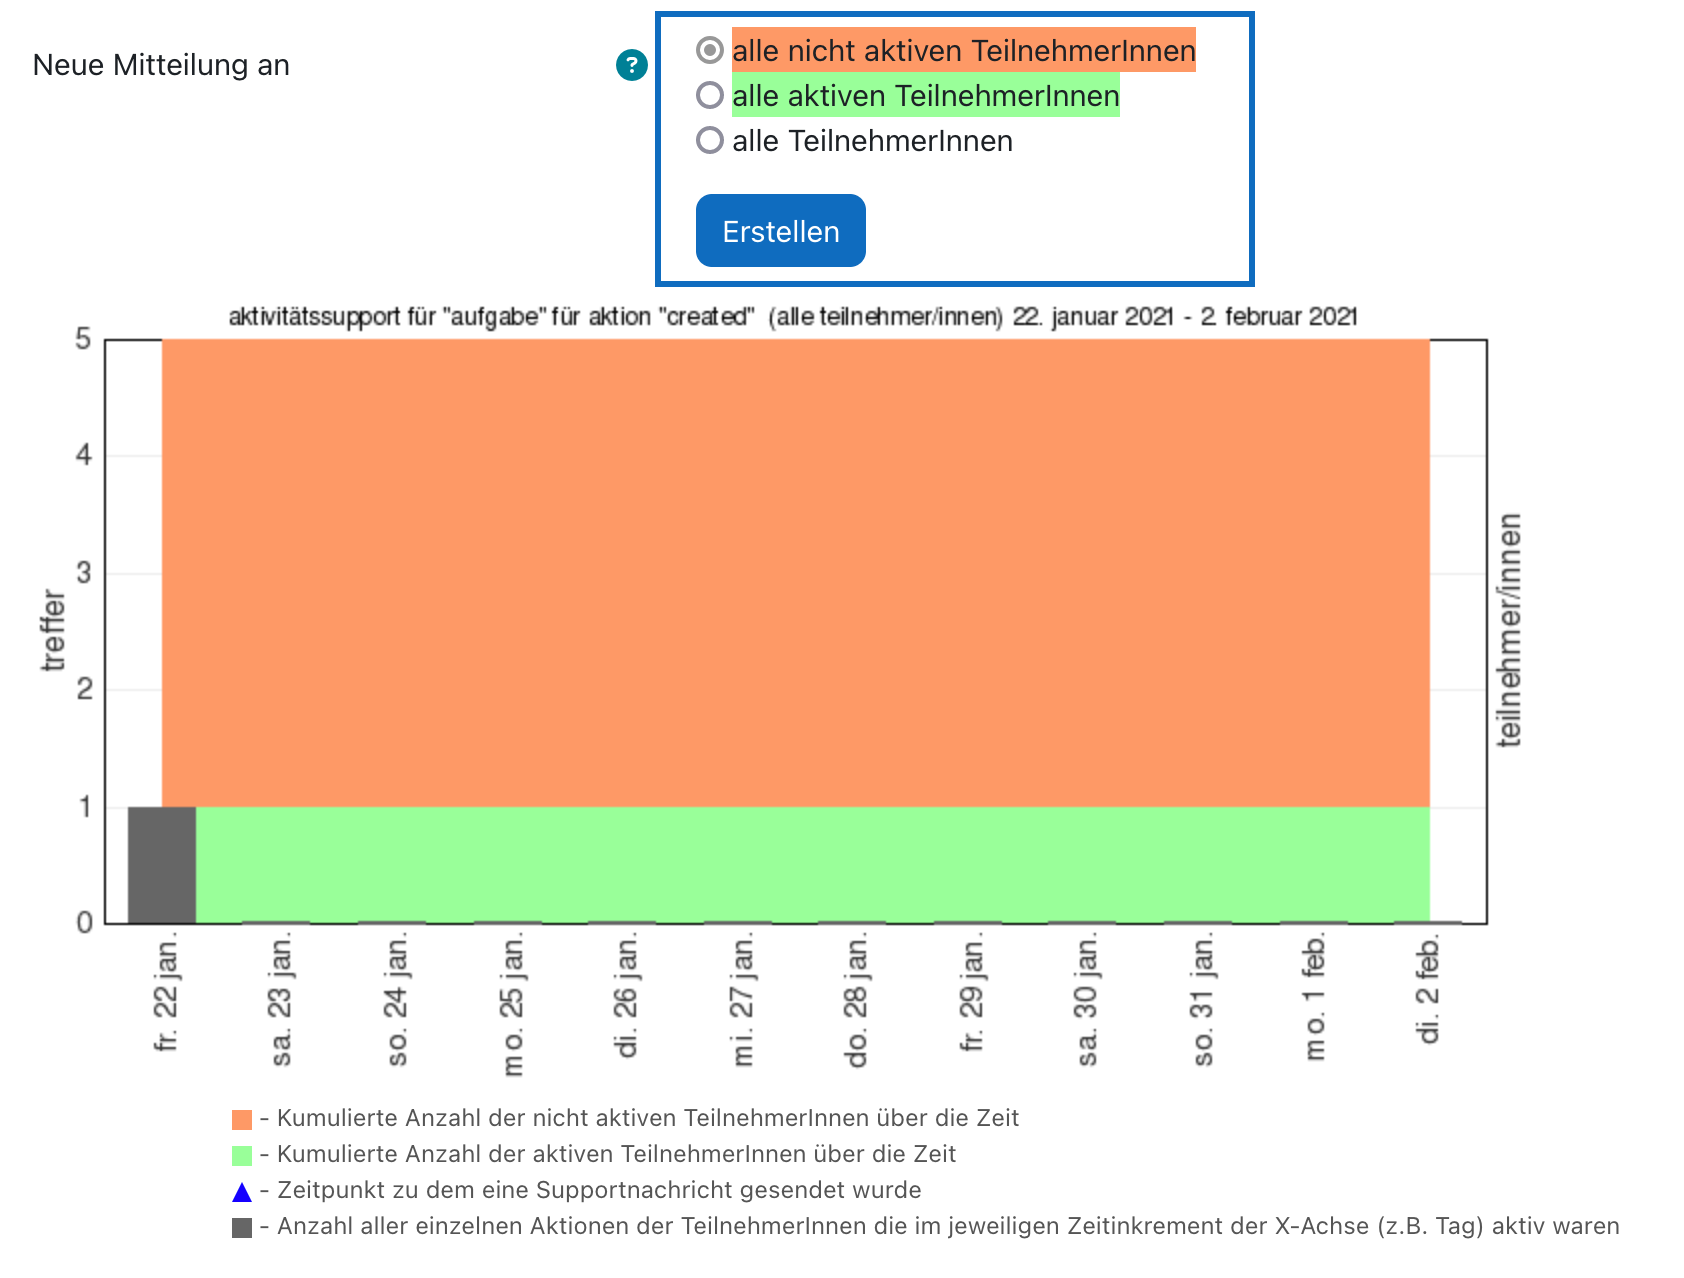
5. Detailinformationen einsehen
Sobald die Detailinformationen aufgerufen werden, können Lehrende nun auch Sammelmails an Studierende verschicken, nämlich an alle, die bisher noch nicht aktiv waren, an jene Studierenden, die bisher bereits aktiv waren oder einfach an alle Kursteilnehmer*innen.
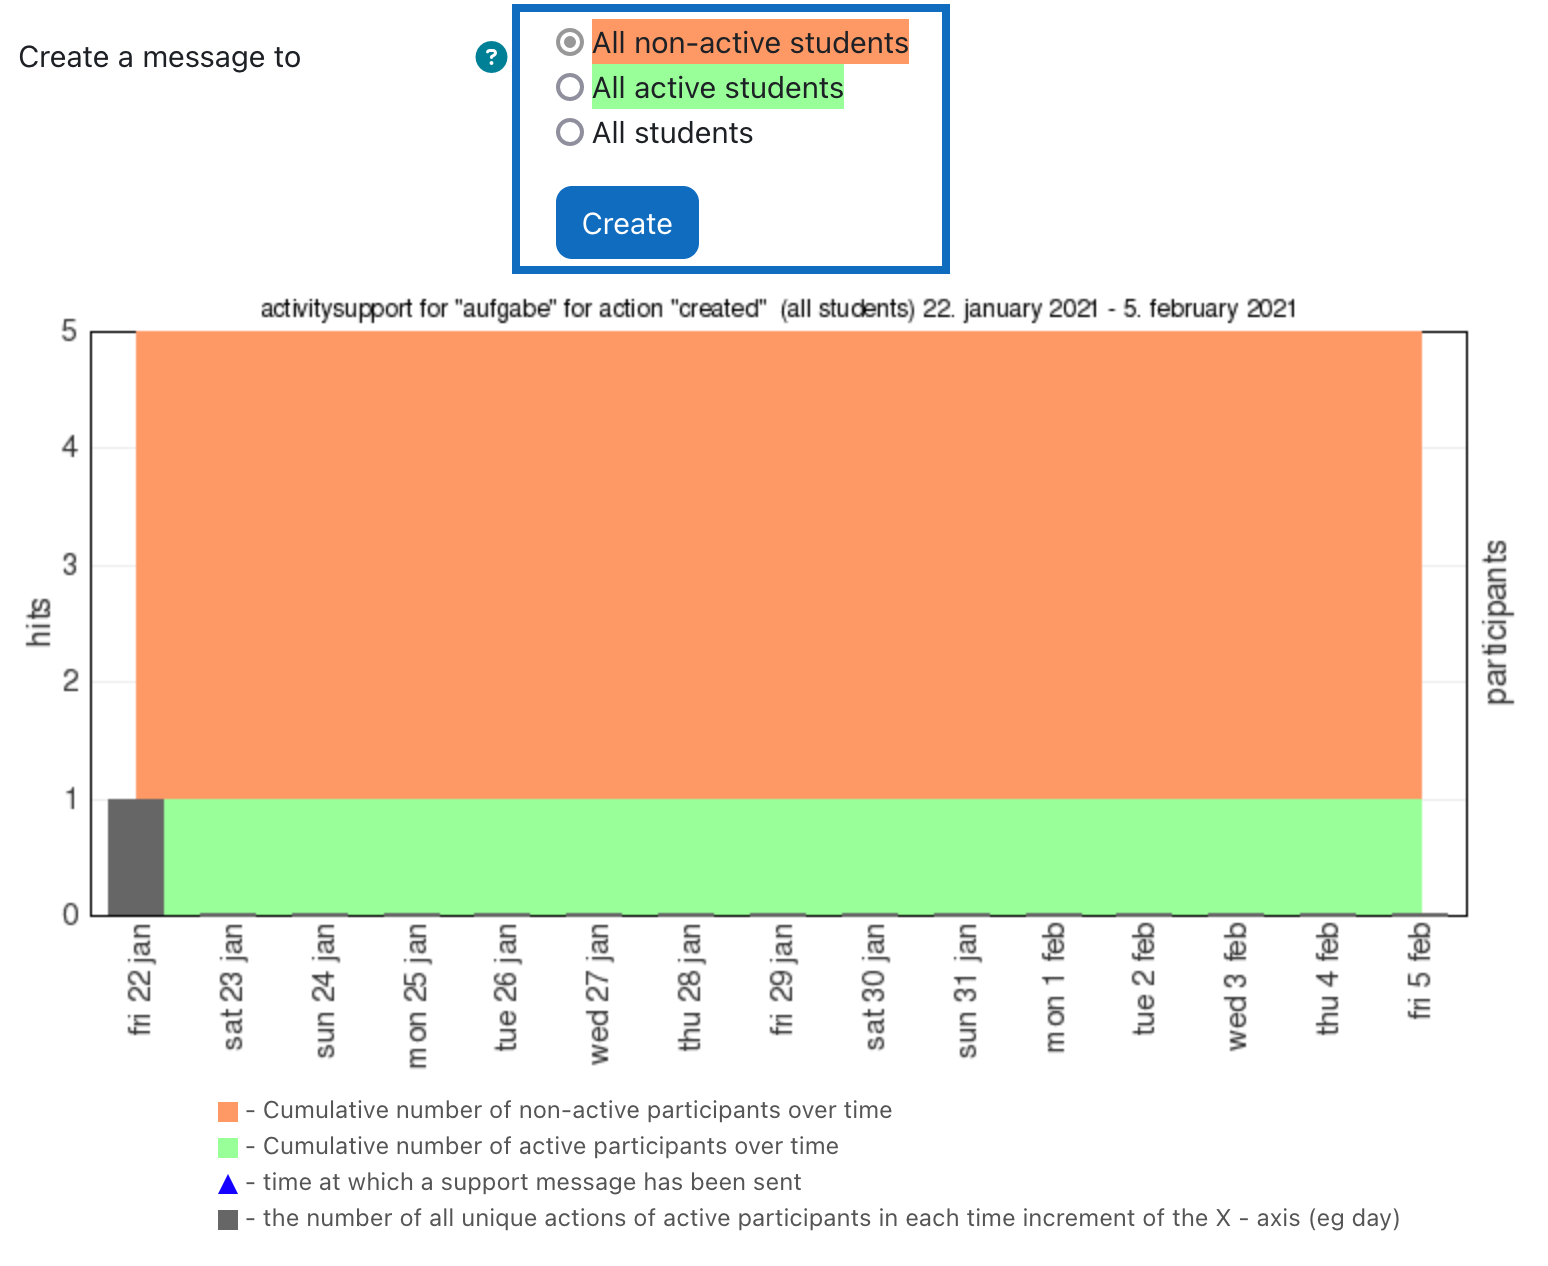
5. View detailed information
As soon as the detailled information is accessed, teachers can send collective emails to students, namely to all those who have not yet been active, to those students who have already been active or simply to all course participants...
Weitere Informationen
Bei Fragen zur Barrierefreiheit wenden Sie sich bitte an die entsprechende Supporteinrichtung Ihrer Hochschule.
Dieses Werk steht unter einer Creative Commons Attribution-ShareAlike 4.0 Lizenz:
https://creativecommons.org/licenses/by-sa/4.0/
Further information
If you have any questions regarding accessibility, please contact the relevant support facility at your university.
This work is licensed under a Creative Commons Attribution-ShareAlike 4.0 License:
https://creativecommons.org/licenses/by-sa/4.0/