Tabellen erstellen und editieren
Create and edit tables
Ziele:
Diese Anleitung zeigt Ihnen am Beispiel eines Textfeldes, wie Sie Tabellen anlegen können. Zudem erfahren Sie, wie Sie Tabellen aus externen Editoren übernehmen können.
Schwierigkeit: einfach
Gültig ab Moodle Version 4.3
Goals:
This guide shows you how to create tables using the example of a text and media area. You will also learn how to include tables from external editors.
Difficulty: easy
Valid from Moodle version 4.3
9 Schritte:
Textfeld anlegen und Tabelle erstellen
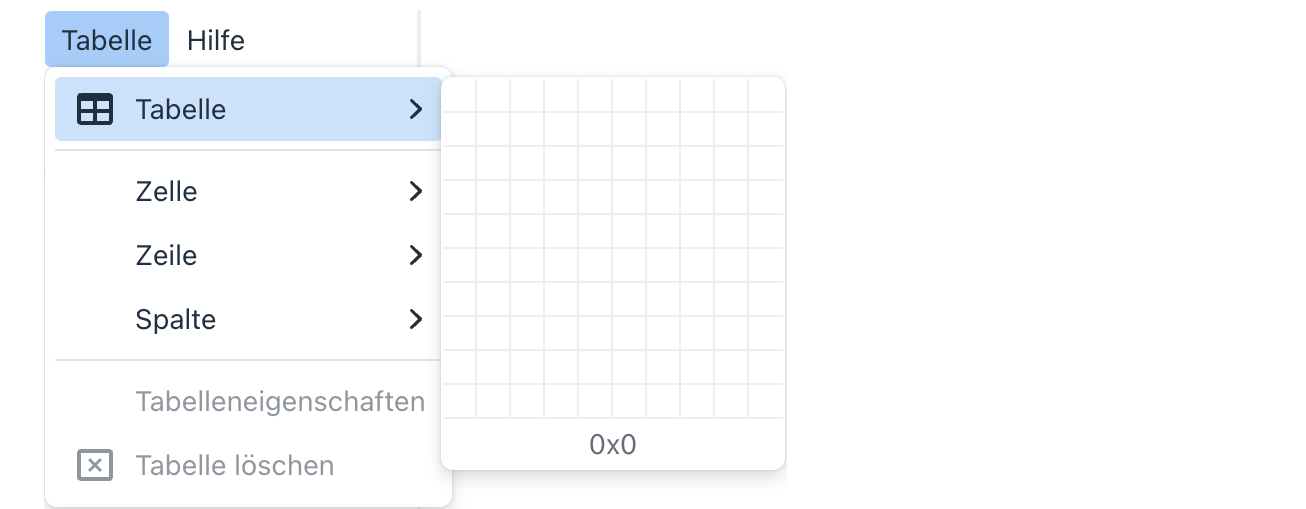
Legen Sie im ersten Schritt, wie in der Anleitung „Aktivität oder Material anlegen“ beschrieben, ein "Textfeld" an. Wählen Sie anschließend in der Funktionspalette die Option „Tabelle" aus. Markieren Sie nun mit Ihrer Maus die gewünschte Anzahl an Zeilen und Spalten in der Matrix aus, die neben der Option „Tabelle" im Drop-down-Menü aufscheint.
Create a text and media area and a table
First create the "Text and media area" activity as described in the guide "Create an activity or resource". Then select the "Table" option in the function palette. Use your mouse to select the desired number of rows and columns in the matrix that appears next to the "Table" option in the drop-down menu.

Zellen, Zeilen und Spalten bearbeiten: Variante 1
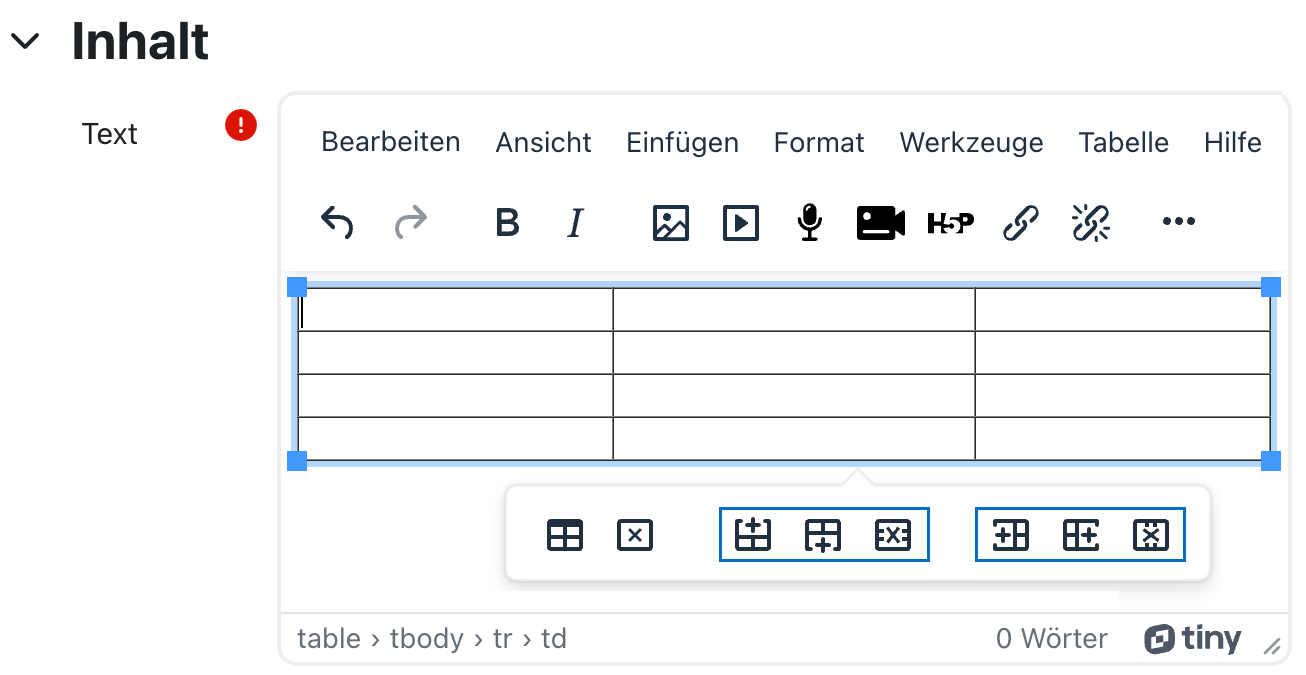
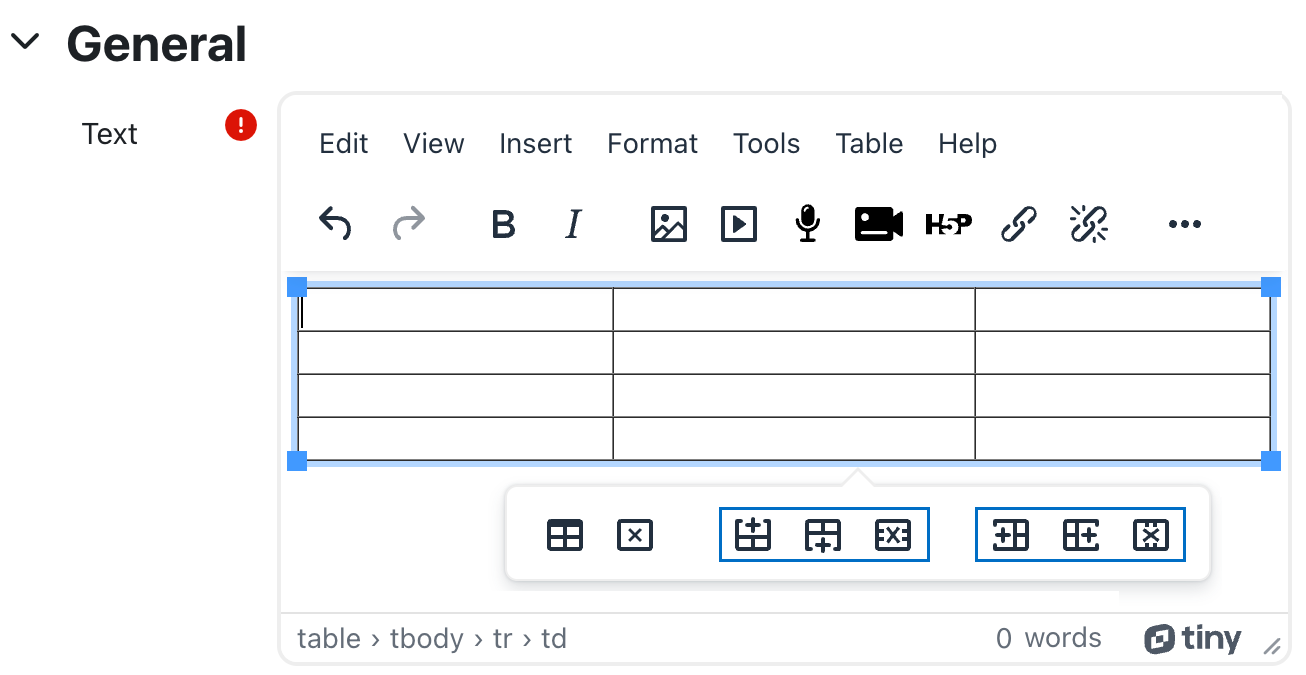
Nachdem Sie die Grundstruktur der Tabelle angelegt haben, können Sie die Zellen, Zeilen und Spalten weiter bearbeiten. Sobald Sie die Tabelle auswählen, scheint eine Palette auf, mit welcher Sie schnell und einfach Zeilen oder Spalten hinzufügen oder löschen können. Klicken Sie auf das jeweilige Symbol in der aufscheinenden Palette, um Zeilen oberhalb oder unterhalb sowie Spalten rechts oder links hinzuzufügen.
Edit cells, rows and columns: option 1
After you have created the basic structure of the table, you can further edit the cells, rows and columns. As soon as you select the table, a palette appears that allows you to quickly and easily add or delete rows or columns. Click on the respective icon in the palette that appears to add rows above or below and columns to the right or left.
Zellen, Zeilen und Spalten bearbeiten: Variante 2
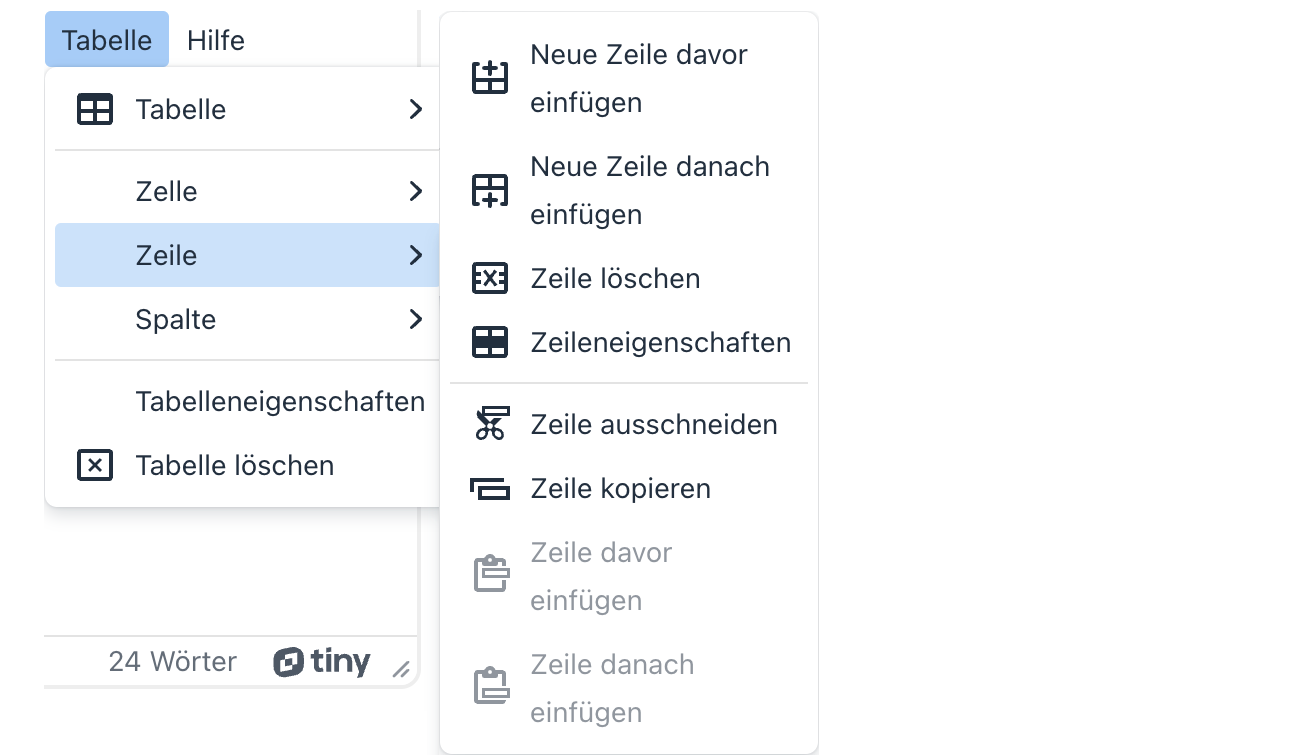
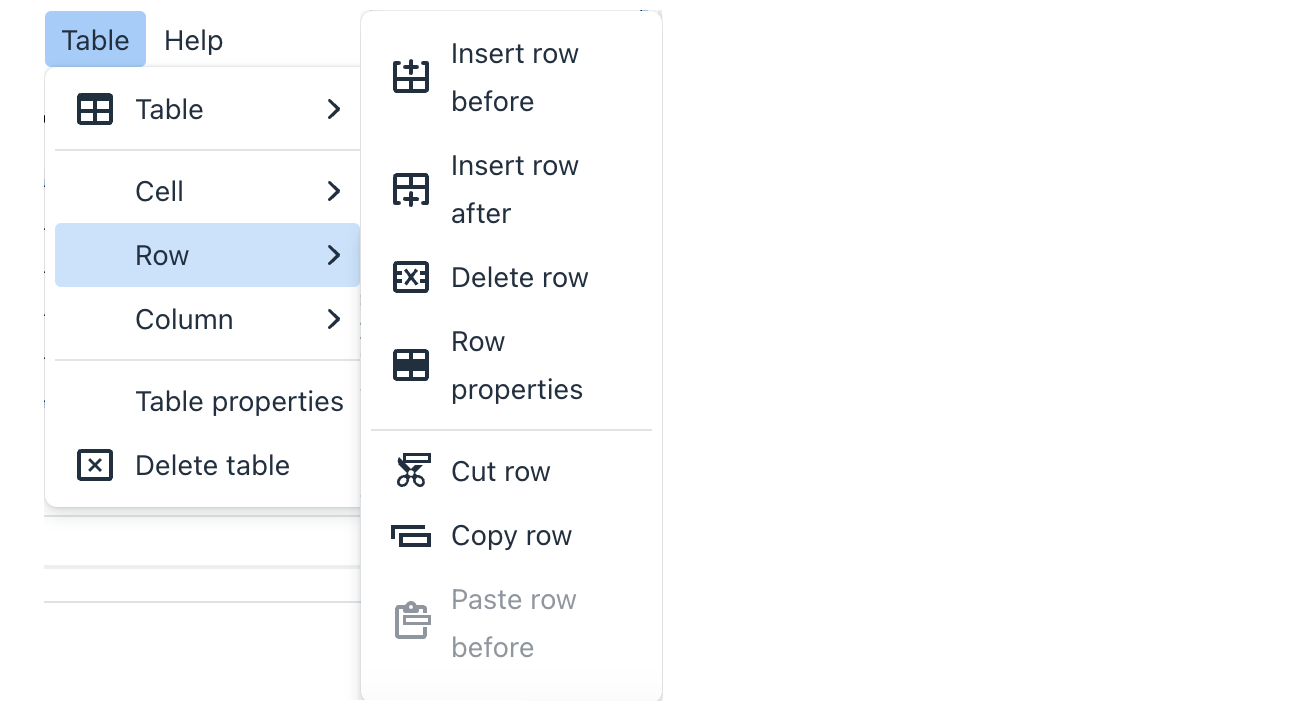
Alternativ können Sie die angelegte Tabelle auswählen und anschließend in der Funktionspalette die Option „Tabelle“ sowie „Zeile“ oder „Spalte“ auswählen. Bei dieser Variante stehen Ihnen zusätzlich Funktionen wie „Zeile ausschneiden“ bzw. „Spalte ausschneiden“ sowie „Zeile kopieren“ bzw. „Spalte kopieren“ zur Verfügung.
Edit cells, rows and columns: option 2
Alternatively, you can select the table you have created and then select the "Table" and "Row" or "Column" option in the function palette. With this variant, additional functions such as "Cut row" or "Cut column" and "Copy row" or "Copy column" are available.
Zellen verbinden
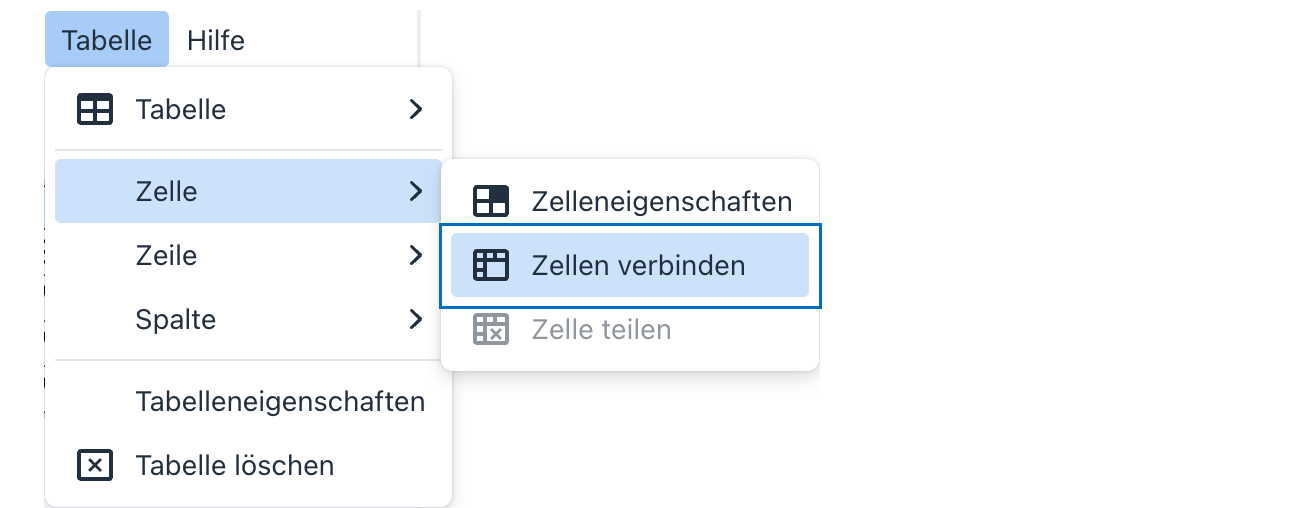
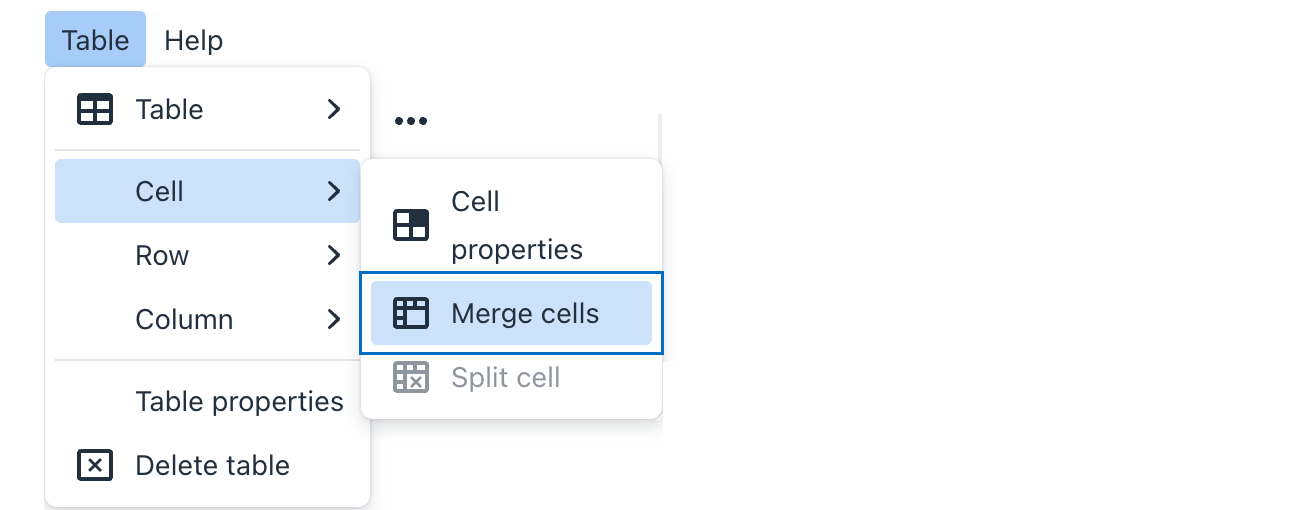
Um zwei oder mehr Zellen zu verbinden, markieren Sie in der Tabelle die gewünschten Zellen, klicken Sie in der Funktionspalette auf „Tabelle“ und wählen Sie die Option „Zellen verbinden“ aus.
Merge cells
To merge two or more cells, select the desired cells in the table, click on "Table" in the function palette and select the "Merge cells" option.
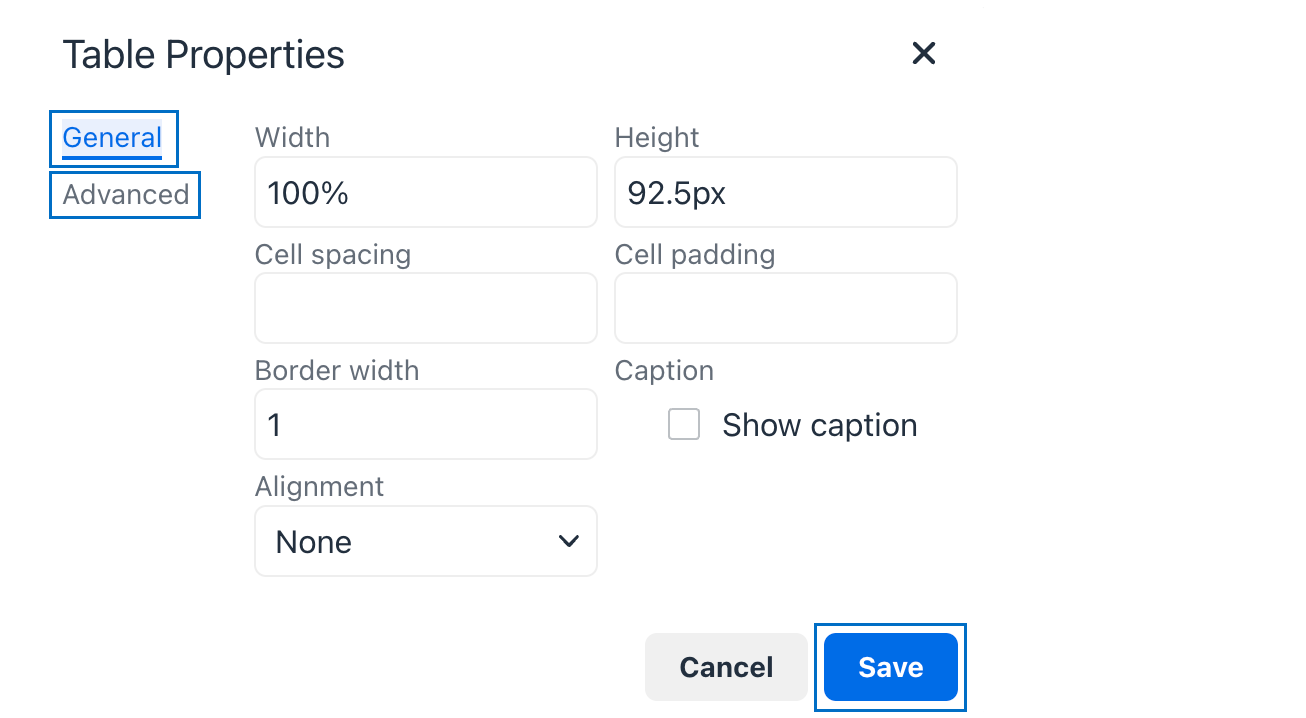
Tabelleneigenschaften konfigurieren
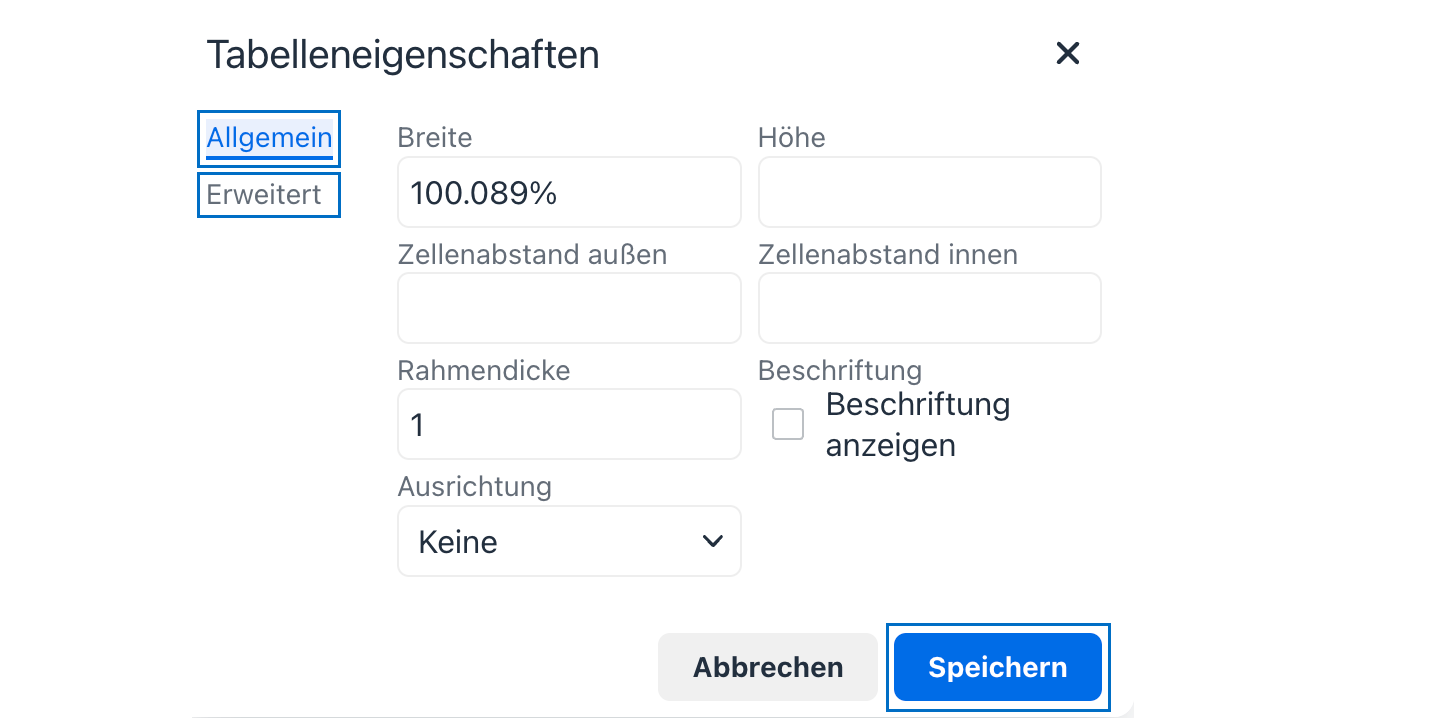
Um die Eigenschaften wie Breite, Höhe, Zeilenabstand, Rahmendicke, Beschriftung oder Ausrichtung zu bearbeiten, klicken Sie erneut in der Funktionspalette auf „Tabelle“ und wählen Sie die Option „Tabelleneigenschaften“ sowie „Allgemein“ aus. Klicken Sie auf „Erweitert“, um Eigenschaften wie Rahmenstil, Rahmenfarbe oder Hintergrundfarbe zu bearbeiten. Sobald Sie mit der Konfiguration der Tabelle fertig sind, können Sie die Änderungen über die „Speichern“ Schaltfläche sichern.
Configure table properties
To edit properties such as width, height, cell spacing, border width, caption, or alignment, click again on "Table" in the function palette and select the "Table Properties" option as well as "General". Click "Advanced" to edit properties such as border style, border colour, or background colour. Once you are done configuring the table, you can save the changes via the "Save" button.
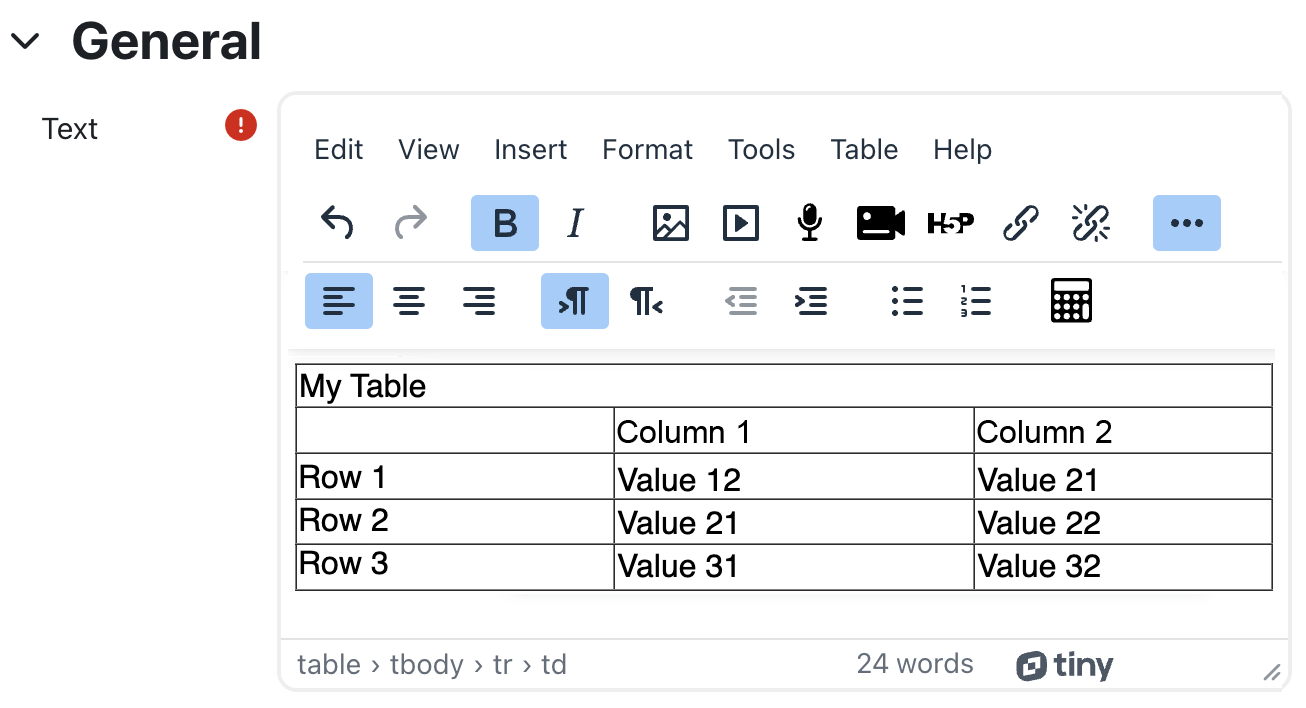
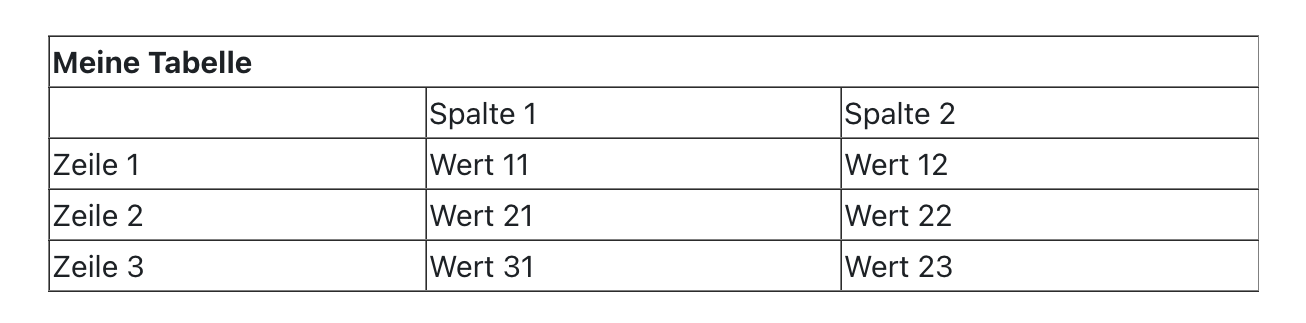
Befüllen der Tabelle
Befüllen Sie nun die Tabelle, indem Sie in die jeweilige Zelle klicken und den gewünschten Wert eintragen. Speichern Sie abschließend die Tabelle mit einem Klick auf „Speichern und zum Kurs".

Fill the table
You can now fill the table with data with a click in the respective cell and enter the desired value. Finally save the table with a click on the "Save and return to course" button
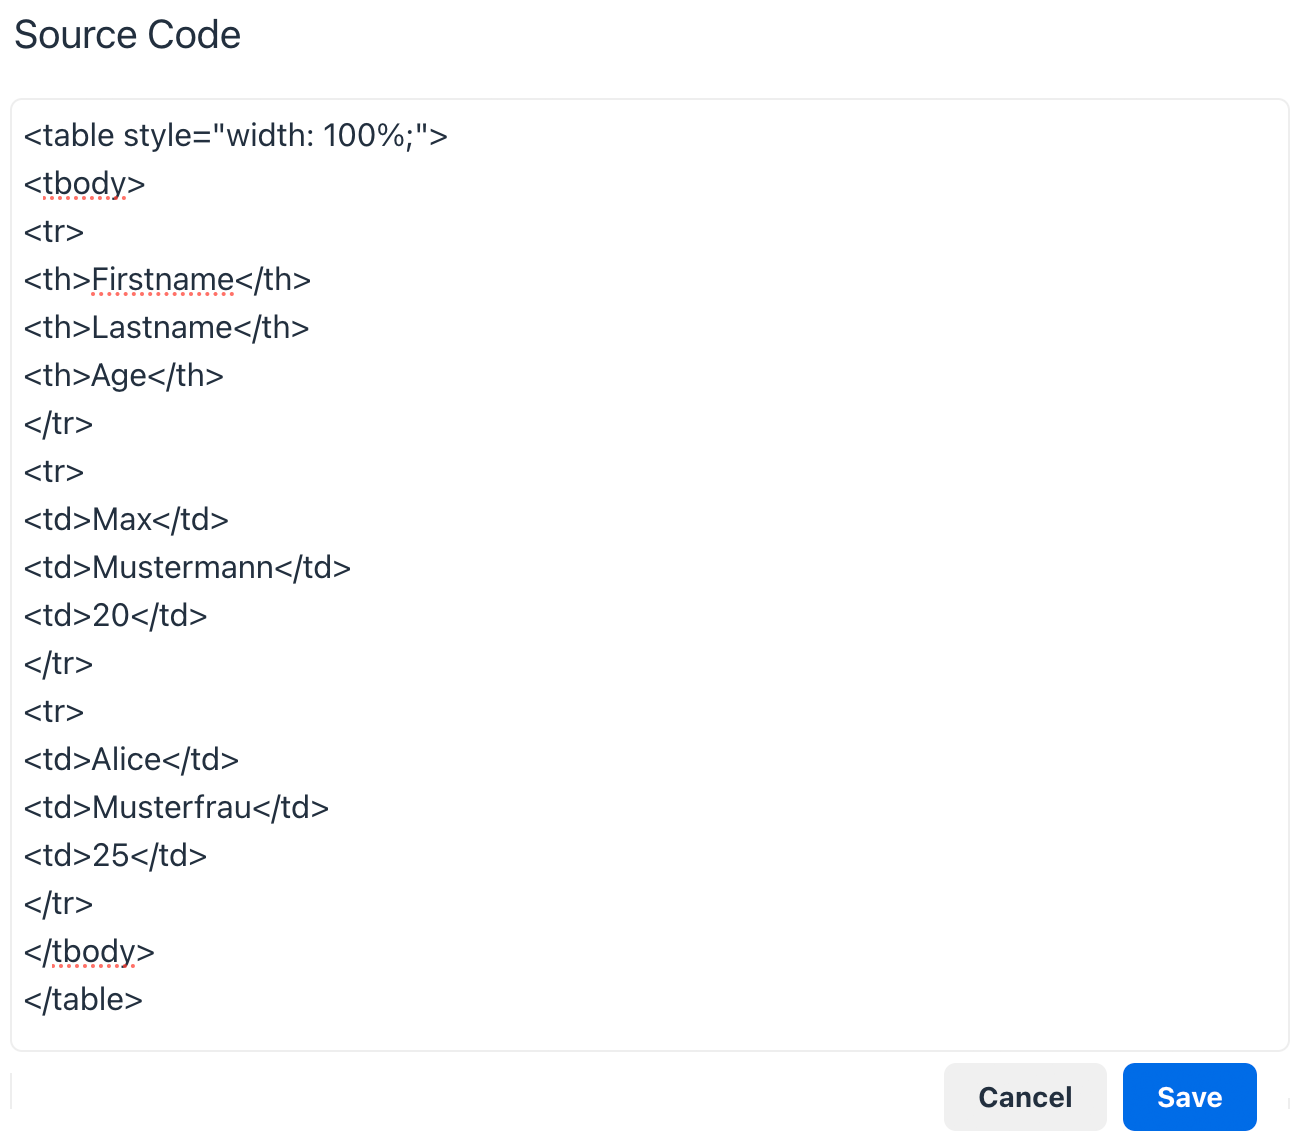
Alternative mit HTML-Code
Alternativ können Sie Tabellen als HTML-Code aus externen Editoren (wie Notepad++, etc.) übernehmen. Um den HTML-Code übernehmen zu können, muss der HTML-Modus in der Funktionspalette mit einem Klick auf „Werkzeuge“ sowie Auswahl der Option „< > Quellcode“ aktiviert werden. Berücksichtigen Sie bei dieser Variante die Barrierefreiheit und Spezialformatierungen, die Moodle eventuell nicht unterstützt.
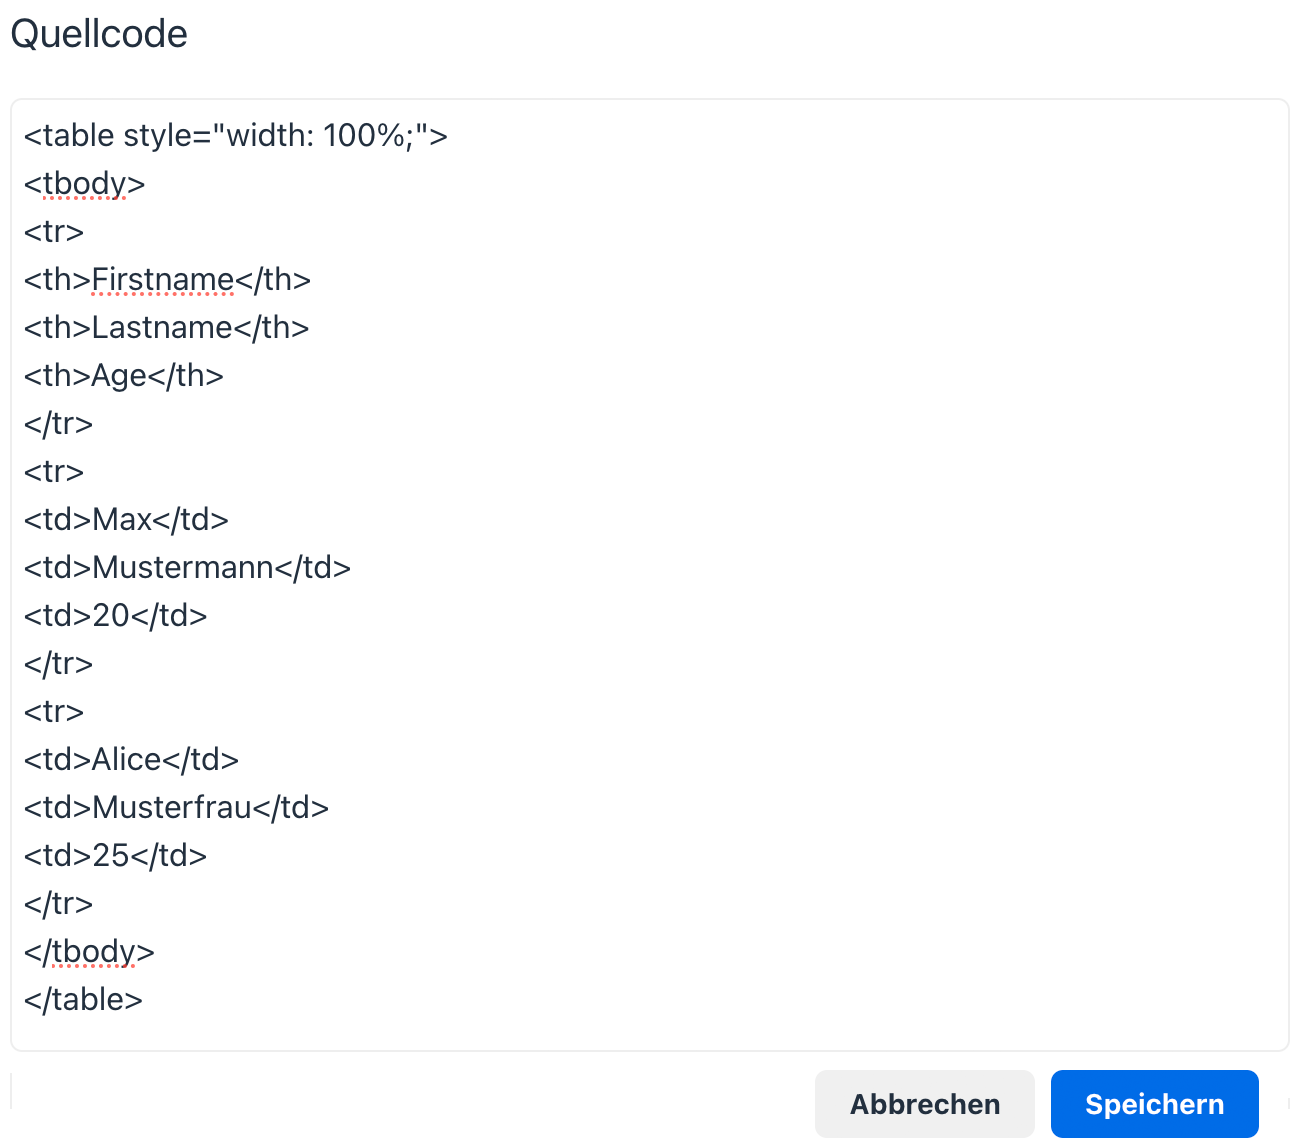
Alternative using HTML code
You can also import tables as HTML code from external editors (such as Notepad++, etc.). To be able to transfer the HTML code, the HTML mode must be activated in the function palette by clicking on "Tools" and selecting the option "< > Source code". Take into account accessibility and special formatting that Moodle may not support.
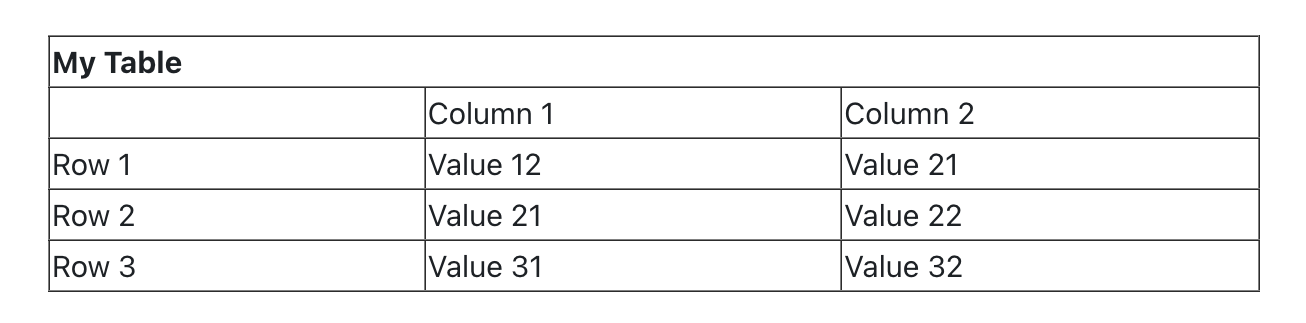
Ansicht auf der Kursseite
Sobald Sie die Tabelle erstellt, befüllt und gespeichert haben, wird diese auf der Kursseite angezeigt.
View on the course page
Once you have created, filled and saved the table, it will be displayed on the course page.
Weitere Informationen
Bei Fragen zur Barrierefreiheit wenden Sie sich bitte an die entsprechende Supporteinrichtung Ihrer Hochschule.
Dieses Werk steht unter einer Creative Commons Attribution-ShareAlike 4.0 Lizenz:
https://creativecommons.org/licenses/by-sa/4.0/
Further information
If you have any questions regarding accessibility, please contact the relevant support facility at your university.
This work is licensed under a Creative Commons Attribution-ShareAlike 4.0 License:
https://creativecommons.org/licenses/by-sa/4.0/