Gruppenverwaltung: Gruppenadministration
Grouptool: group adminstration
Ziele:
In dieser Anleitung lernen Sie die Funktionen kennen, die Ihnen zur Administration der Gruppen in der „Gruppenverwaltung“ zur Verfügung stehen. Erfahren Sie mehr über den Gruppenstatus, wie Sie Gruppengröße und Namen ändern können und wie Sie Gruppen löschen.
Schwierigkeit: einfach
Gültig ab Moodle Version 5.0
Goals:
In this guide, you will learn about the functions available to you for administering the groups in the "Grouptool". Find out more about the group status, how to change the group size and name and how to delete groups.
Diffidulty: easy
Valid from Moodle version 5.0
9 Schritte:
Vorbereitung
Damit die zentralen Schritte dieser Anleitung durchgeführt werden können, müssen Sie wie in der Anleitung „Gruppenverwaltung: Selbstanmeldung zu Gruppen einrichten” beschrieben eine „Gruppenverwaltung“ und Gruppen anlegen.
Preparation
In order to carry out the central steps of this guide, you must create a "Grouptool" and groups as described in the guide "Grouptool: set up self registration to groups".
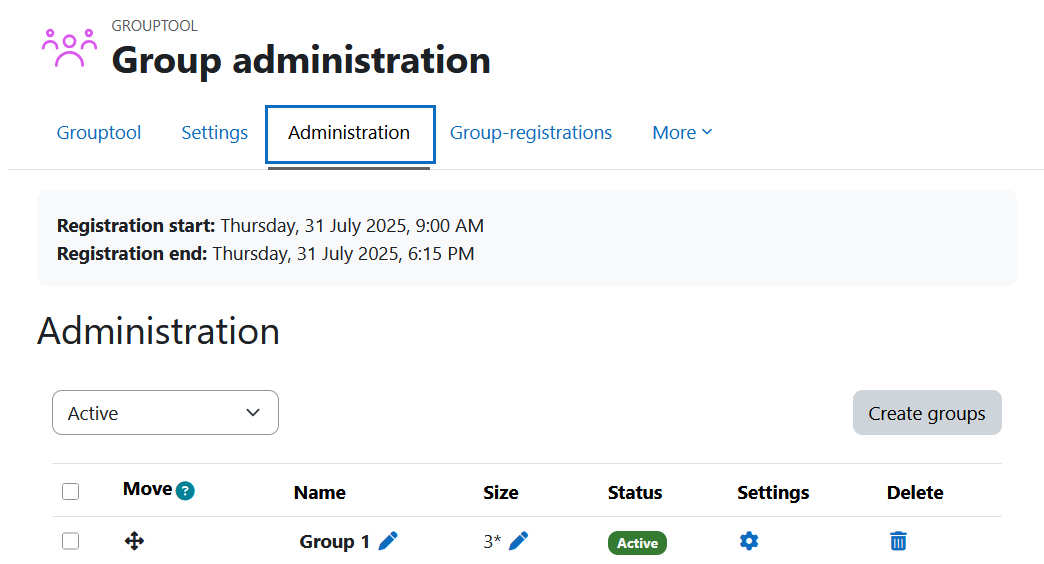
Administrationsbereich öffnen
Um den Gruppenadministrationsbereich zu öffnen, wählen Sie in der Gruppenverwaltung das Register „Administration“.
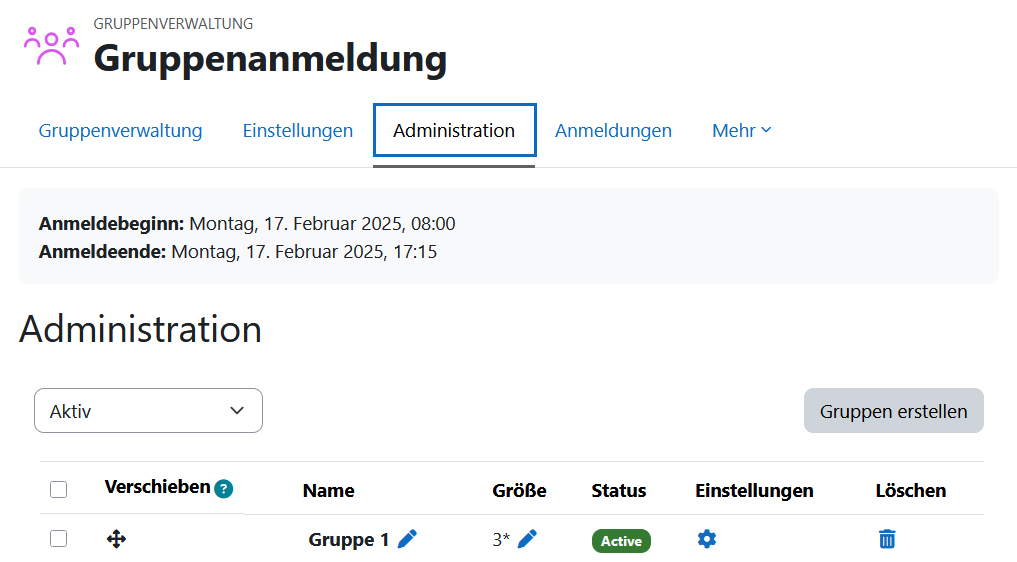
Open adminstration area
To open the group administration area, select the "Administration" tab in the grouptool.
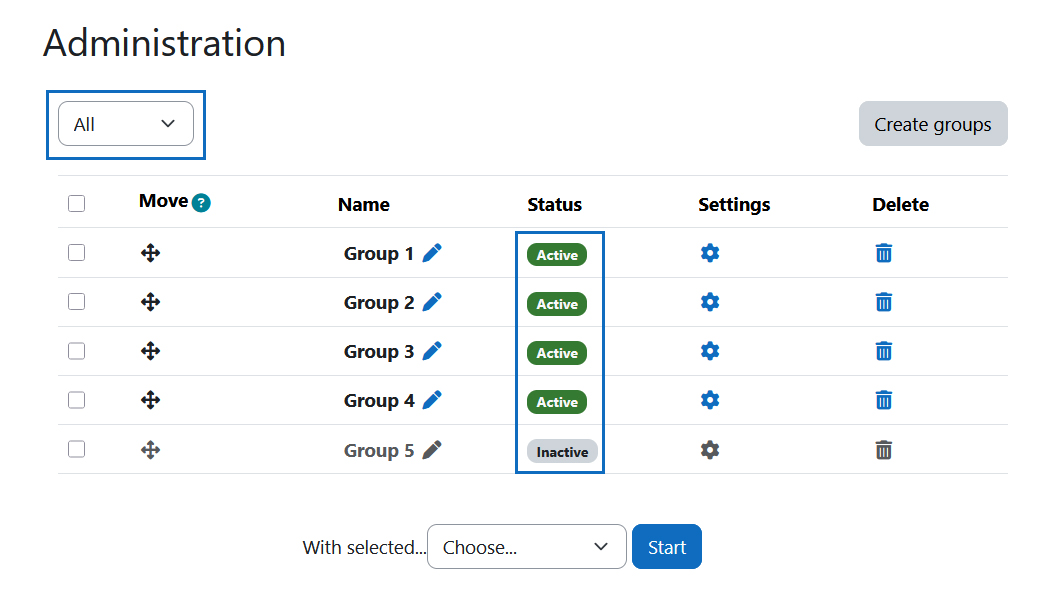
Gruppenstatus einsehen und für eine Gruppe ändern
Links oben können Sie über das Drop-down-Menü alle Gruppen des Kurses oder nur die aktiven oder inaktiven Gruppen anzeigen lassen. Aktive Gruppen sind solche, die für die Studierenden in der Gruppenverwaltung sichtbar sind und für die sie sich im Falle einer studentischen Selbstanmeldung in der Gruppenverwaltung anmelden können. In der Spalte „Status“ sehen, Sie, ob eine Gruppe in der vorliegenden Gruppenverwaltung aktiv ist (grünes Icon - „Aktiv“) oder nicht (graues Icon - “Inkativ“). Sie können den Status einer Gruppe einfach durch Klick auf das jeweilige Icon ändern.
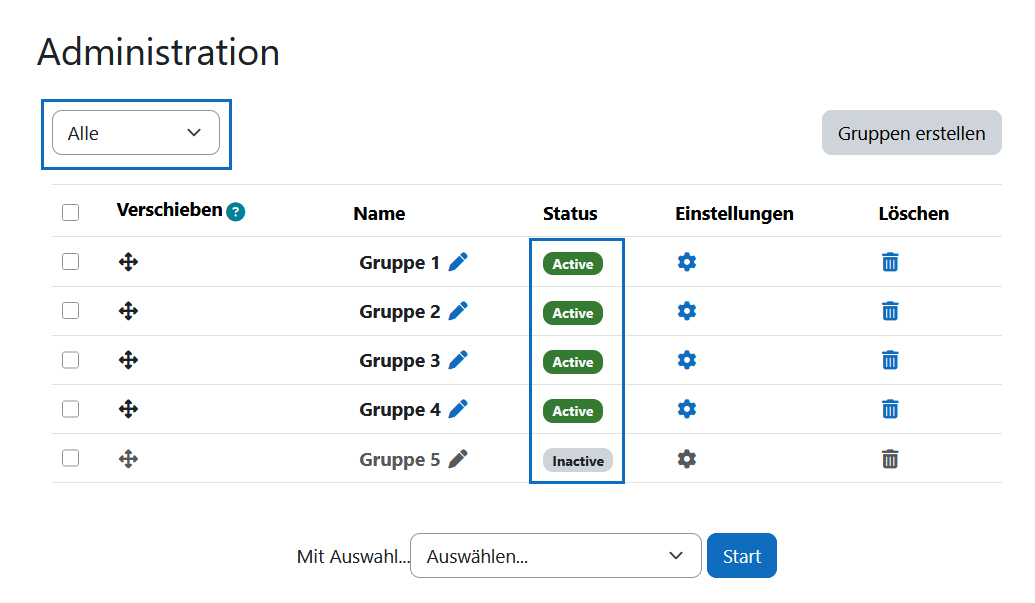
View group status and change it for one group
At the top left, you can use the drop-down menu to display all groups in the course or only the active or inactive groups. Active groups are those that are visible to students in the grouptool and for which they can register in the grouptool in the case of student self-registration. In the “Status” column, you can see whether a group is active (green icon - "Active") or not (gray icon - "Inactive") in the current grouptool. You can change the status of a group simply by clicking on the relevant icon.
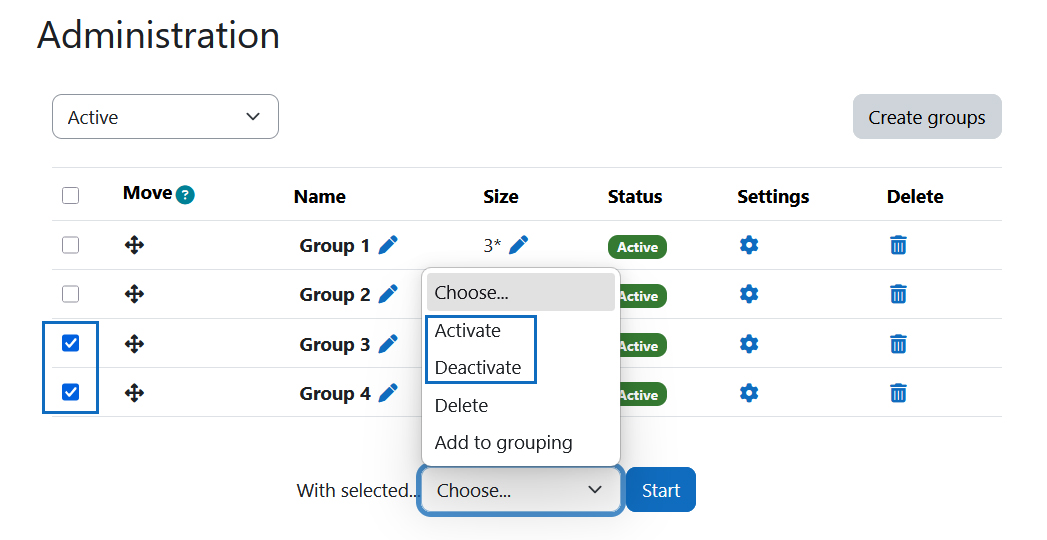
Status mehrerer Gruppen gleichzeitig ändern
Um den Status mehrerer Gruppen auf einmal zu ändern, haken Sie zunächst die Kästchen der betreffenden Gruppen in der linken Spalte der Tabelle an. Wählen Sie dann unten aus dem Drop-down-Menü „Aktivieren“ bzw. „Deaktivieren“ aus.
Tipp: Um alle Gruppen auszuwählen, klicken Sie das Kästchen ganz links in der Kopfzeile der Tabelle an.
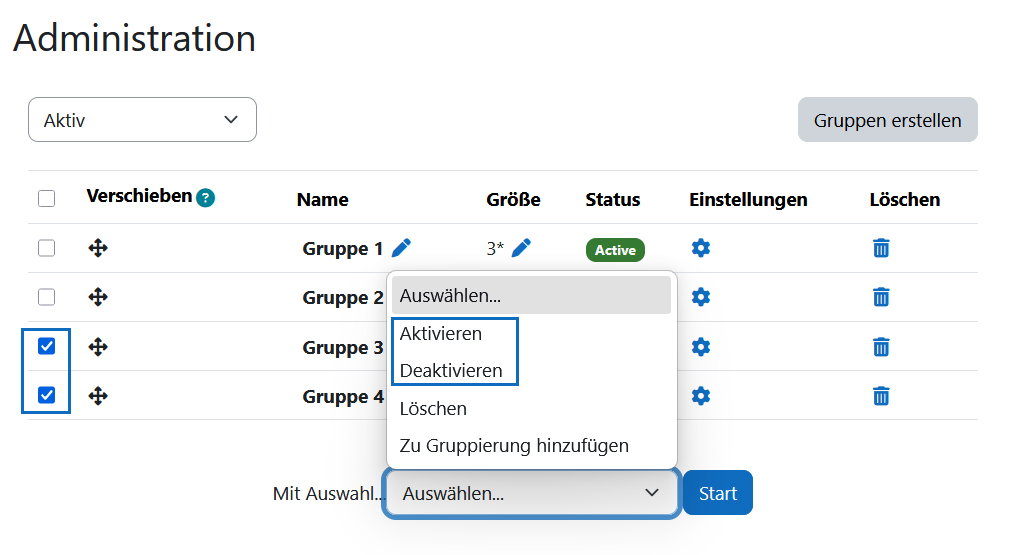
Change status of multiple groups at once
To change the status of several groups at once, first tick the boxes of the relevant groups in the left column of the table. Then select "Activate" or "Deactivate" from the drop down menu at the bottom.
Tip: To select all groups, tick the checkbox on the far left of the table header.
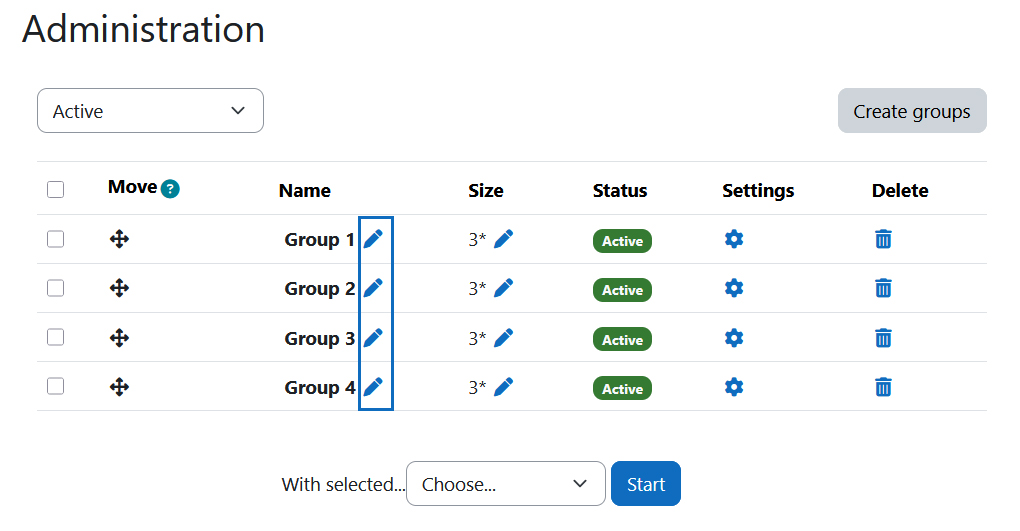
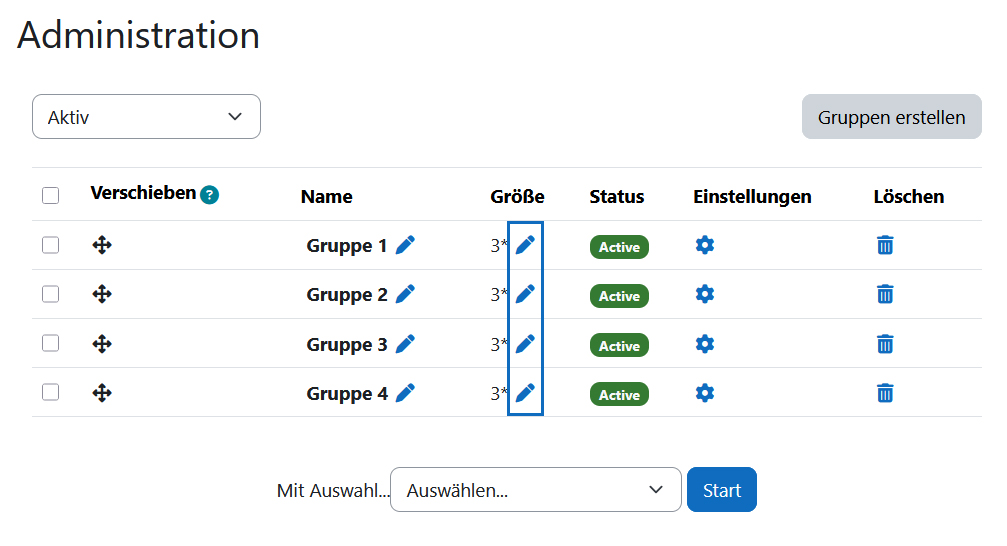
Gruppennamen ändern
Sie können bei Bedarf Gruppen umbenennen. Klicken Sie dazu in der Spalte „Name“ bei der betreffenden Gruppe auf das Stift-Symbol („Umbenennen“). Geben Sie dann den gewünschten neuen Namen in das Eingabefeld ein und speichern Sie die Änderung, indem Sie die Eingabetaste („Enter“) Ihrer Tastatur betätigen.
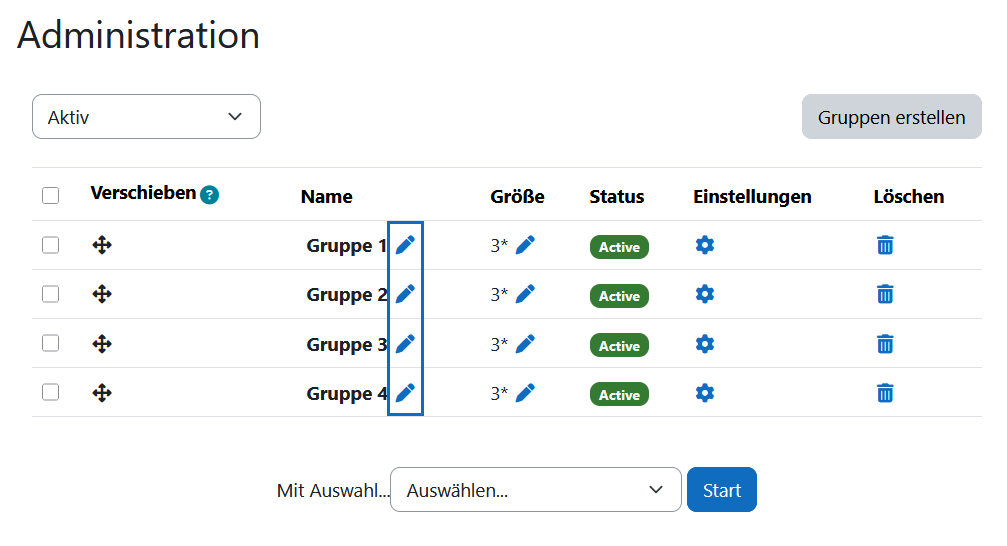
Change group names
You can rename groups if necessary. To do this, click in the "Name" column for the group in question on the pencil icon (“Rename"). Then enter the desired new name in the input field and save the change by pressing the “Enter” key on your keyboard.
Größe einzelner Gruppen ändern
Wenn Sie in den „Instanzeinstellungen“ Ihrer Gruppenverwaltung die Option „Gruppengröße“ aktiviert haben, können Sie im Gruppenadministrationsbereich die Gruppengrößen individuell ändern. Klicken Sie dazu in der Spalte „Größe“ bei der betreffenden Gruppe auf das Stift-Symbol („Größe ändern“). Geben Sie nun die gewünschte neue Mitgliederzahl in das Eingabefeld ein und speichern Sie die Änderung mittels Eingabetaste Ihrer Tastatur.
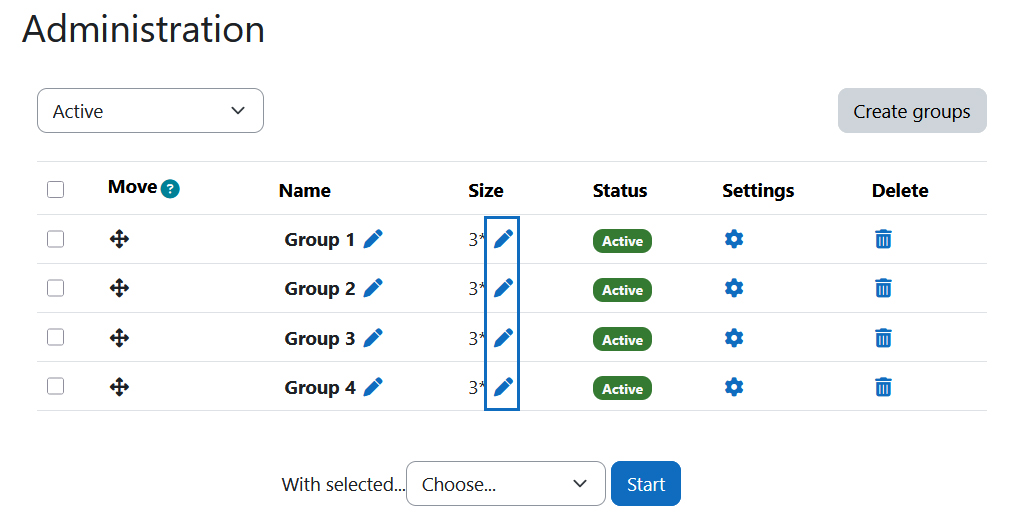
Change size of individual groups
If you have activated the "Group size" option in the "Instance settings" of your grouptool, you can change the group sizes individually in the group administration area. To do this, click in the "Size" column on the pencil icon ("Resize") for the relevant group. Now enter the desired new number of group members in the input field and save the change by pressing the Enter key on your keyboard.
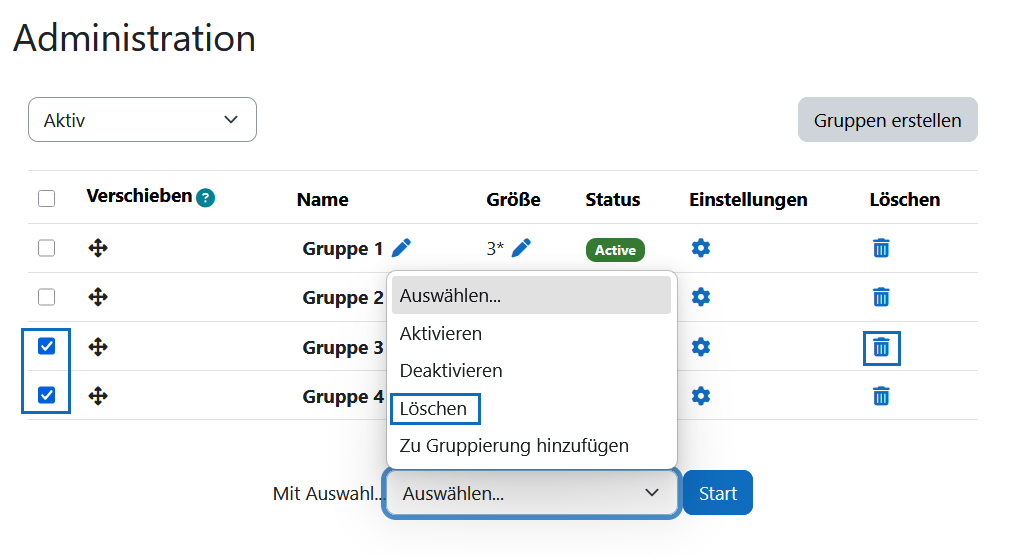
Gruppen löschen
Um eine einzelne Gruppe zu löschen, klicken Sie in der Spalte „Löschen“ auf das Mülleimer-Symbol („Löschen“) der betreffenden Gruppe. Mehrere Gruppen können Sie auch auf einmal löschen. Haken Sie dazu zunächst in der Spalte ganz links in der Tabelle die Checkboxen der betreffenden Gruppen an. Wählen Sie anschließend unten aus dem Drop-down-Menü bei „Mit Auswahl...” die Option „Löschen” aus. Klicken Sie abschließend auf „Start”.
Hinweis: Standardmäßig wird das Löschen von Gruppen in der Gruppenverwaltung mit den Moodle-Gruppen synchronisiert. Wenn Sie daher eine Gruppe nicht generell aus Ihrem Kurs entfernen möchten, sondern diese nur in der Gruppenverwaltung nicht angezeigt werden soll, ändern Sie im Register „Administration“ den Status der Gruppe durch Klick auf das grüne Icon („Aktiv“). Es ändert sich damit zu einem grauen Icon („Inaktiv“ = ausgeblendet). Alternativ können Sie auch die Synchronisationseinstellungen in der Gruppenverwaltung im Abschnitt „Verhalten bei Änderungen in Moodle-Gruppen” ändern.
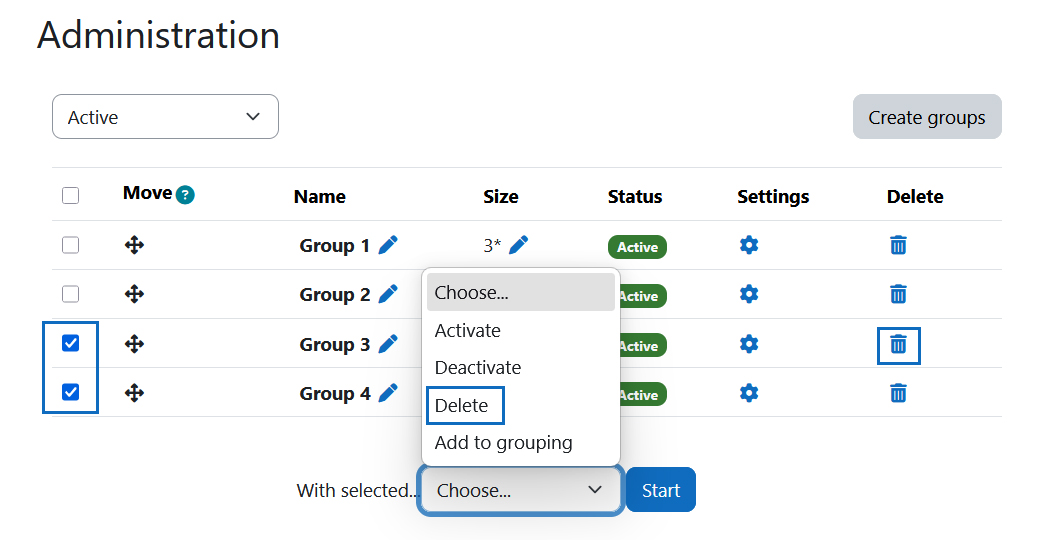
Delete Groups
To delete a single group, click in the "Delete" column for the group in question on the dustbin icon ("Delete"). Multiple groups can be deleted at once. To do this, first tick the boxes for the relevant groups in the leftmost column of the table. Then select at the bottom "Delete" from the drop-down menu next to "With selected...". Finally click "Start".
Note: By default, deleting groups in the grouptool is synchronized with Moodle groups. Therefore, if you do not want to remove a group from your course in general, but only do not want it to be displayed in the grouptool, change the status of the group in the tab "Administration" by clicking on the green icon ("Active"). It will change to a gray icon ("Inactive" = hidden). Alternatively, you can change the synchronization settings in the grouptool in the section "Behavior on changes in moodle".
Weitere Anleitungen zur „Gruppenverwaltung“
Für die Aktivität „Gruppenverwaltung“ sind folgende weitere Anleitungen verfügbar:
Further guides for "Grouptool"
The following additional guides are available for the "Grouptool" activity:
Weitere Informationen
Bei Fragen zur Barrierefreiheit wenden Sie sich bitte an die entsprechende Supporteinrichtung Ihrer Hochschule.
Dieses Werk steht unter einer Creative Commons Attribution-ShareAlike 4.0 Lizenz: https://creativecommons.org/licenses/by-sa/4.0/
![]() Gruppenverwaltung ist ein von der AMC entwickeltes Plugin. (Das Plugin kann hier im Detail angesehen und heruntergeladen werden.)
Gruppenverwaltung ist ein von der AMC entwickeltes Plugin. (Das Plugin kann hier im Detail angesehen und heruntergeladen werden.)
Further information
If you have any questions regarding accessibility, please contact the relevant support facility at your university.
This work is licensed under a Creative Commons Attribution-ShareAlike 4.0 License: https://creativecommons.org/licenses/by-sa/4.0/
![]() Grouptool is developed by AMC. (The plugin can be viewed and downloaded in detail here.)
Grouptool is developed by AMC. (The plugin can be viewed and downloaded in detail here.)